How to remodel a bathroom? A step-by-step look into a bathroom gut renovation project.
My bathroom tops the list of things that I love about my house.
It’s the number one thing that I look forward to at the start and end of my day because showers are a thing for me - yes a shower, not a bath, because I’m a think-on-your-feet kinda person. 😉
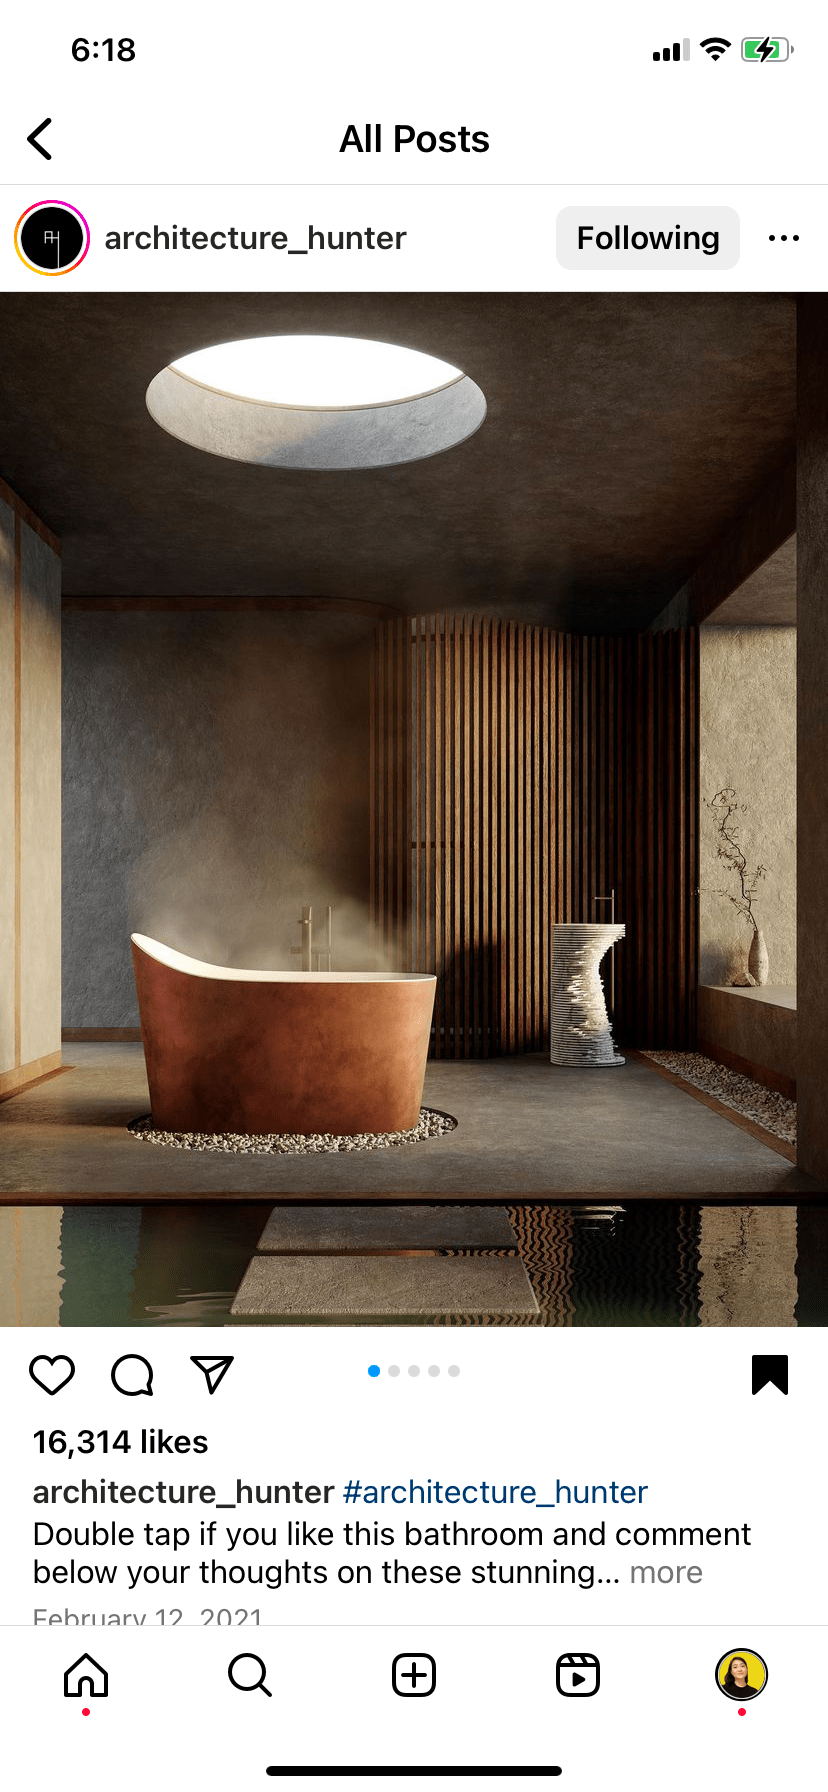
I knew from the start the kind of look and feel that I wanted and poured in solid hours of instagraming for it: a zen bathroom.
Specifically, urban zen.
I remember the first time my husband, Ralf, and I discussed plans for our bathroom. He’d said, “Oh oh! How about white subway tiles?”, and I instantly laughed at his face.
How basic.
What transpired next was essentially like this clip from Justin Bieber’s carpool karaoke with James Corden:
Read on for my step-to-step guide to achieving an urban zen bathroom :)
How to remodel a bathroom step 1: Decide if Current Layout Stays, or Goes
I’ve heard too many stories of people remodeling, regretting and redoing, to want to walk the same path, so I knew I had to get the blueprint nailed from the start. U-turns are costly!
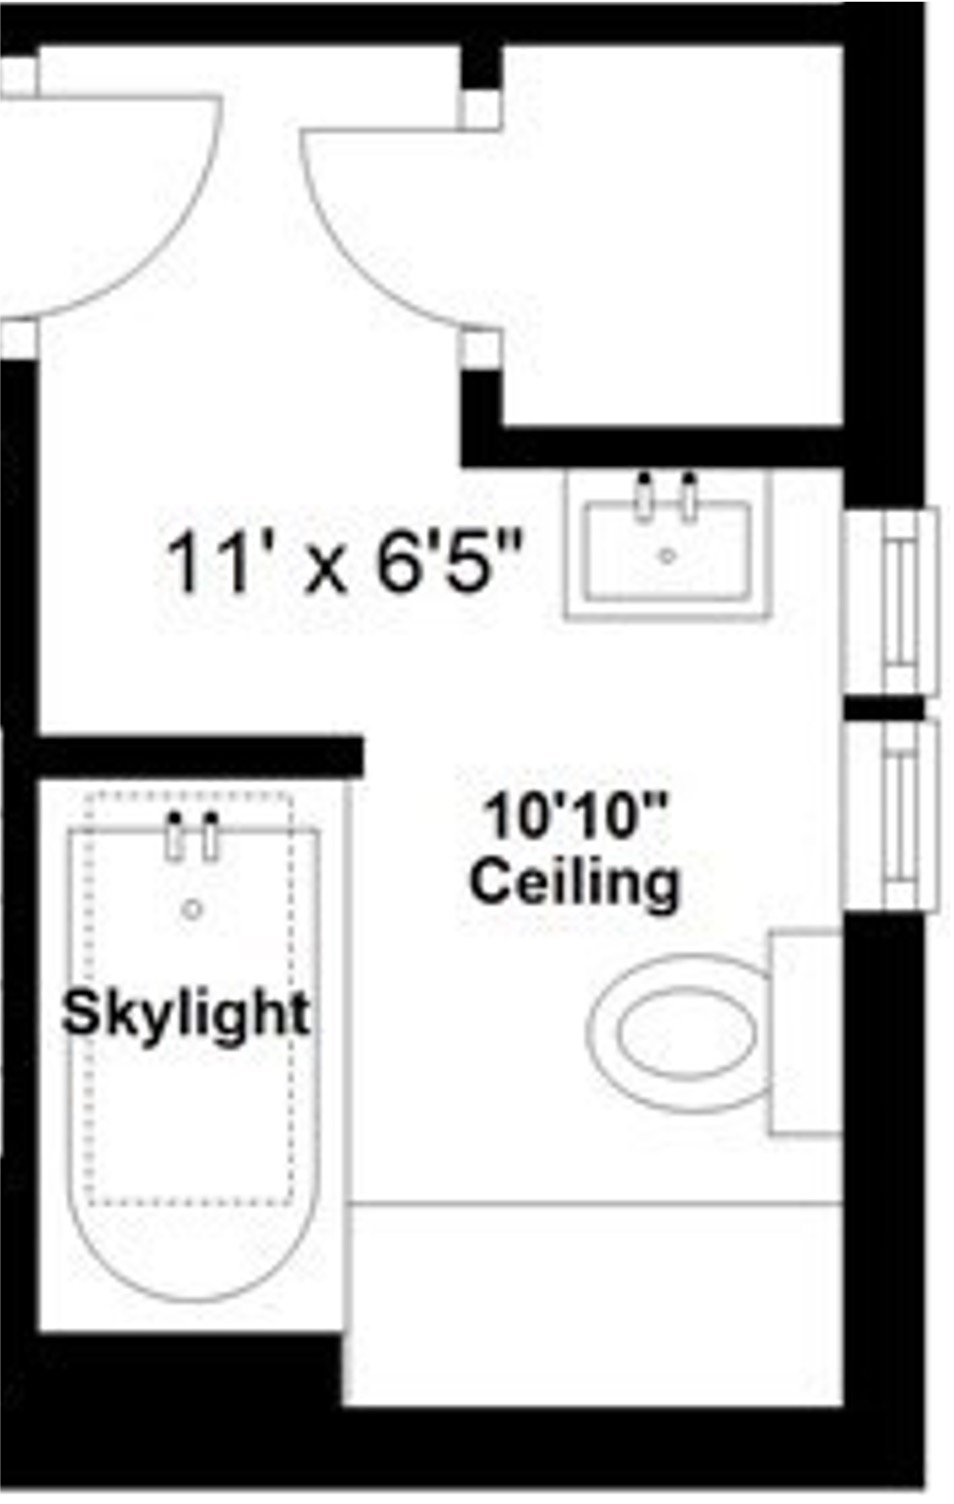
So, before you get into the nitty gritty details of picking out materials, decide if you need changes to be made to layout. If you, like me, have a general contractor to oversee the project, you don’t even need to research the feasibility of making plumbing changes because that’s what your general contractor is for - an experienced hand to guide you. Sketch out your ideal version of a bathroom within the existing four walls and show it to your contractor for a discussion of feasibility, costs and timelines.
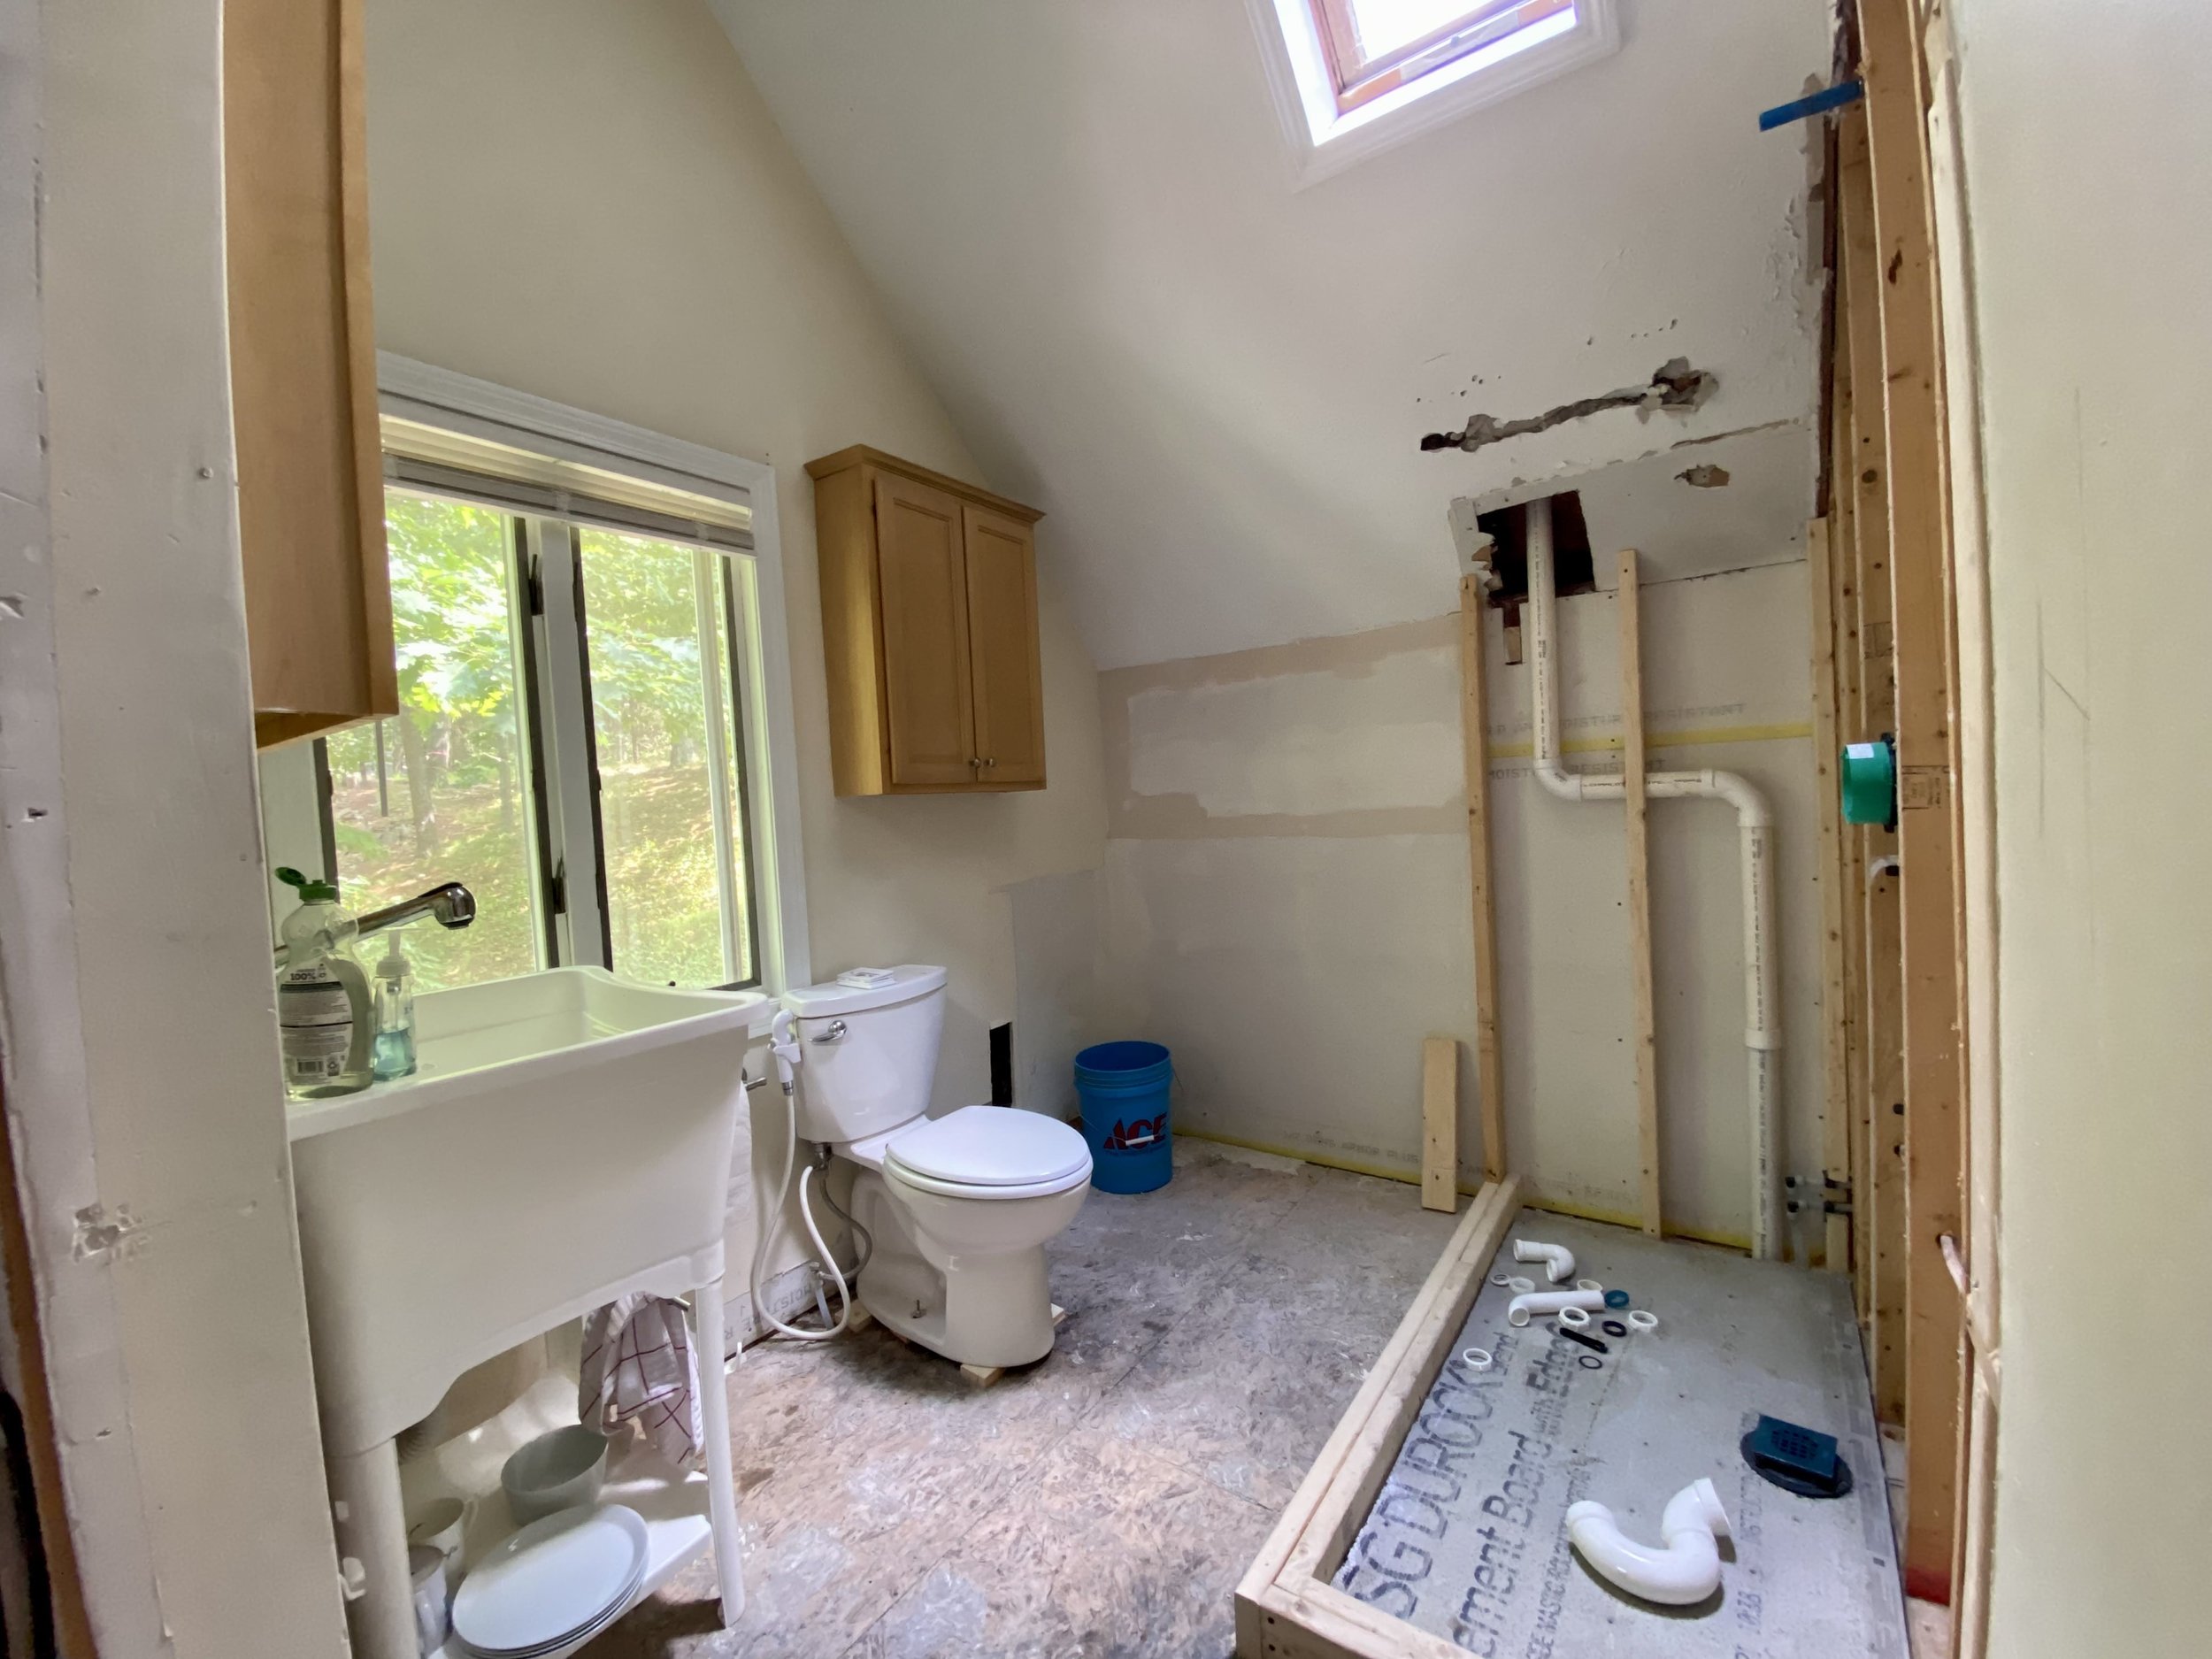
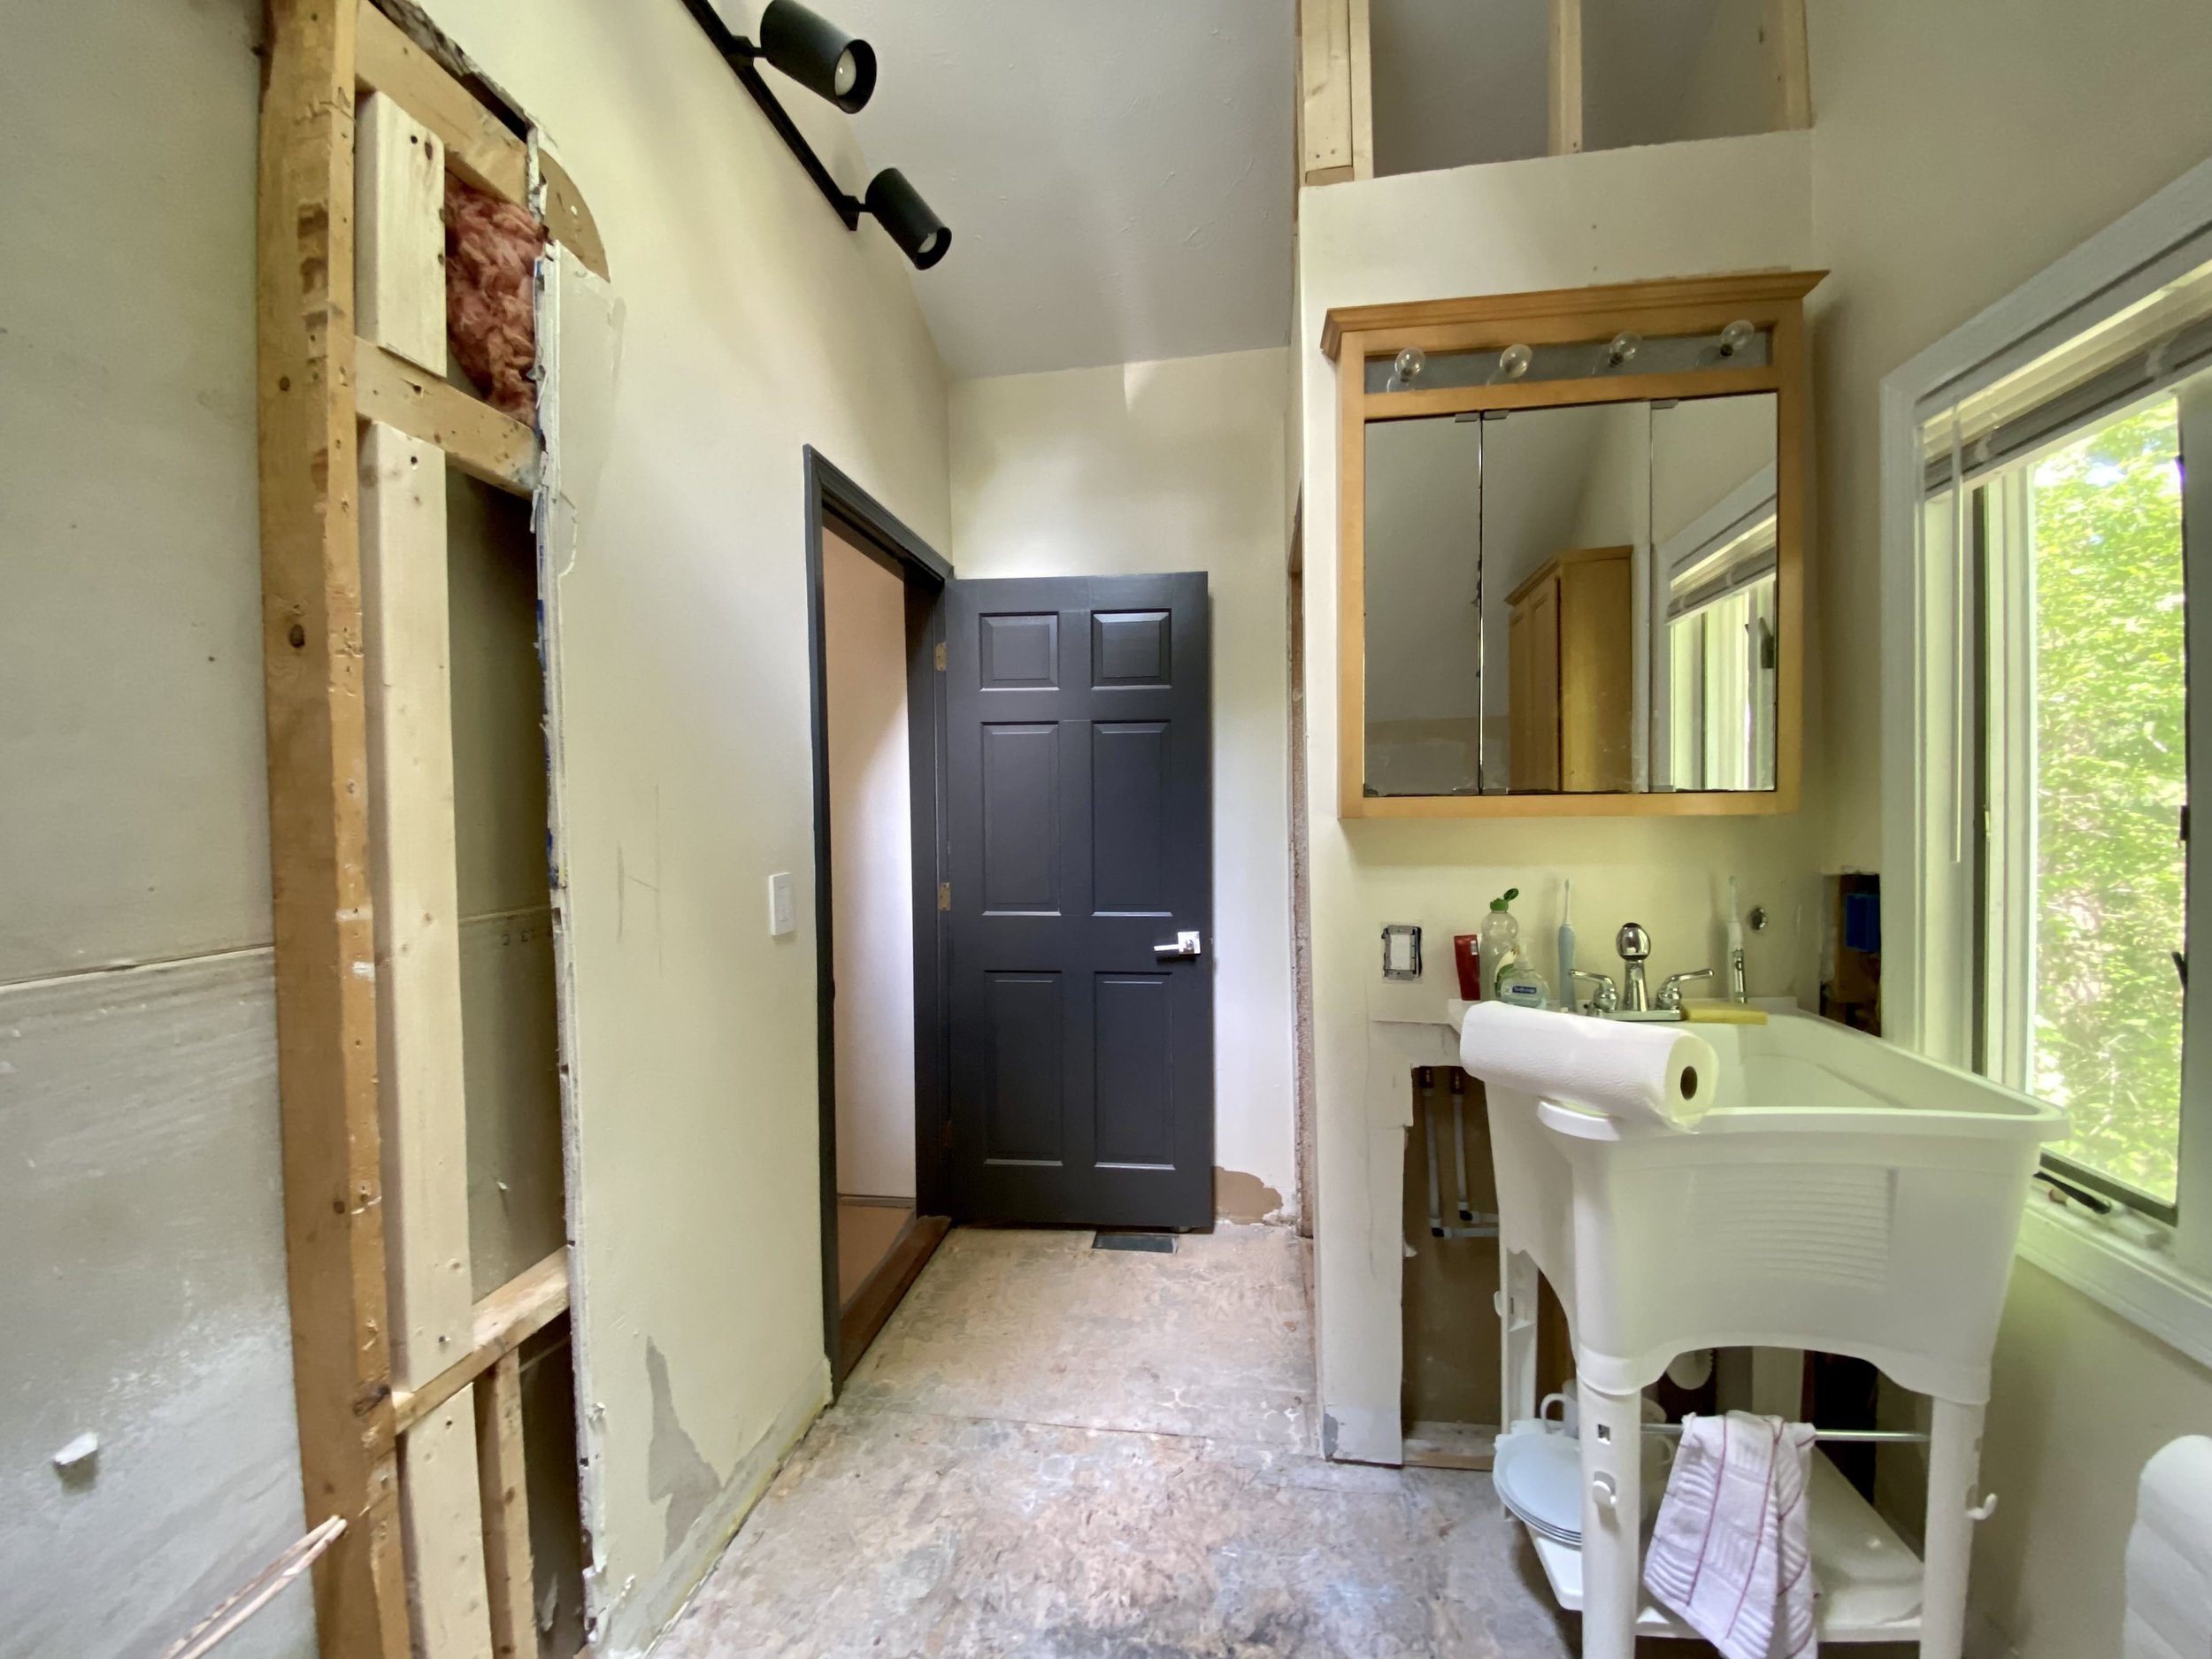
This was our bath:
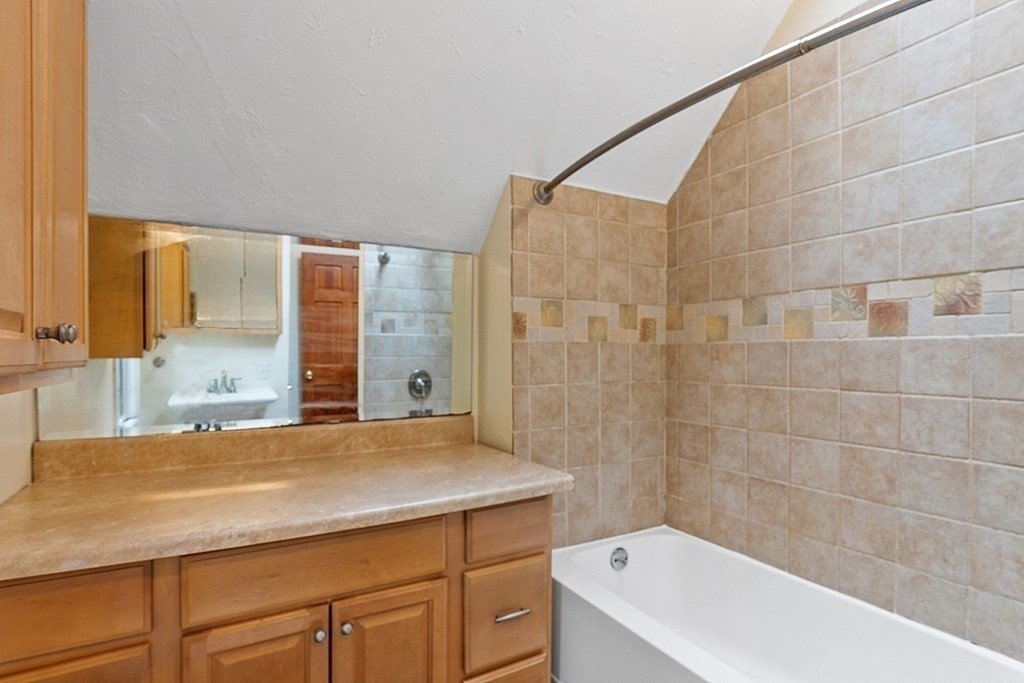

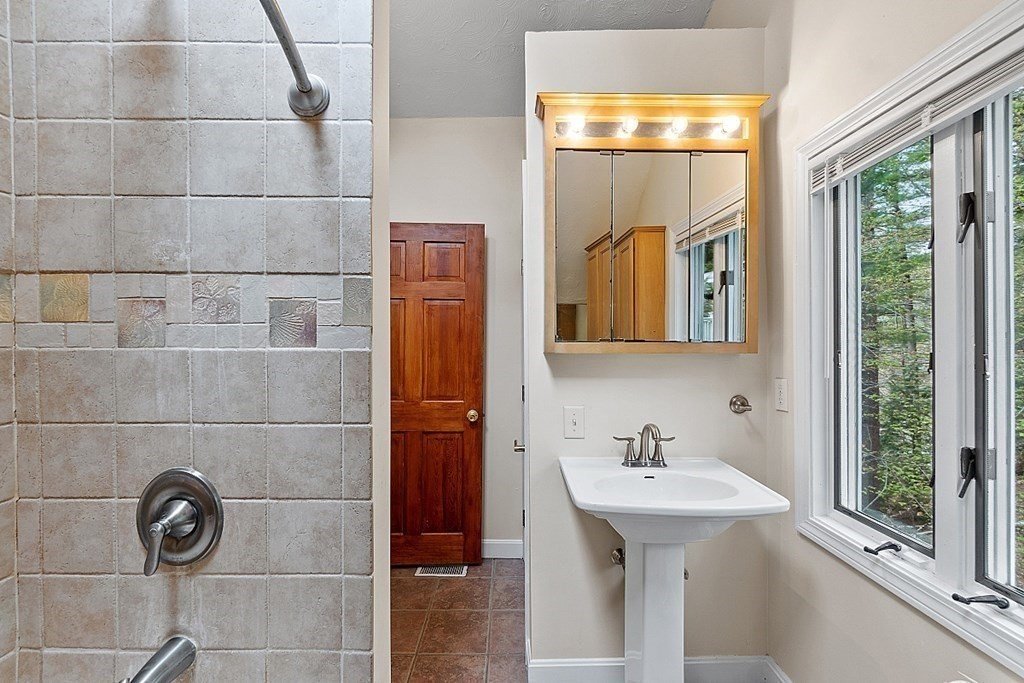
There were 3 things that we wanted to change:
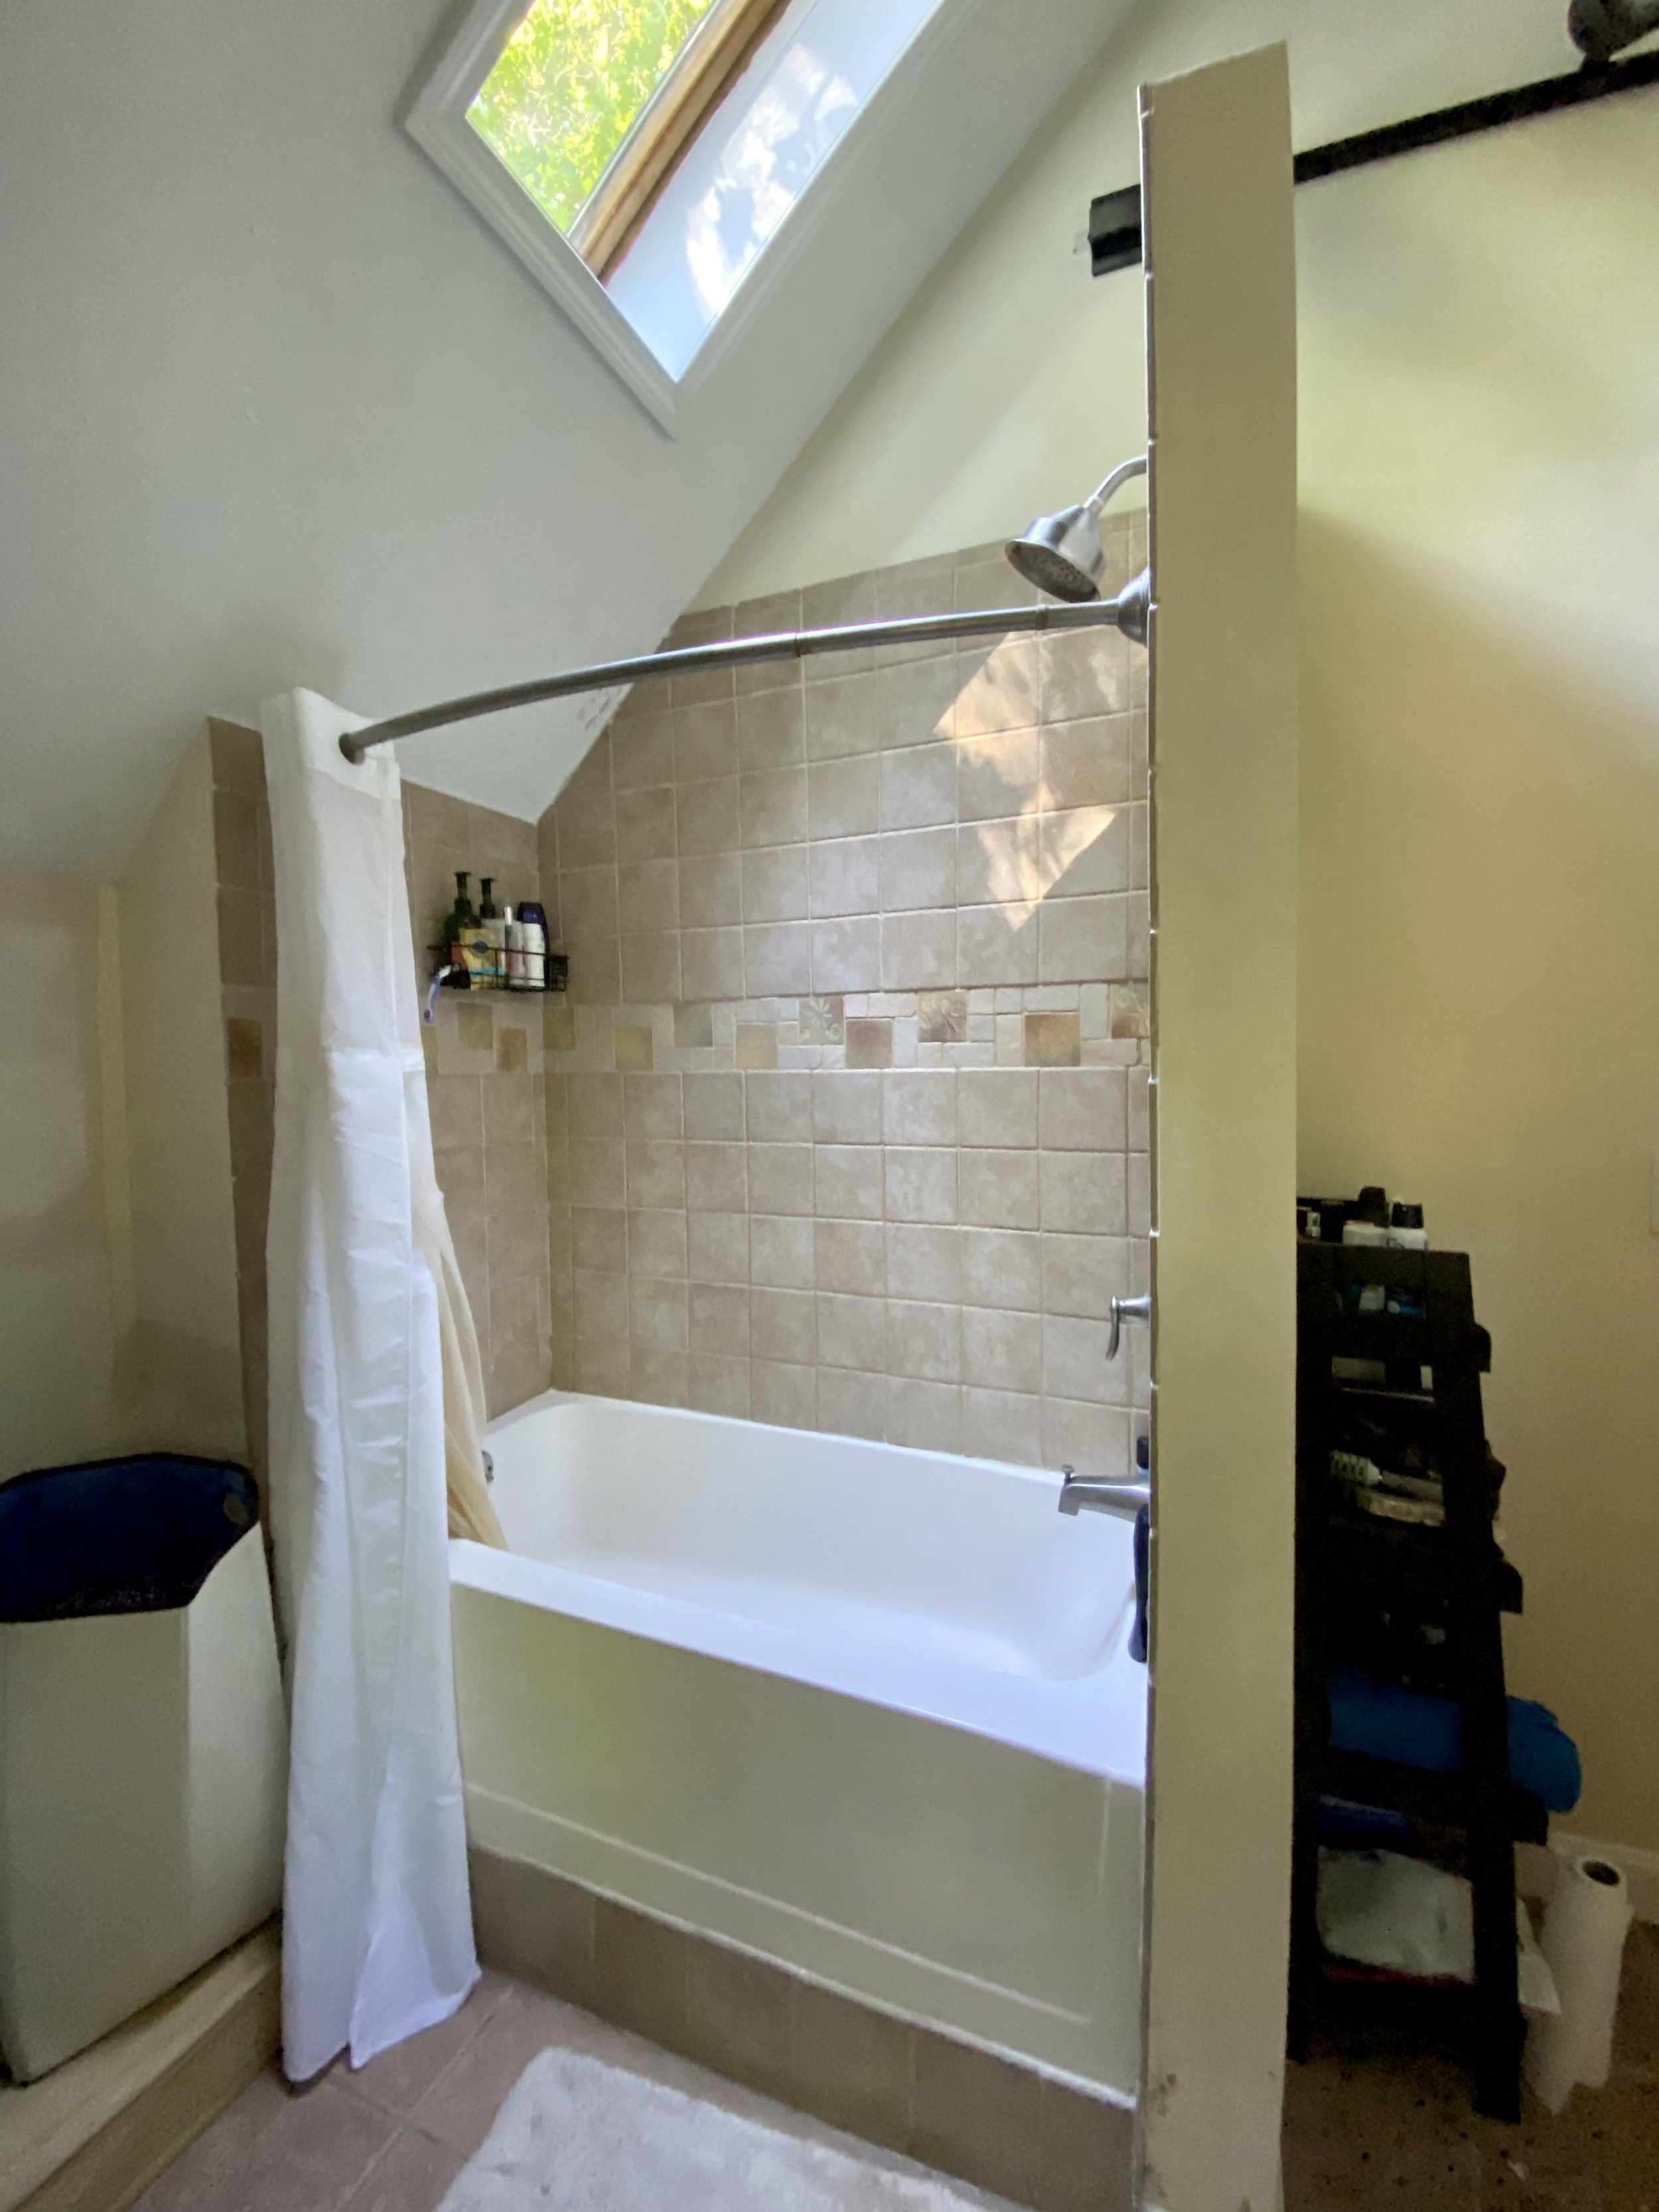
The bathtub. My husband and I aren’t fans of stepping into a tub for a shower. Plus, notice how the entire tub is elevated 3/4 of a feet? I had to pay extra attention when stepping out after a shower because was an essentially a one-legged squat on a wet surface. I was so afraid that my father-in-law would slip and fall when he visited.
Shower head wall. Love the skylight; having a wall which blocks the light streaming in doesn’t make sense.
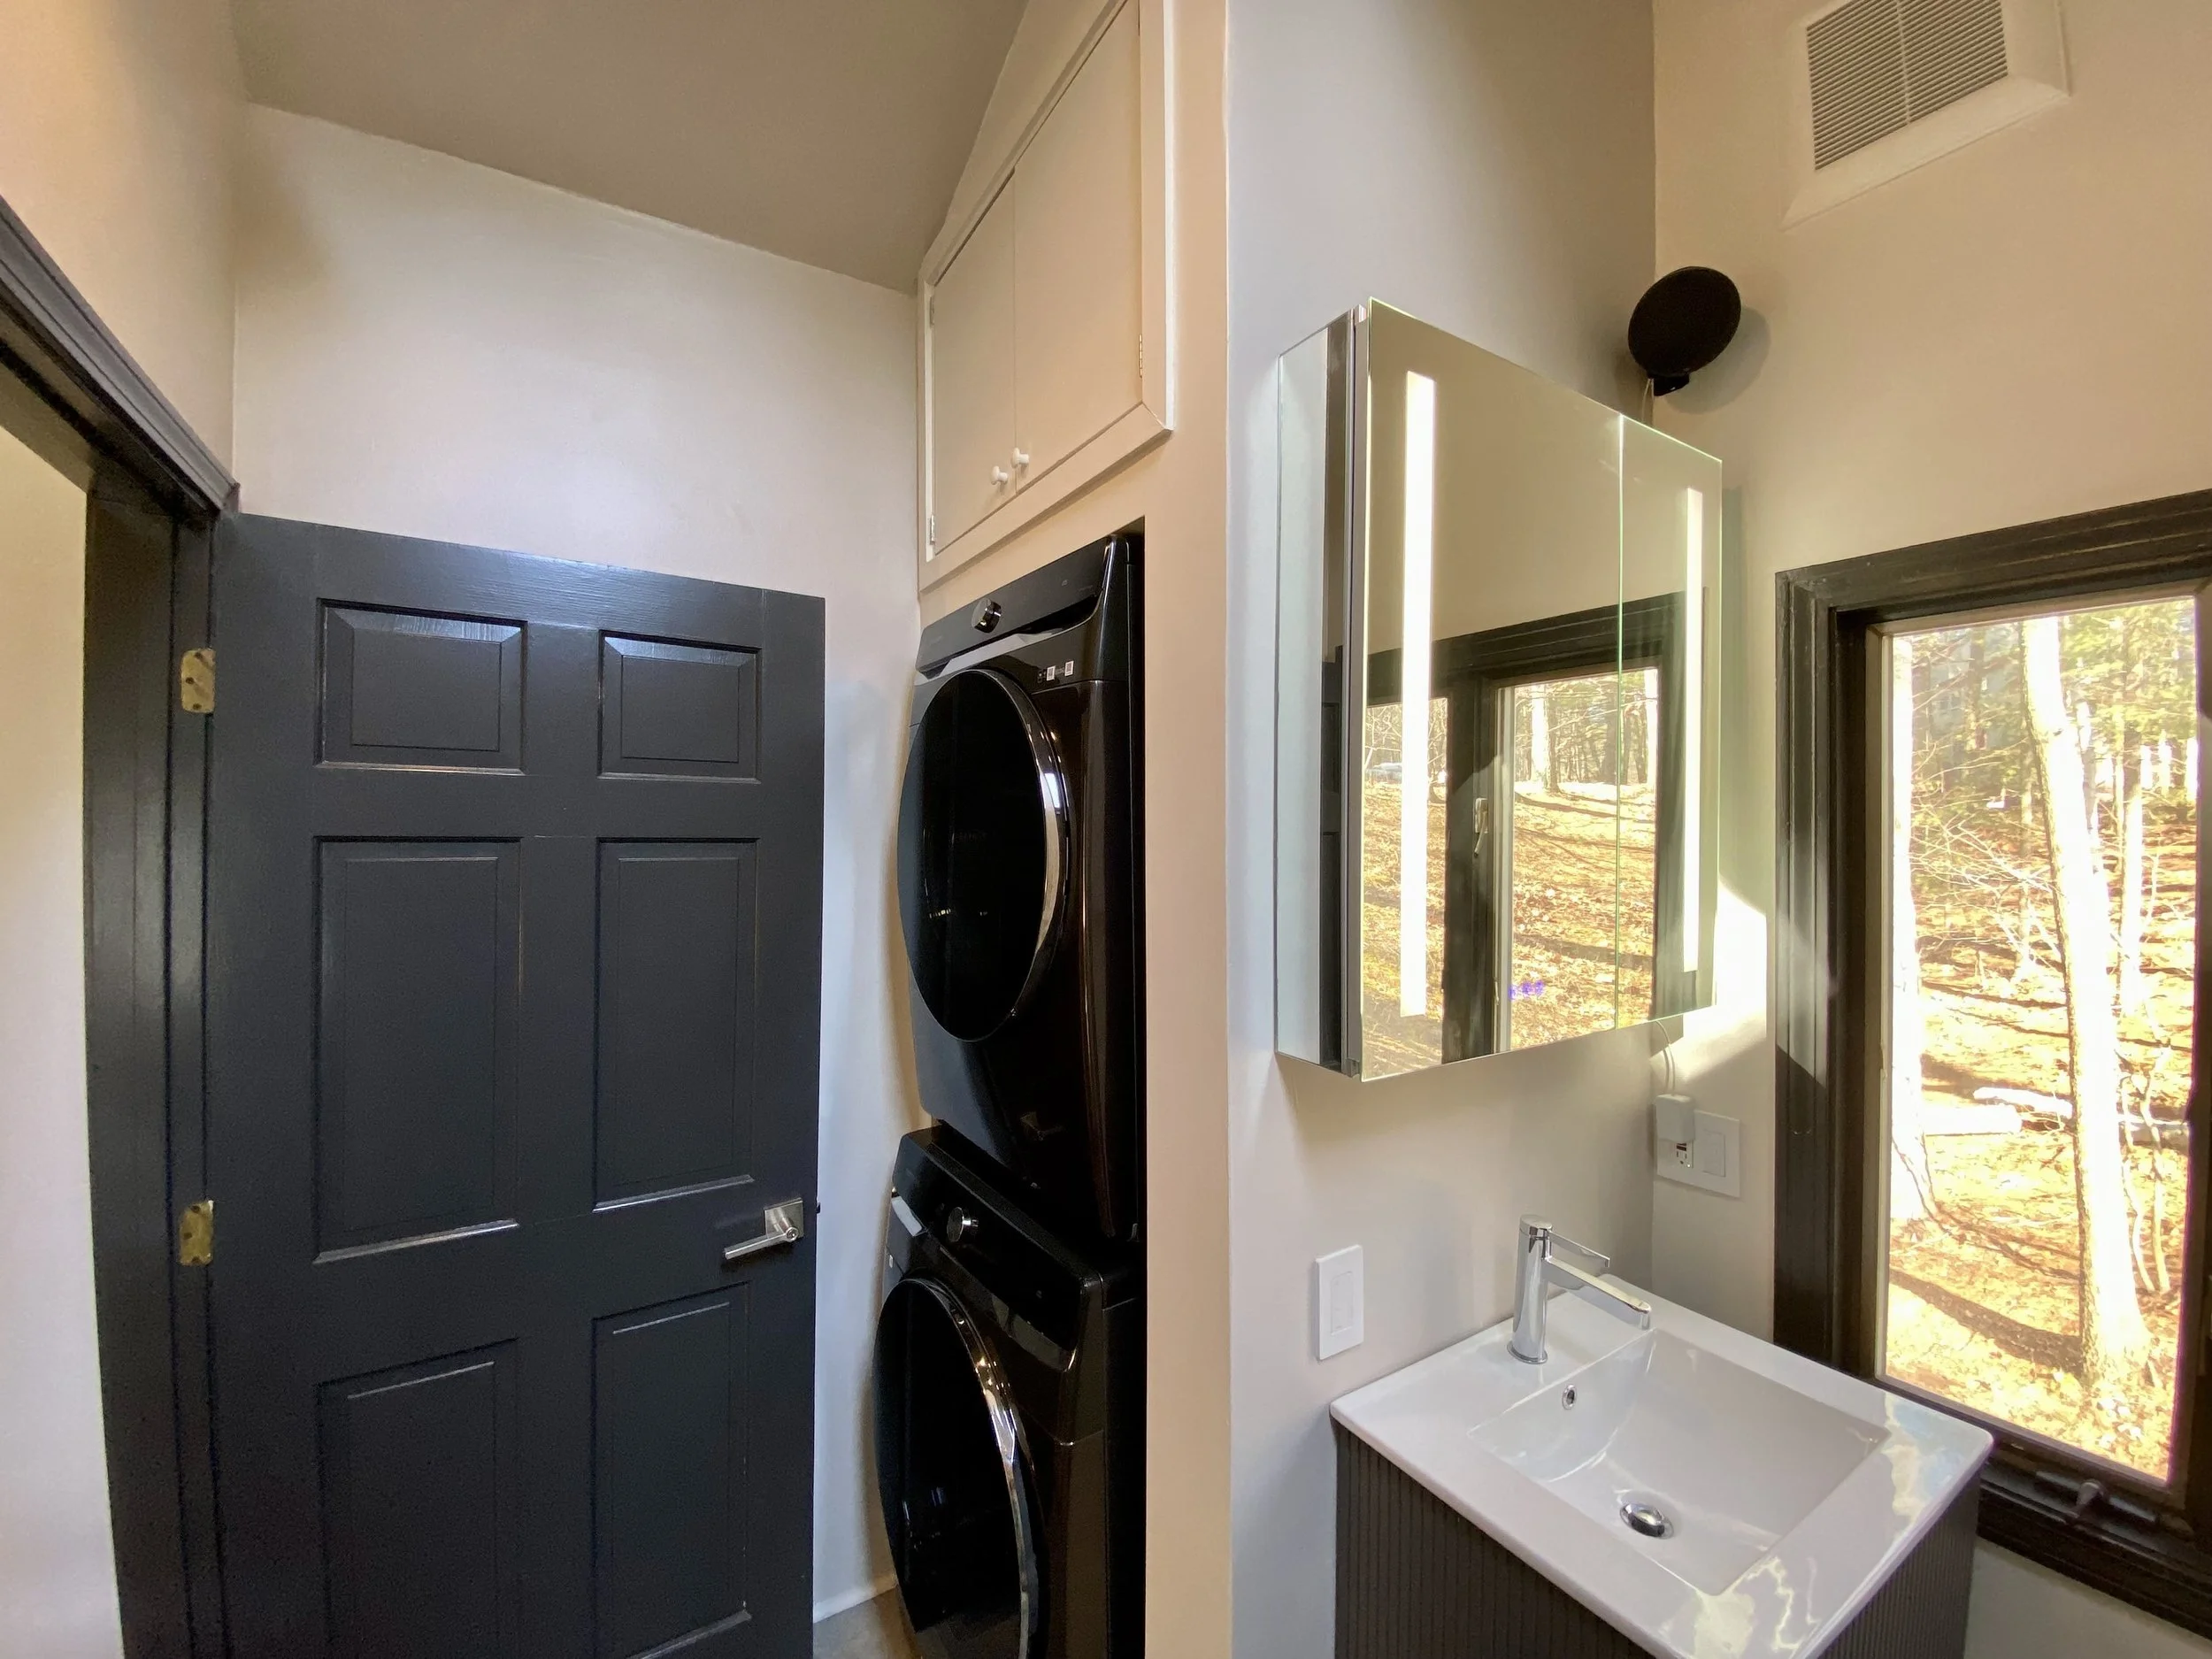
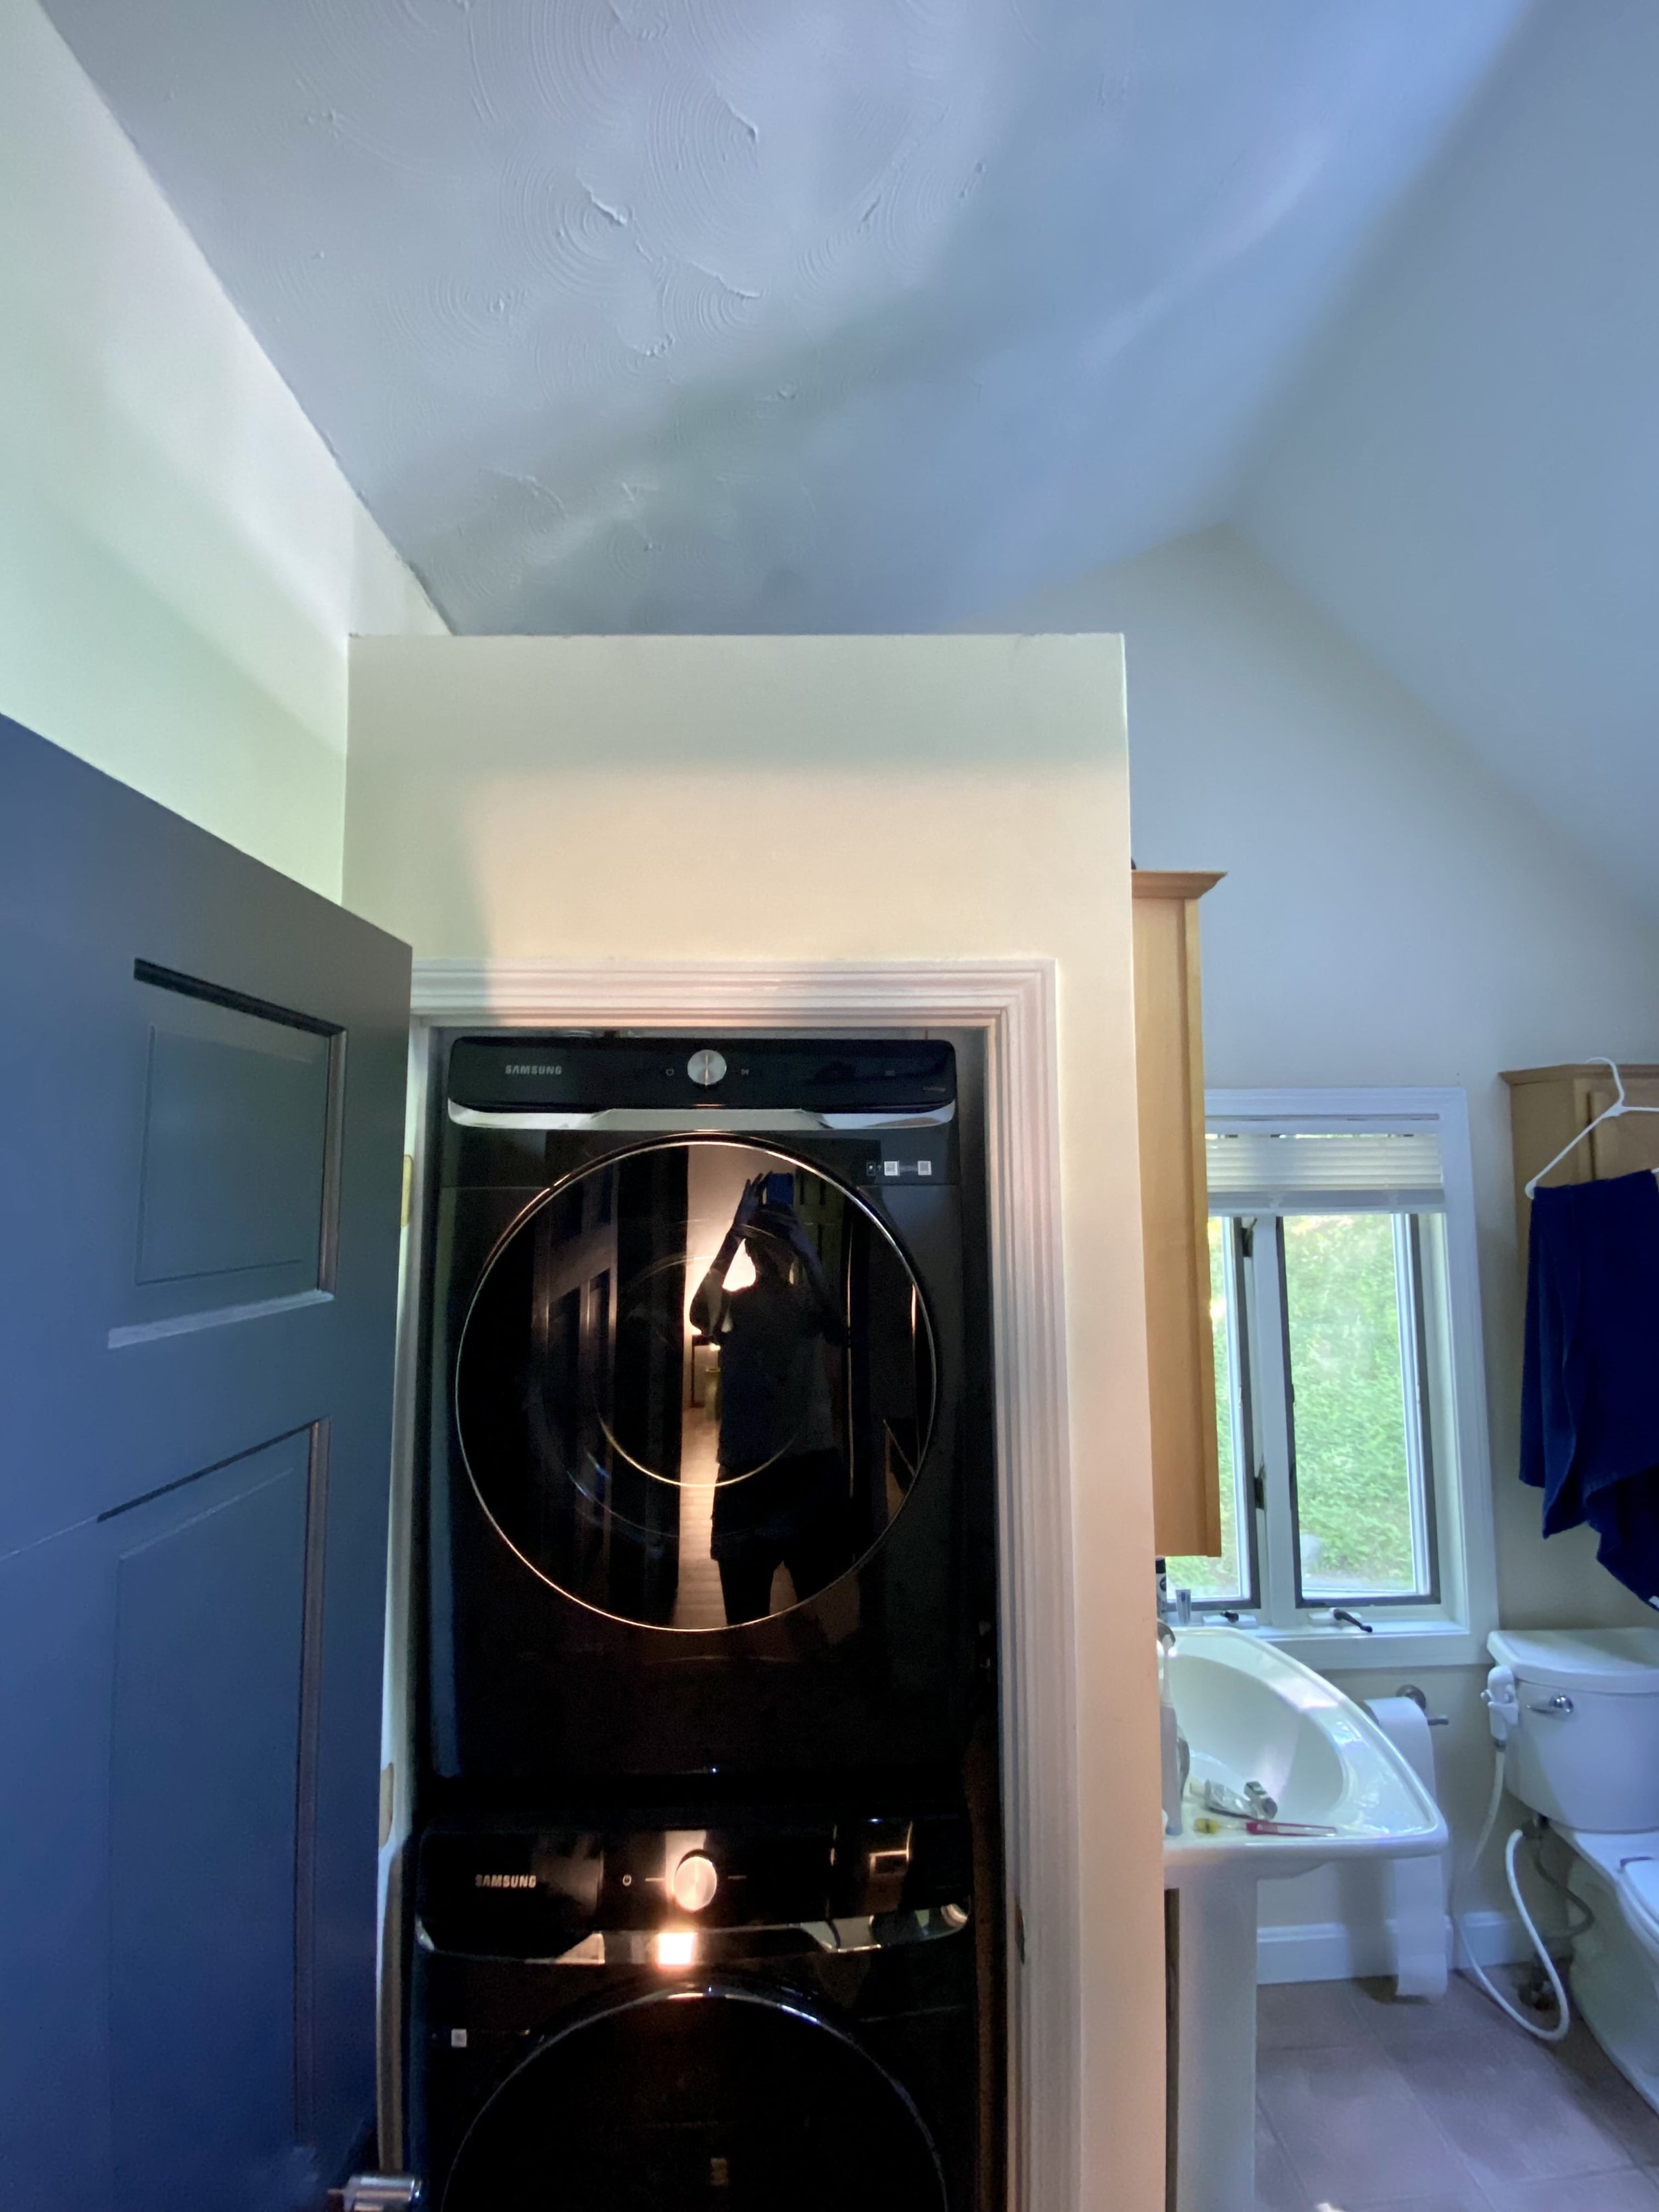
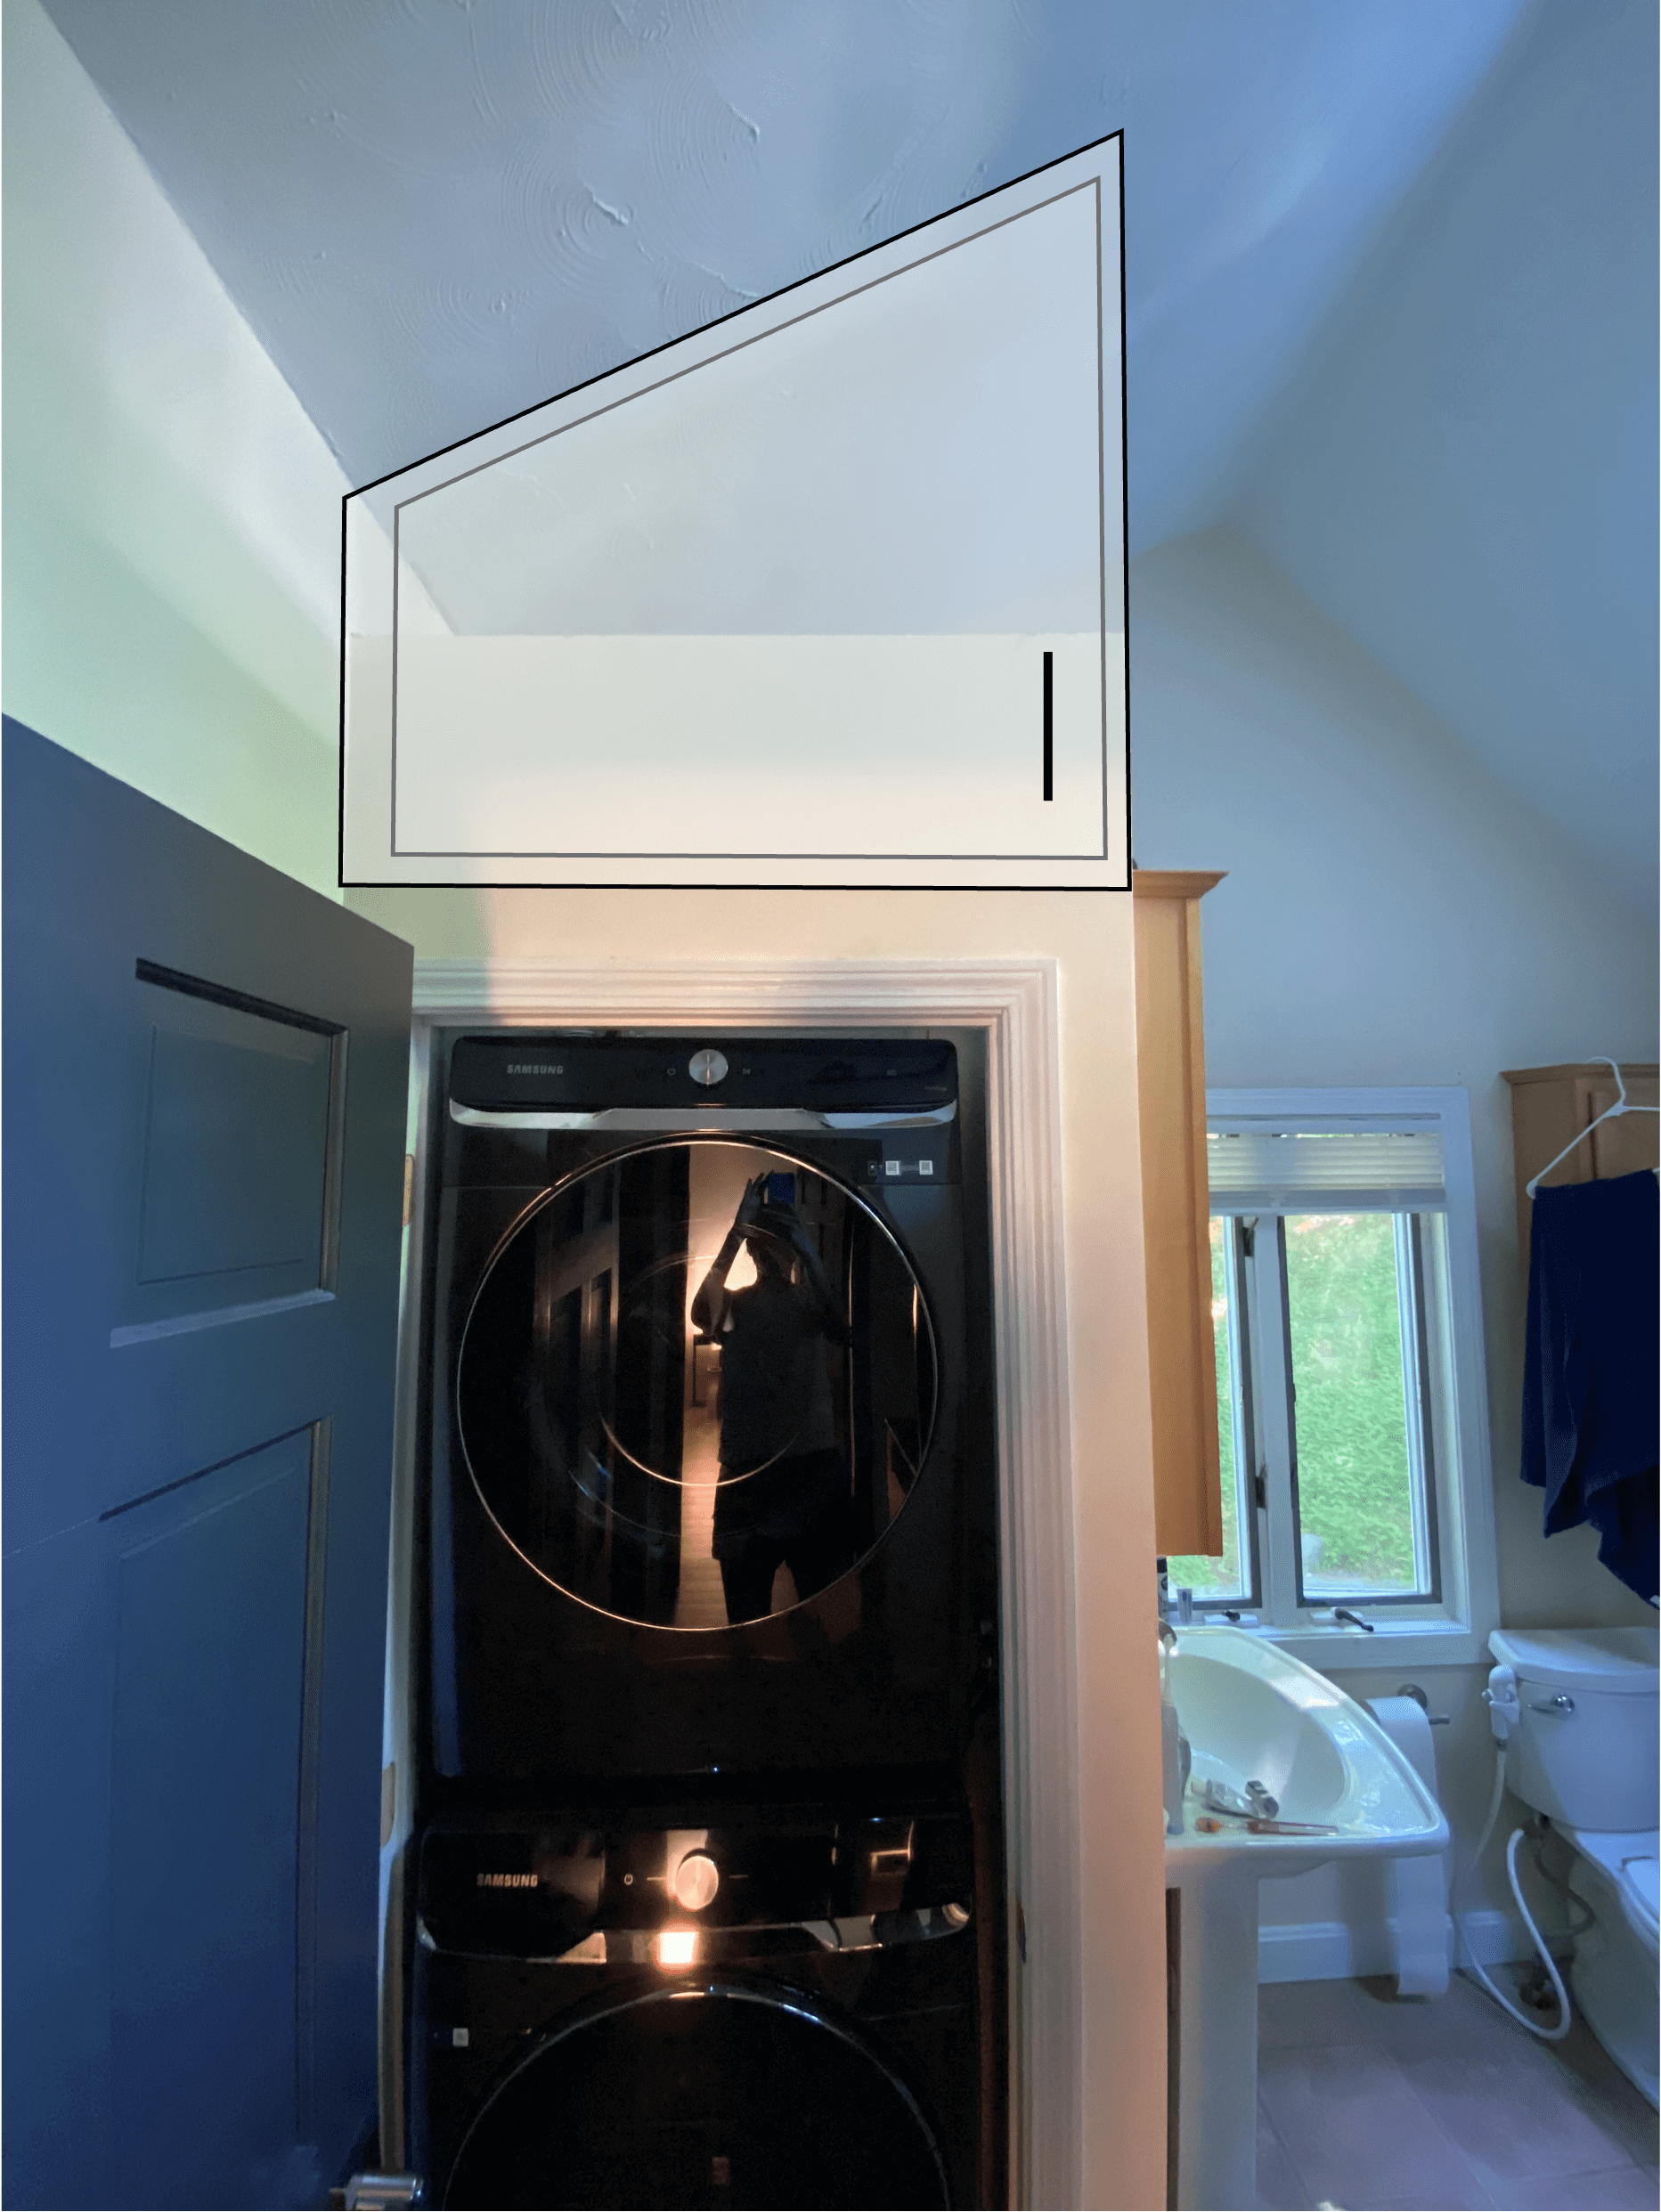
Wasted space above washer and dryer. What’s with the 9/10 built wall?
I do vaguely remember discussing changes to the position of the vanity and toilet, but costs did not justify benefits so we kept them where they were.
How to remodel a bathroom step 2: Have A Vision of the final look
Knowing the amenities that you want is important because that affects timelines and execution.
Say if you presently live in an older house that does not come with a soaking tub and you’re looking to install one, your contractor would need to determine if the joists underneath the tub would be able to support the weight of water and a human. Sometimes that requires input from a structural engineer and might even entail changing out a beam.
Also, remember that we’re still in a Covid-era where materials are in shortage. Windows have a backlog because glass is in shortage… so if you’re looking to have a glass shower enclosure, you’d have to be prepared for the wait.
Again, sketching helps to discuss ideas and prevent mistakes.
This was what we had in mind but our contractor quickly pointed out that the door wouldn’t open completely because of the angle of the sloped ceiling. 😅
We also thought it would be neat to have the shower head coming off the sloped ceiling with the shower control and handle off the back wall. Our contractor pointed out that if the control was at the back, we’d basically turn on the shower and get hit by cold water each time.
Common sense isn’t very common. 🥲
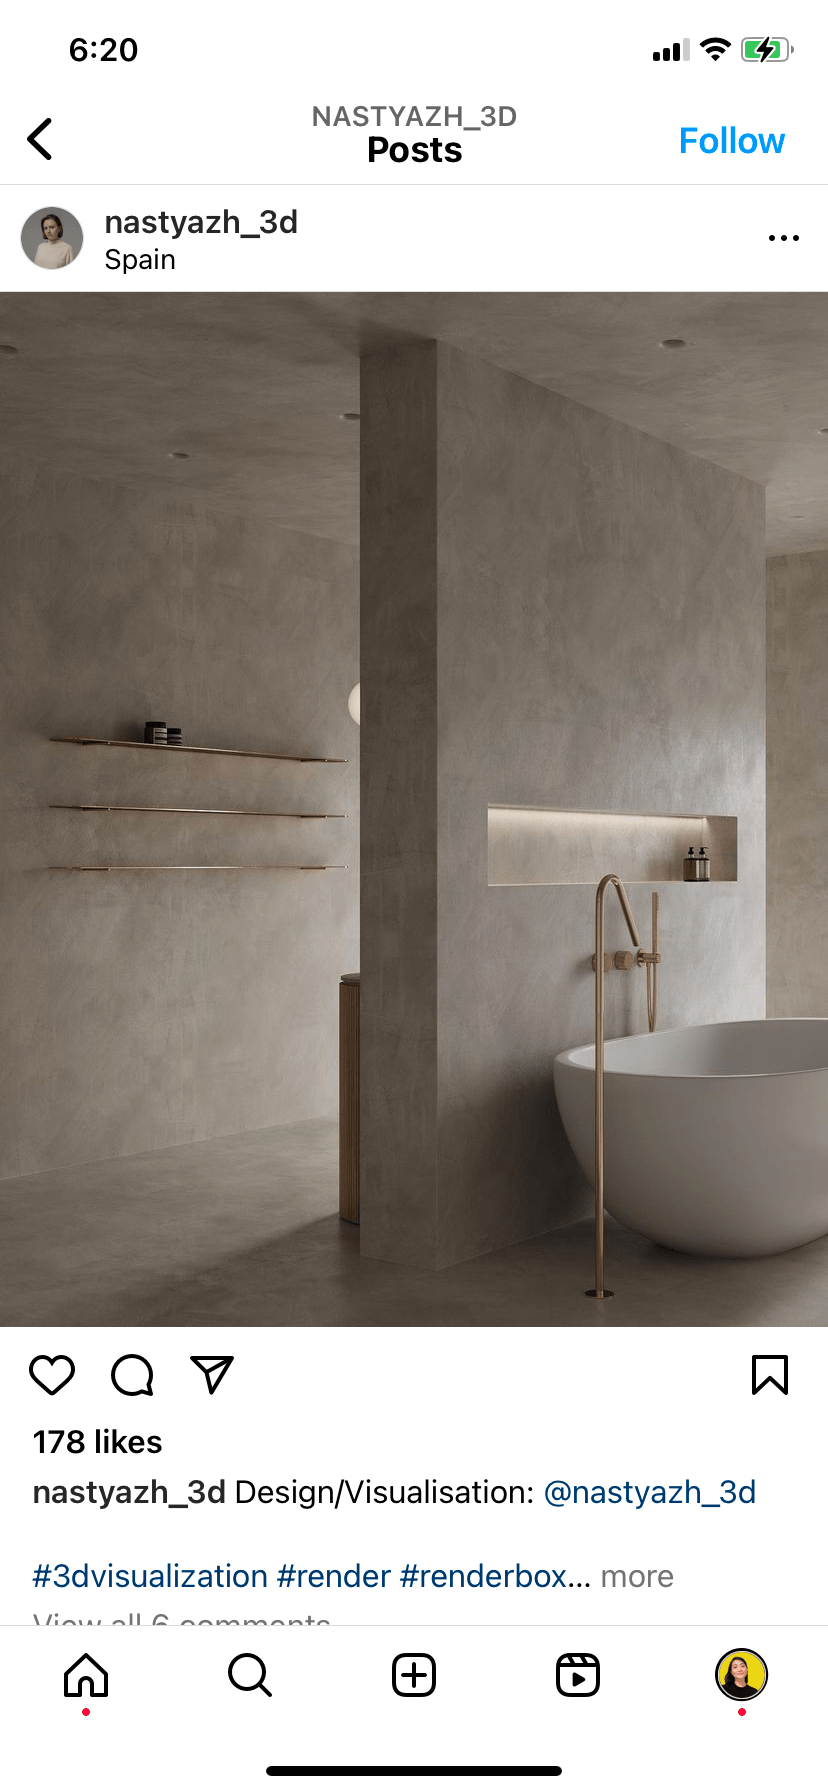
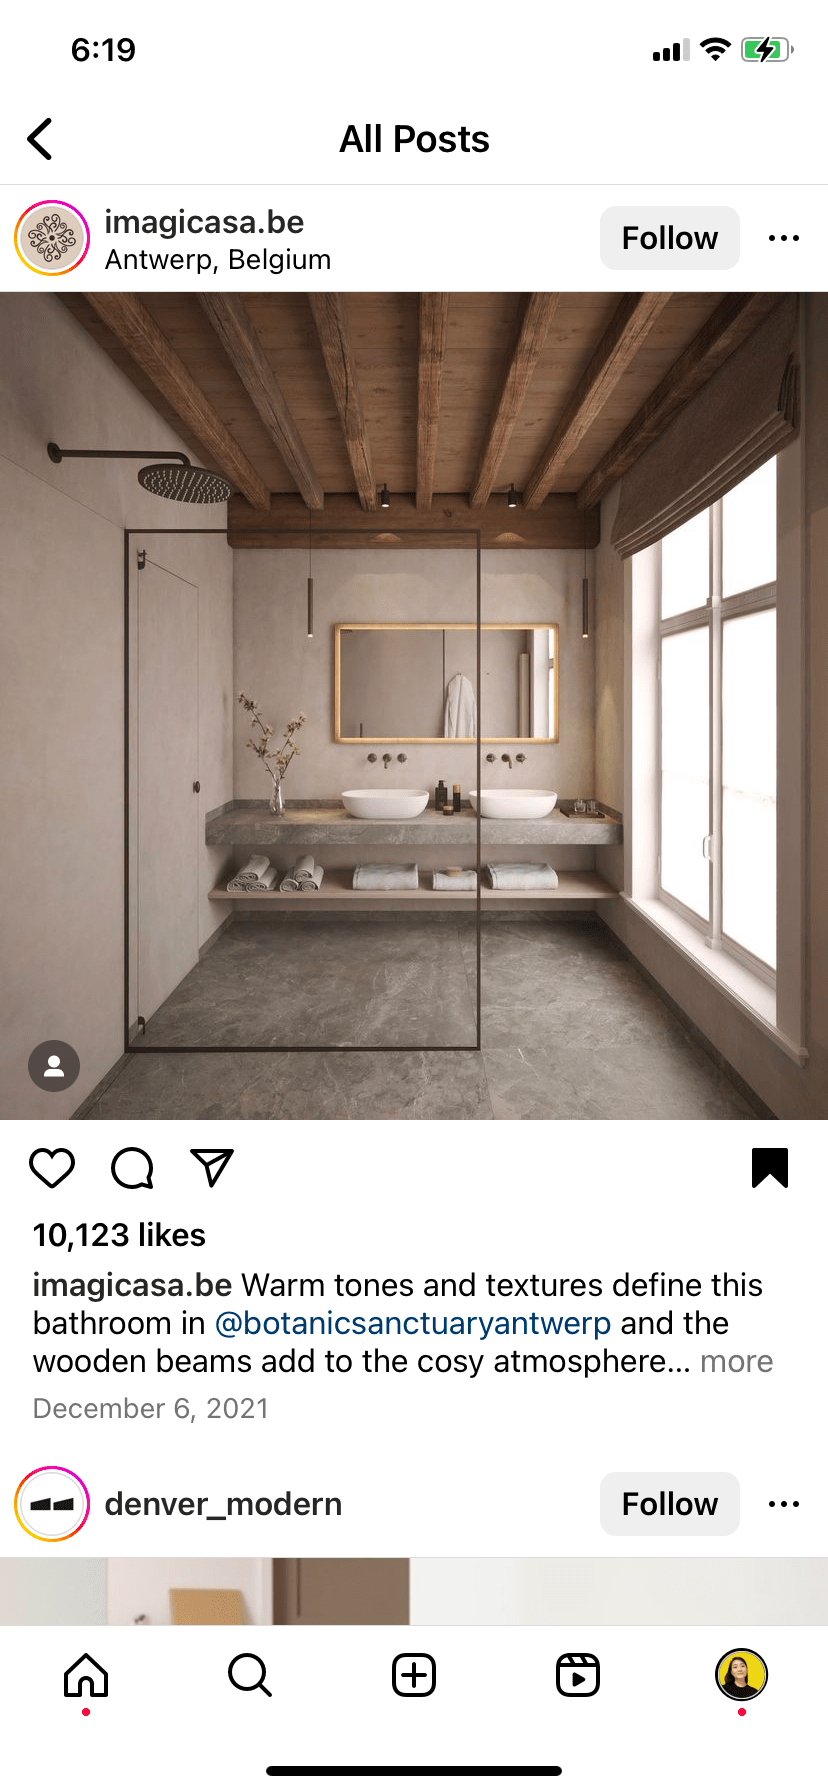
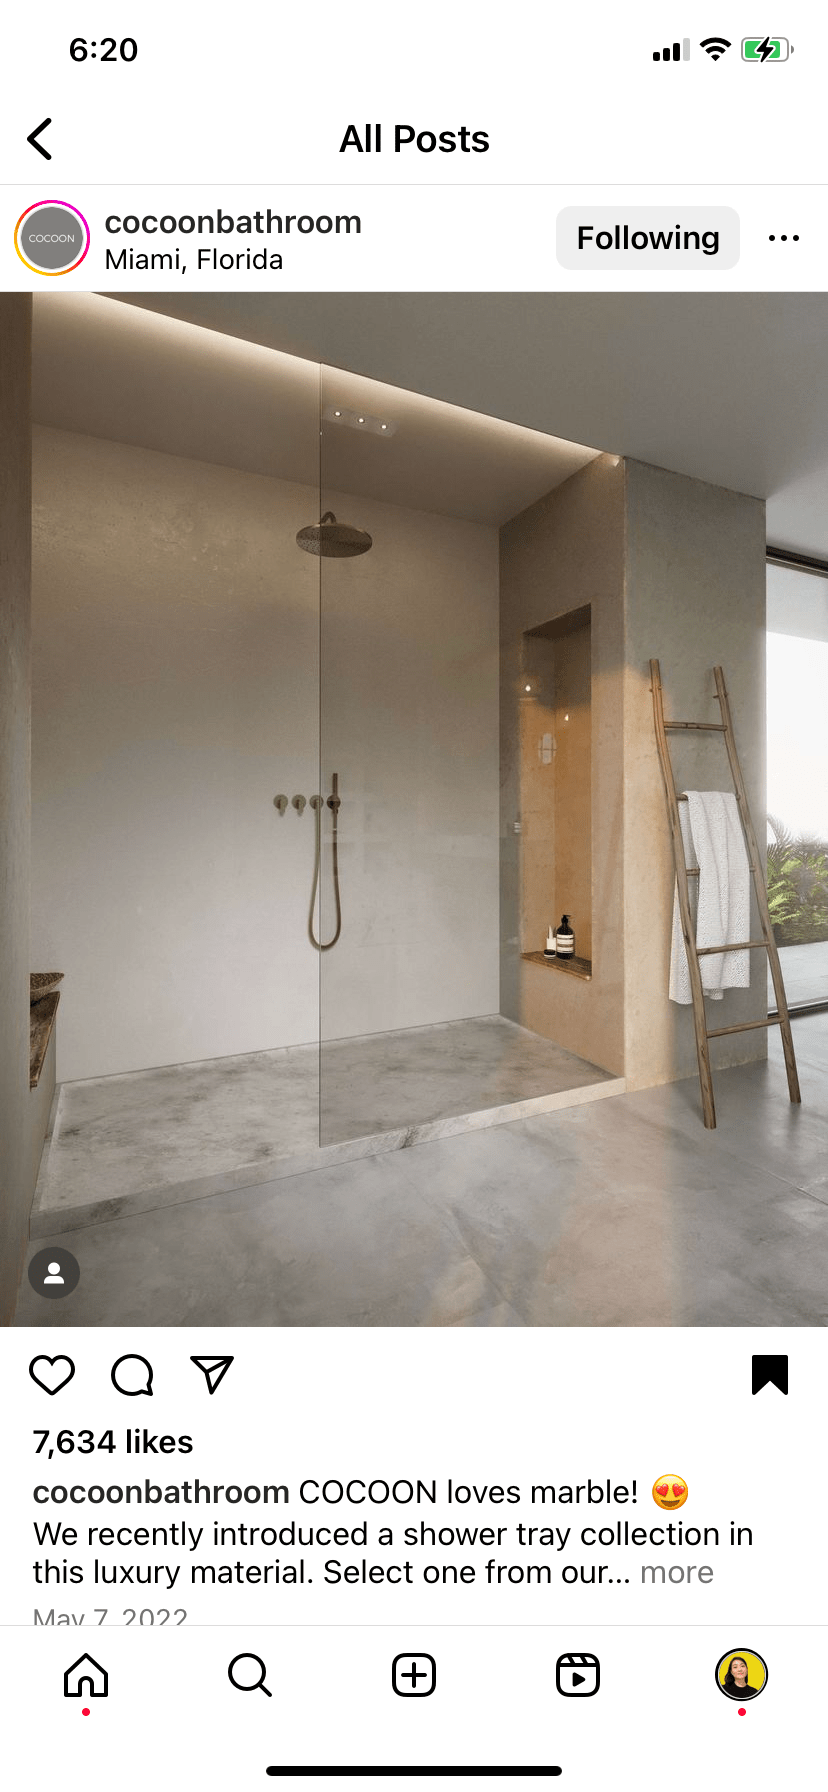
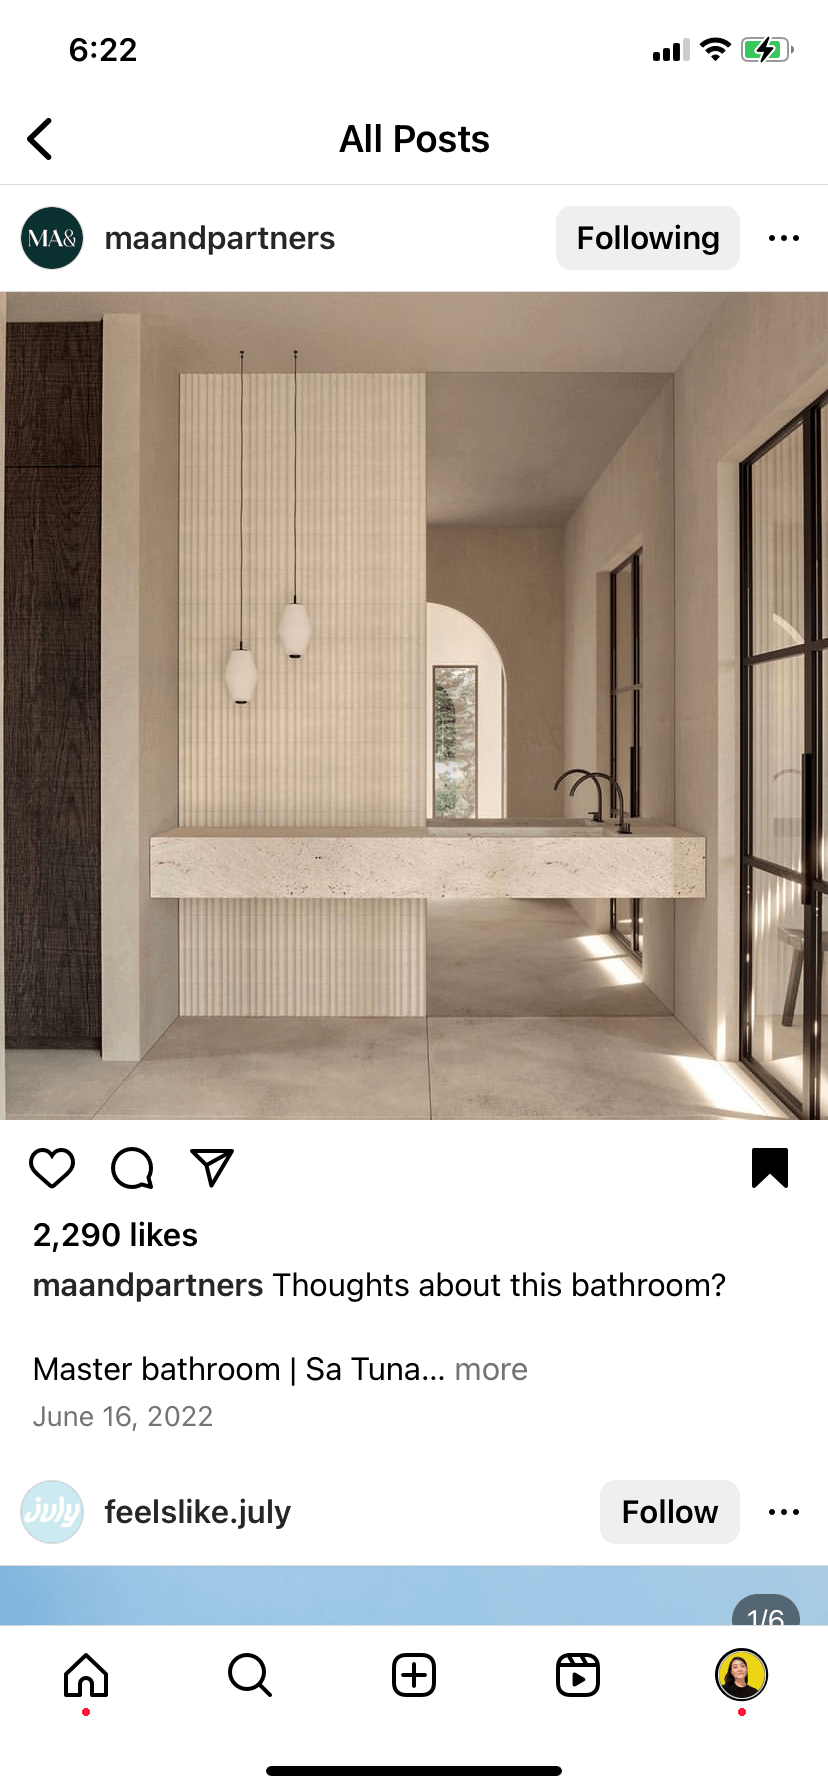
Another thing I pressed for was a cement look. Urban zen, remember? I wanted to microcement the entire surface of the bathroom.
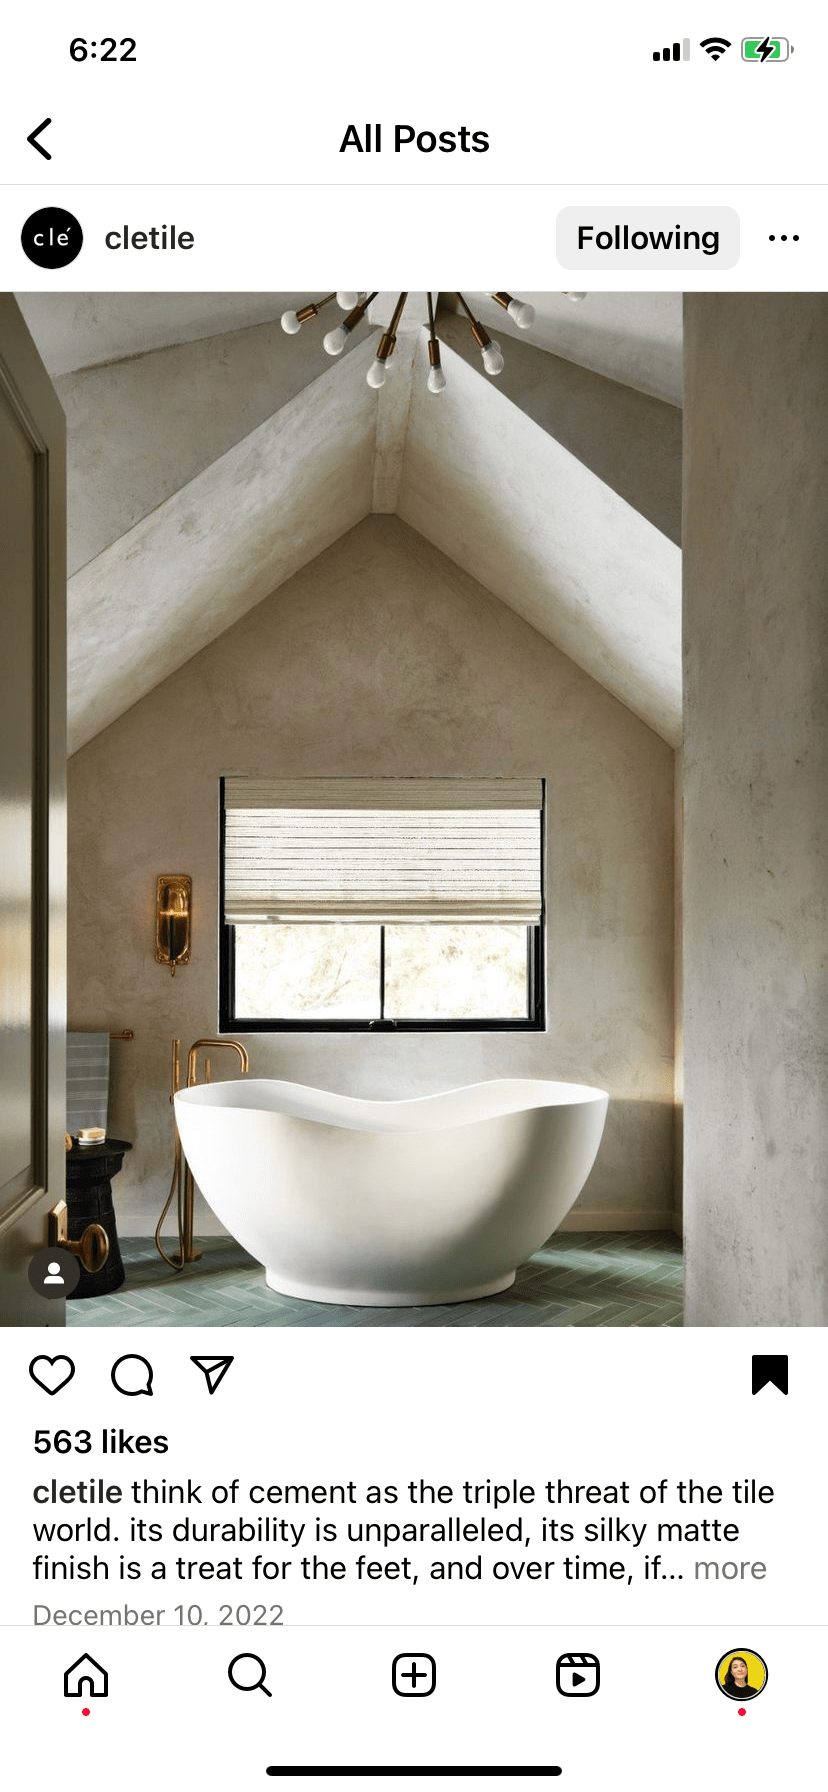
Here are some photos that I’d saved for inspiration:

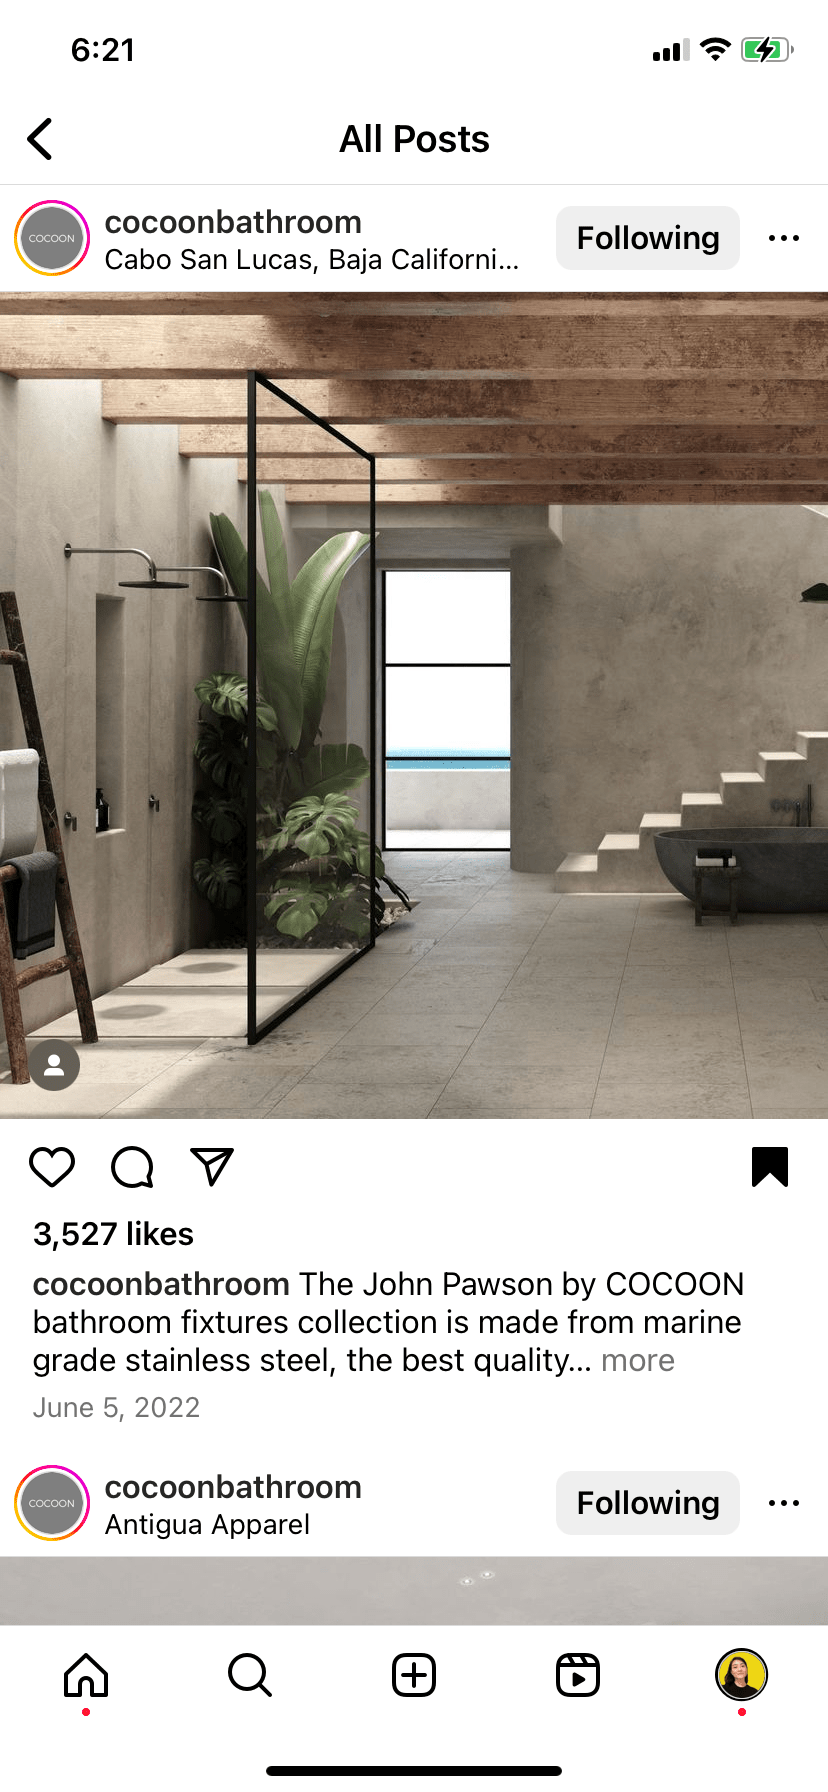

Ralf dropped the idea of white subway tiles and happily bought into mine (not that I’d approve his anyway).
I tried finding someone for weeks - Google, Instagram hashtags, calling up other builders whom I know, you name it. Not a single soul in Massachusetts knew what I was talking about.
Seriously. Don’t even get me started. Before I’d met my general contractor I had difficulty finding an HVAC contractor who could install an electric HVAC instead of the usual gas/oil types. Some told me electric HVAC isn’t a thing. We are that much behind times.
I even contacted the folks in Florida to ask if they’ve got a guy here. No luck.
I desperately asked my tile guy if he could search up all that DIY footage in YouTube and pull it off for us. He looked at me and asked if I really wanted to be his guinea pig for this. No ok fine, that was a brain fart.
In the end, we settled on tiling. Sigh. Same old same old.
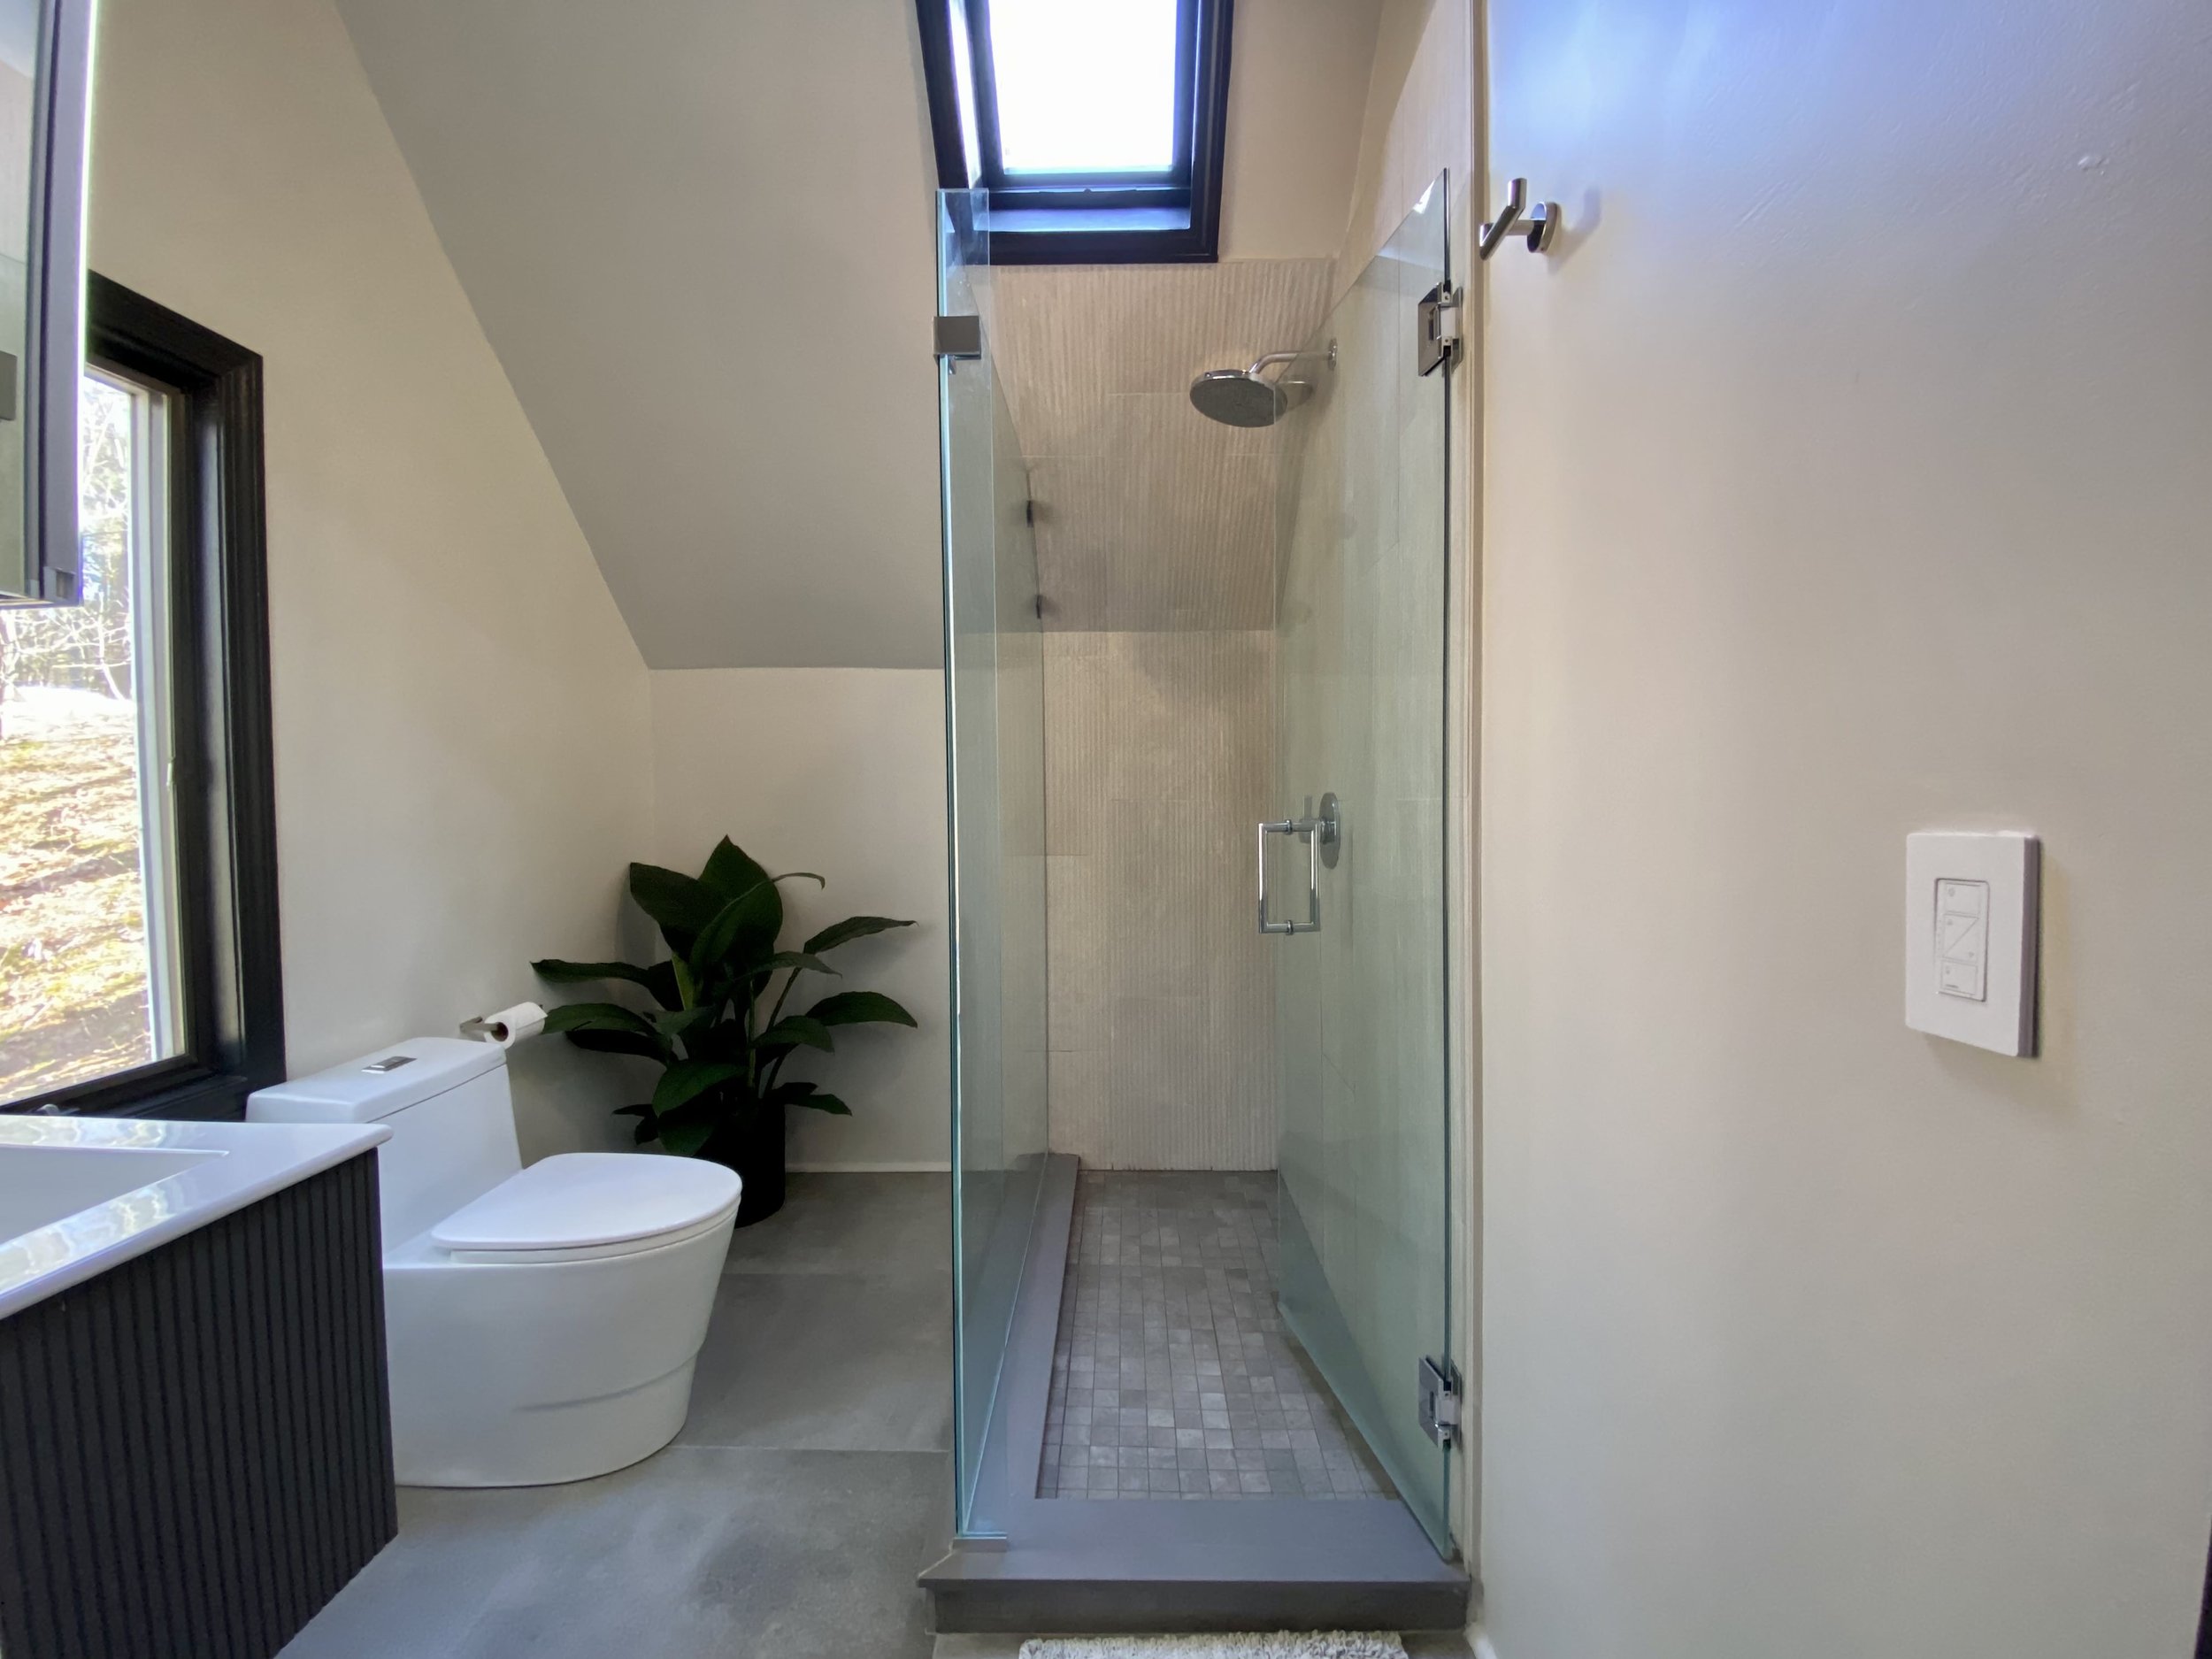
Anyhow, building up the space above the washer and dryer as well as changing the tub to a walk-in shower with glass enclosure were the major changes. The rest were superficial and modular updates.
How to remodel a bathroom step 3: Demolition
There’s actually a Step 2.5 there, which is make plans for showering and biobreaks.
If you’ve got an extra bathroom, good for you. If not, better make sure that you’re friends with your neighbor(s)! Or that you have friends somewhere close by.
There’s a certain schedule for things to be done and signed off by the town’s inspectors and building commissioner.
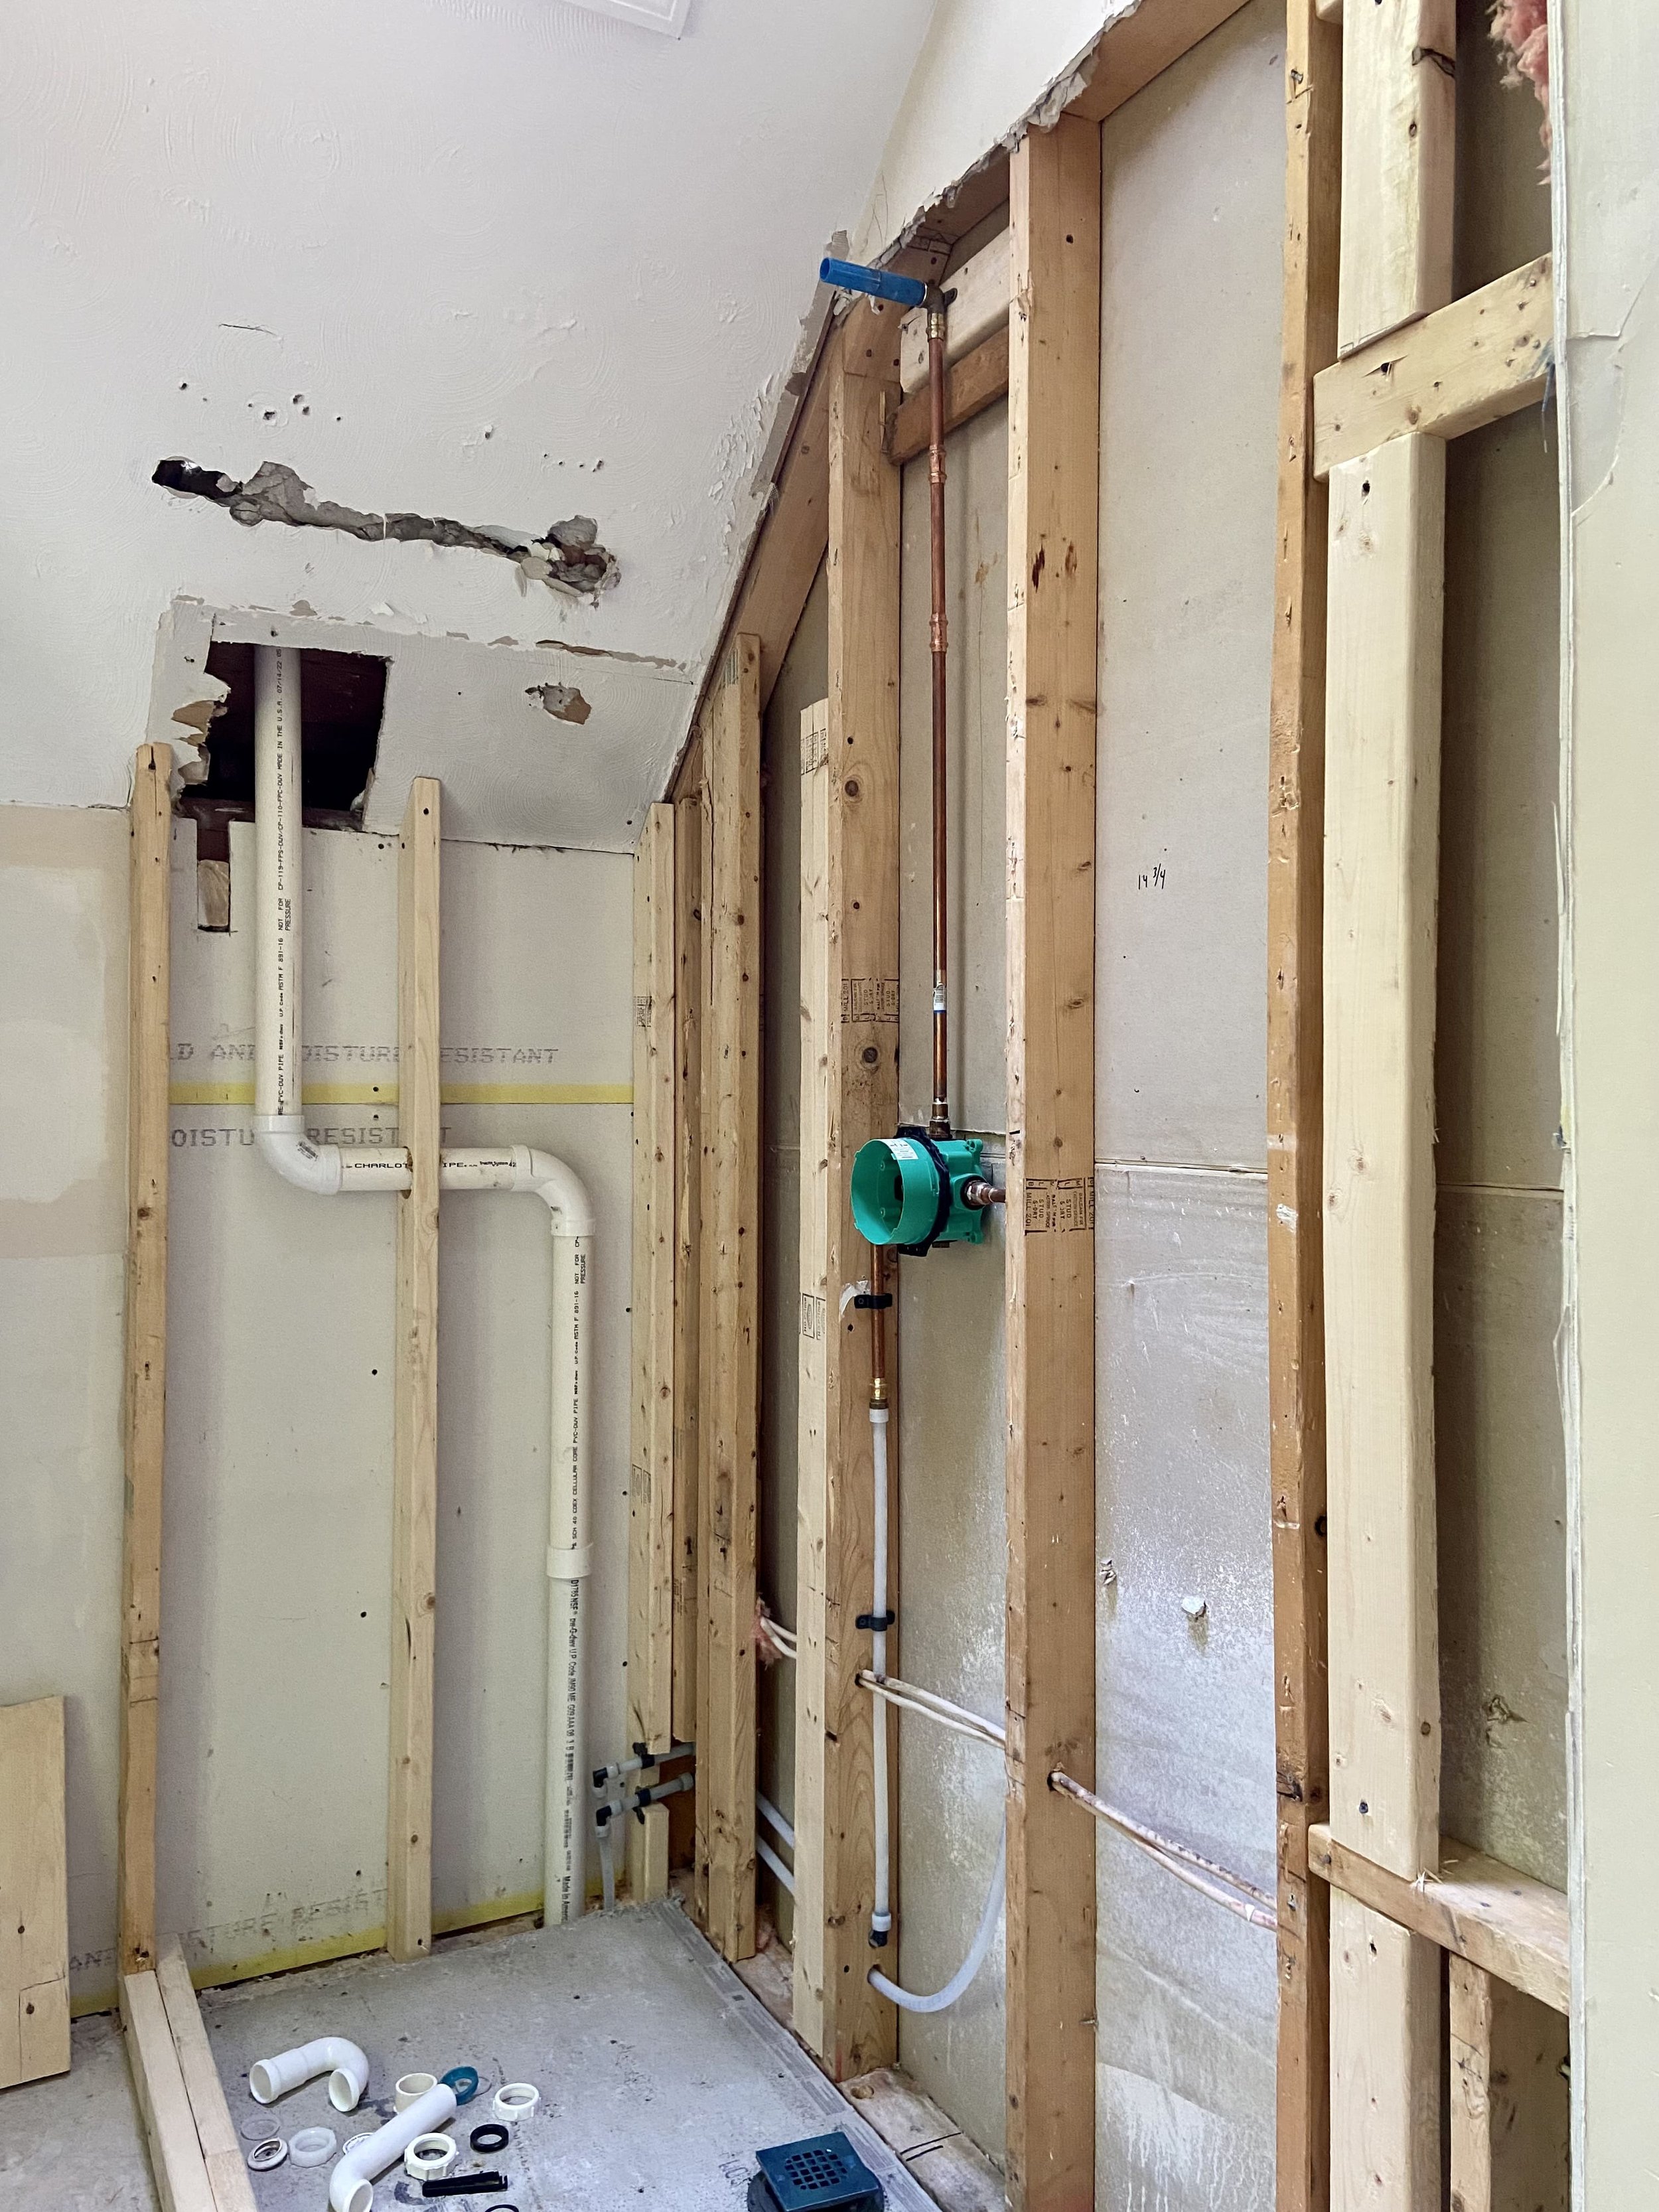
If there’s plumbing work to be done - in our case we moved the shower lines and changed out the ones servicing our vanity and washer - the electrical inspector must first sign off on the permit to approve that work was done correctly before insulation and walling up can proceed.
How to remodel a bathroom step 4: Pick out Finishes and Amenities
There’s a bit of an overlap between Step 3 and Step 4 because the placement of the vanity’s water line depends on where the faucet is going to be.
Do you plan to have a wall-mounted faucet? Single or double vanity? Floating or pedestal vanity?
These things affect how your plumber cut and install your water lines.
So if you do plan to change out your vanity, definitely prioritize the purchase of one at top of list. Check delivery times.
Ralf and I knew that we would want to pick out tiles in person, so at the recommendation of our contractor, we headed to Fitzgerald Tile over at North Reading.

We were still hung up on a cement look and WE FOUND WHAT WE WERE LOOKING FOR!
We first settled on large format cement-looking tiles for the bathroom floors:


Then, with the floor tiles as anchor, we found complementary tiles for the shower wall and floors:


If you’re ever in Fitzgerald Tile, please, do yourself a favor and ask for Gabriella Williamson (Gabe). When you pick tiles, you’ve also got to decide on the color of grout and Schluter® trim (a piece that covers the edge of the tile so you don’t get raw tile as outlines for your shower) - we told Gabe that we wanted a seamless look and she was spot on in picking out the colors for us.
I learnt so much from her, like when choosing tiles, place them how you’d want them eventually - lay tiles down or up depending on whether you want them for floors or walls. Light hits differently, so laying them how you want them provides the most accurate color representation.
We also made a trip to Mass Granite in Acton to pick out a quartz threshold for our shower. I’d already purchased my kitchen countertops from them at that point, so I knew I was going to get excellent service from friends. :)
Pro tip #1: Anytime you need a small piece of stone (e.g. threshold, small vanity), don’t look at the sample catalog because that’s buying a full slab - walk the stone yard and try to find a leftover piece. You’d pay a fraction of the price. Like this one below, I’d only needed a bit from someone else’s left-over piece of kitchen countertop.

I highly recommend online shopping for fixtures and hardware because for one, there’s everything.
But more importantly, because there’s a spec sheet with measurements, I found it so helpful to take an actual tape measure, walk over to e.g. my bath faucet, and actually measure out with reference to an existing object and placement.
The compromise is of course, inability to see/feel the item, but hey… there’s returns.
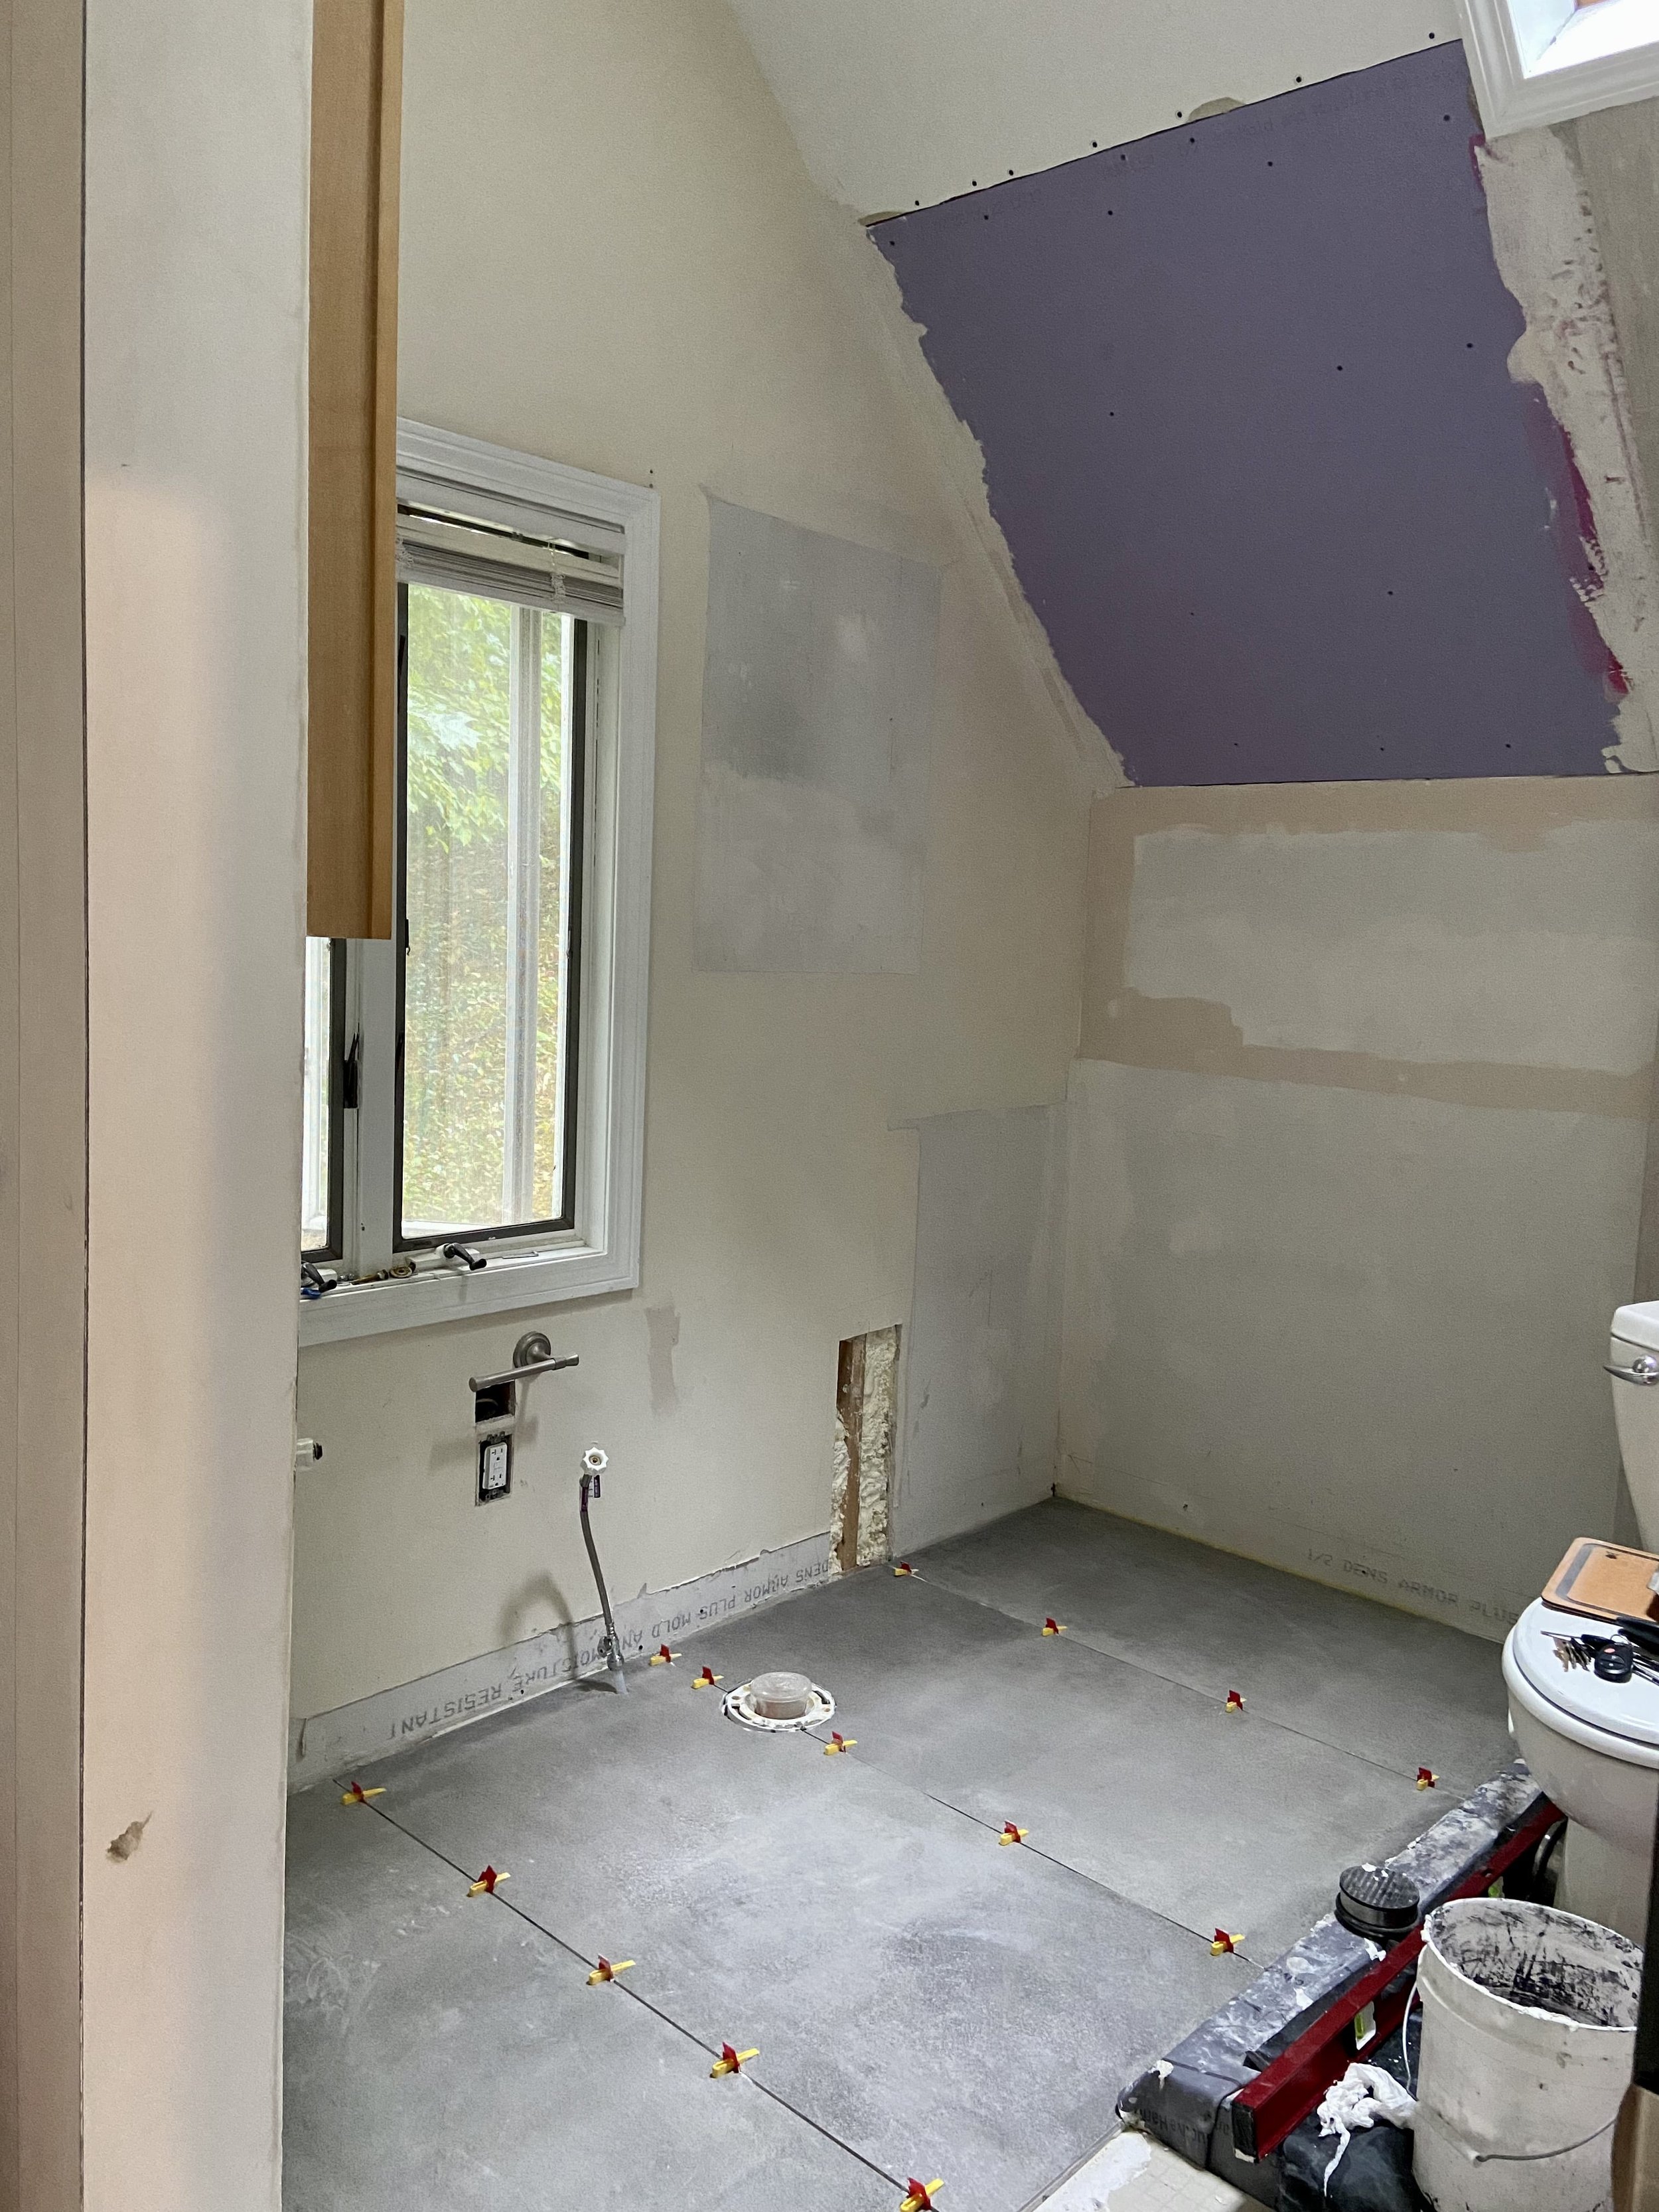
How to remodel a bathroom step 5: Lay tiles
Tiling is tedious and time-consuming.
There is no way to rush it, because before the tile itself is laid, there’s so much prep work that needs to be done and everything that the tile adheres to needs time to dry. 😮💨
And on top of that, a good tiler never rushes because tile work needs planning - if your tiling contractor did not consider corners, angles and critically, where would the final pieces of tile be laid, you’ll end up with messy small cuts of tile everywhere.
Then there’s the cutting. If not precise, your tiled surface will look like a whack job.
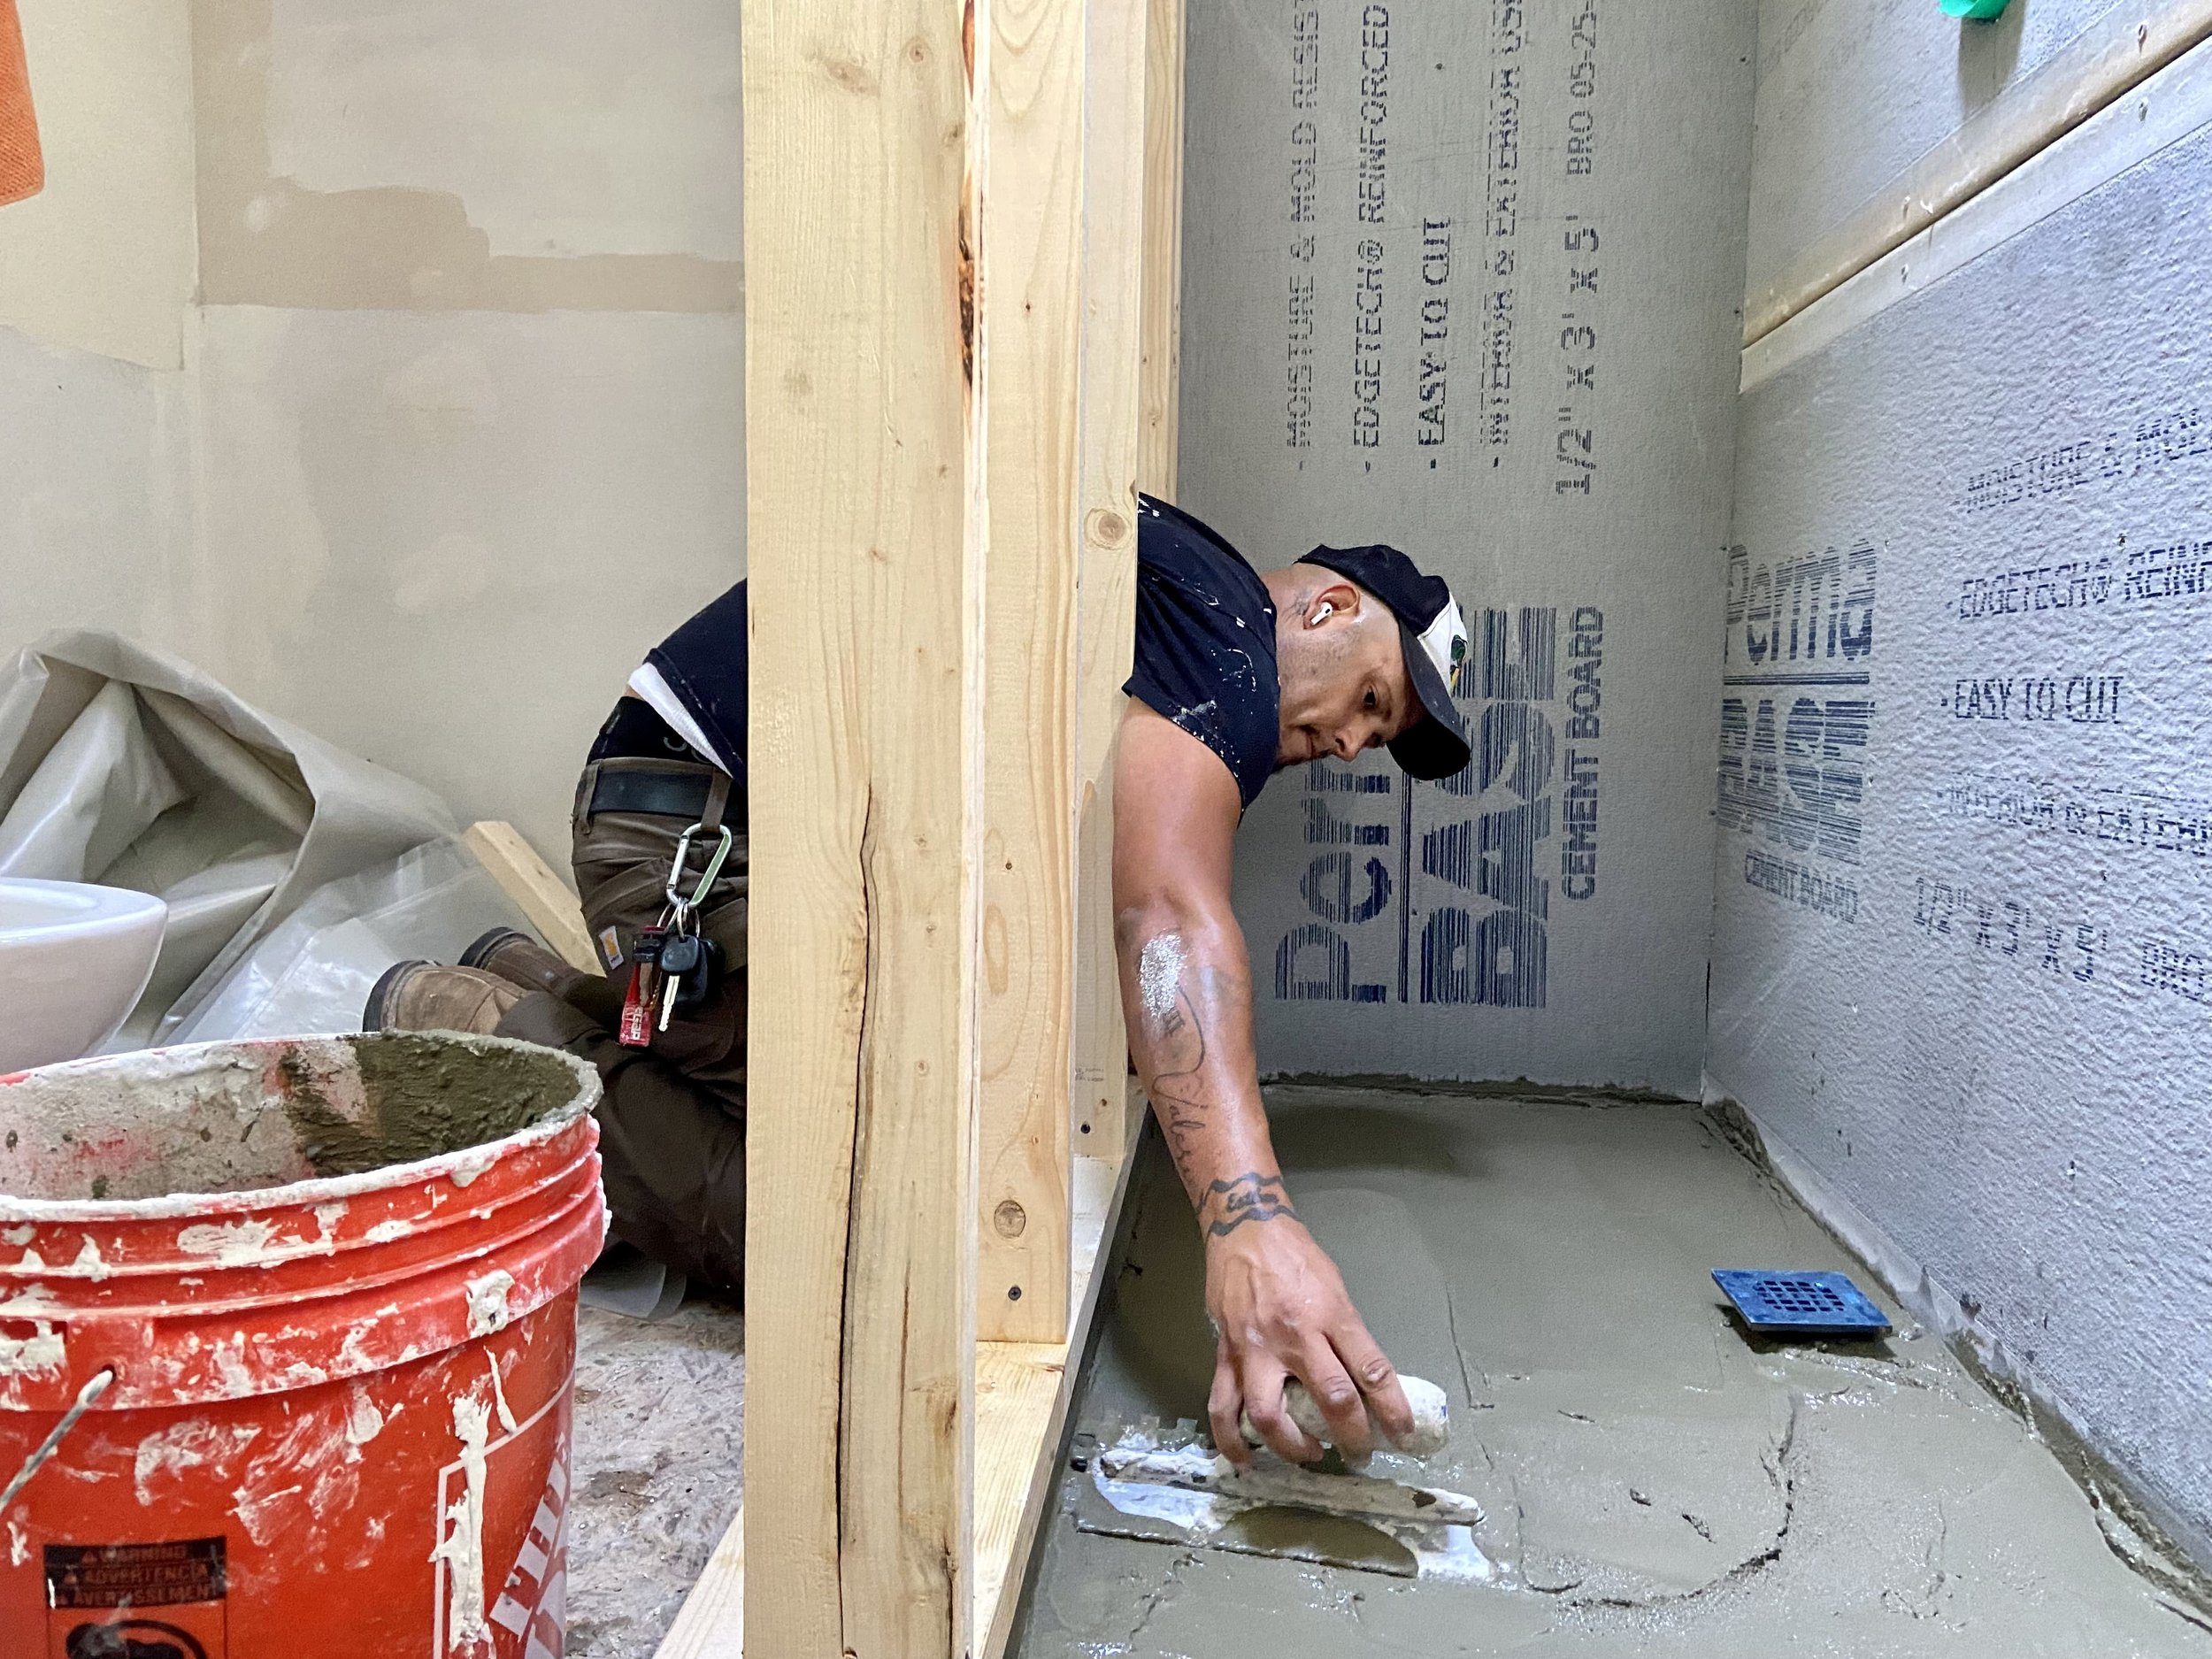
Tiling the shower starts with laying down a piece of PVC waterproof barrier, called a pan liner. Then, cement is laid and manually graded so that water flows towards the drain. I saw Erick and his guy Angel use the leveler 5,000 times just to make sure that the angles are right all over. I have major respect for these guys.

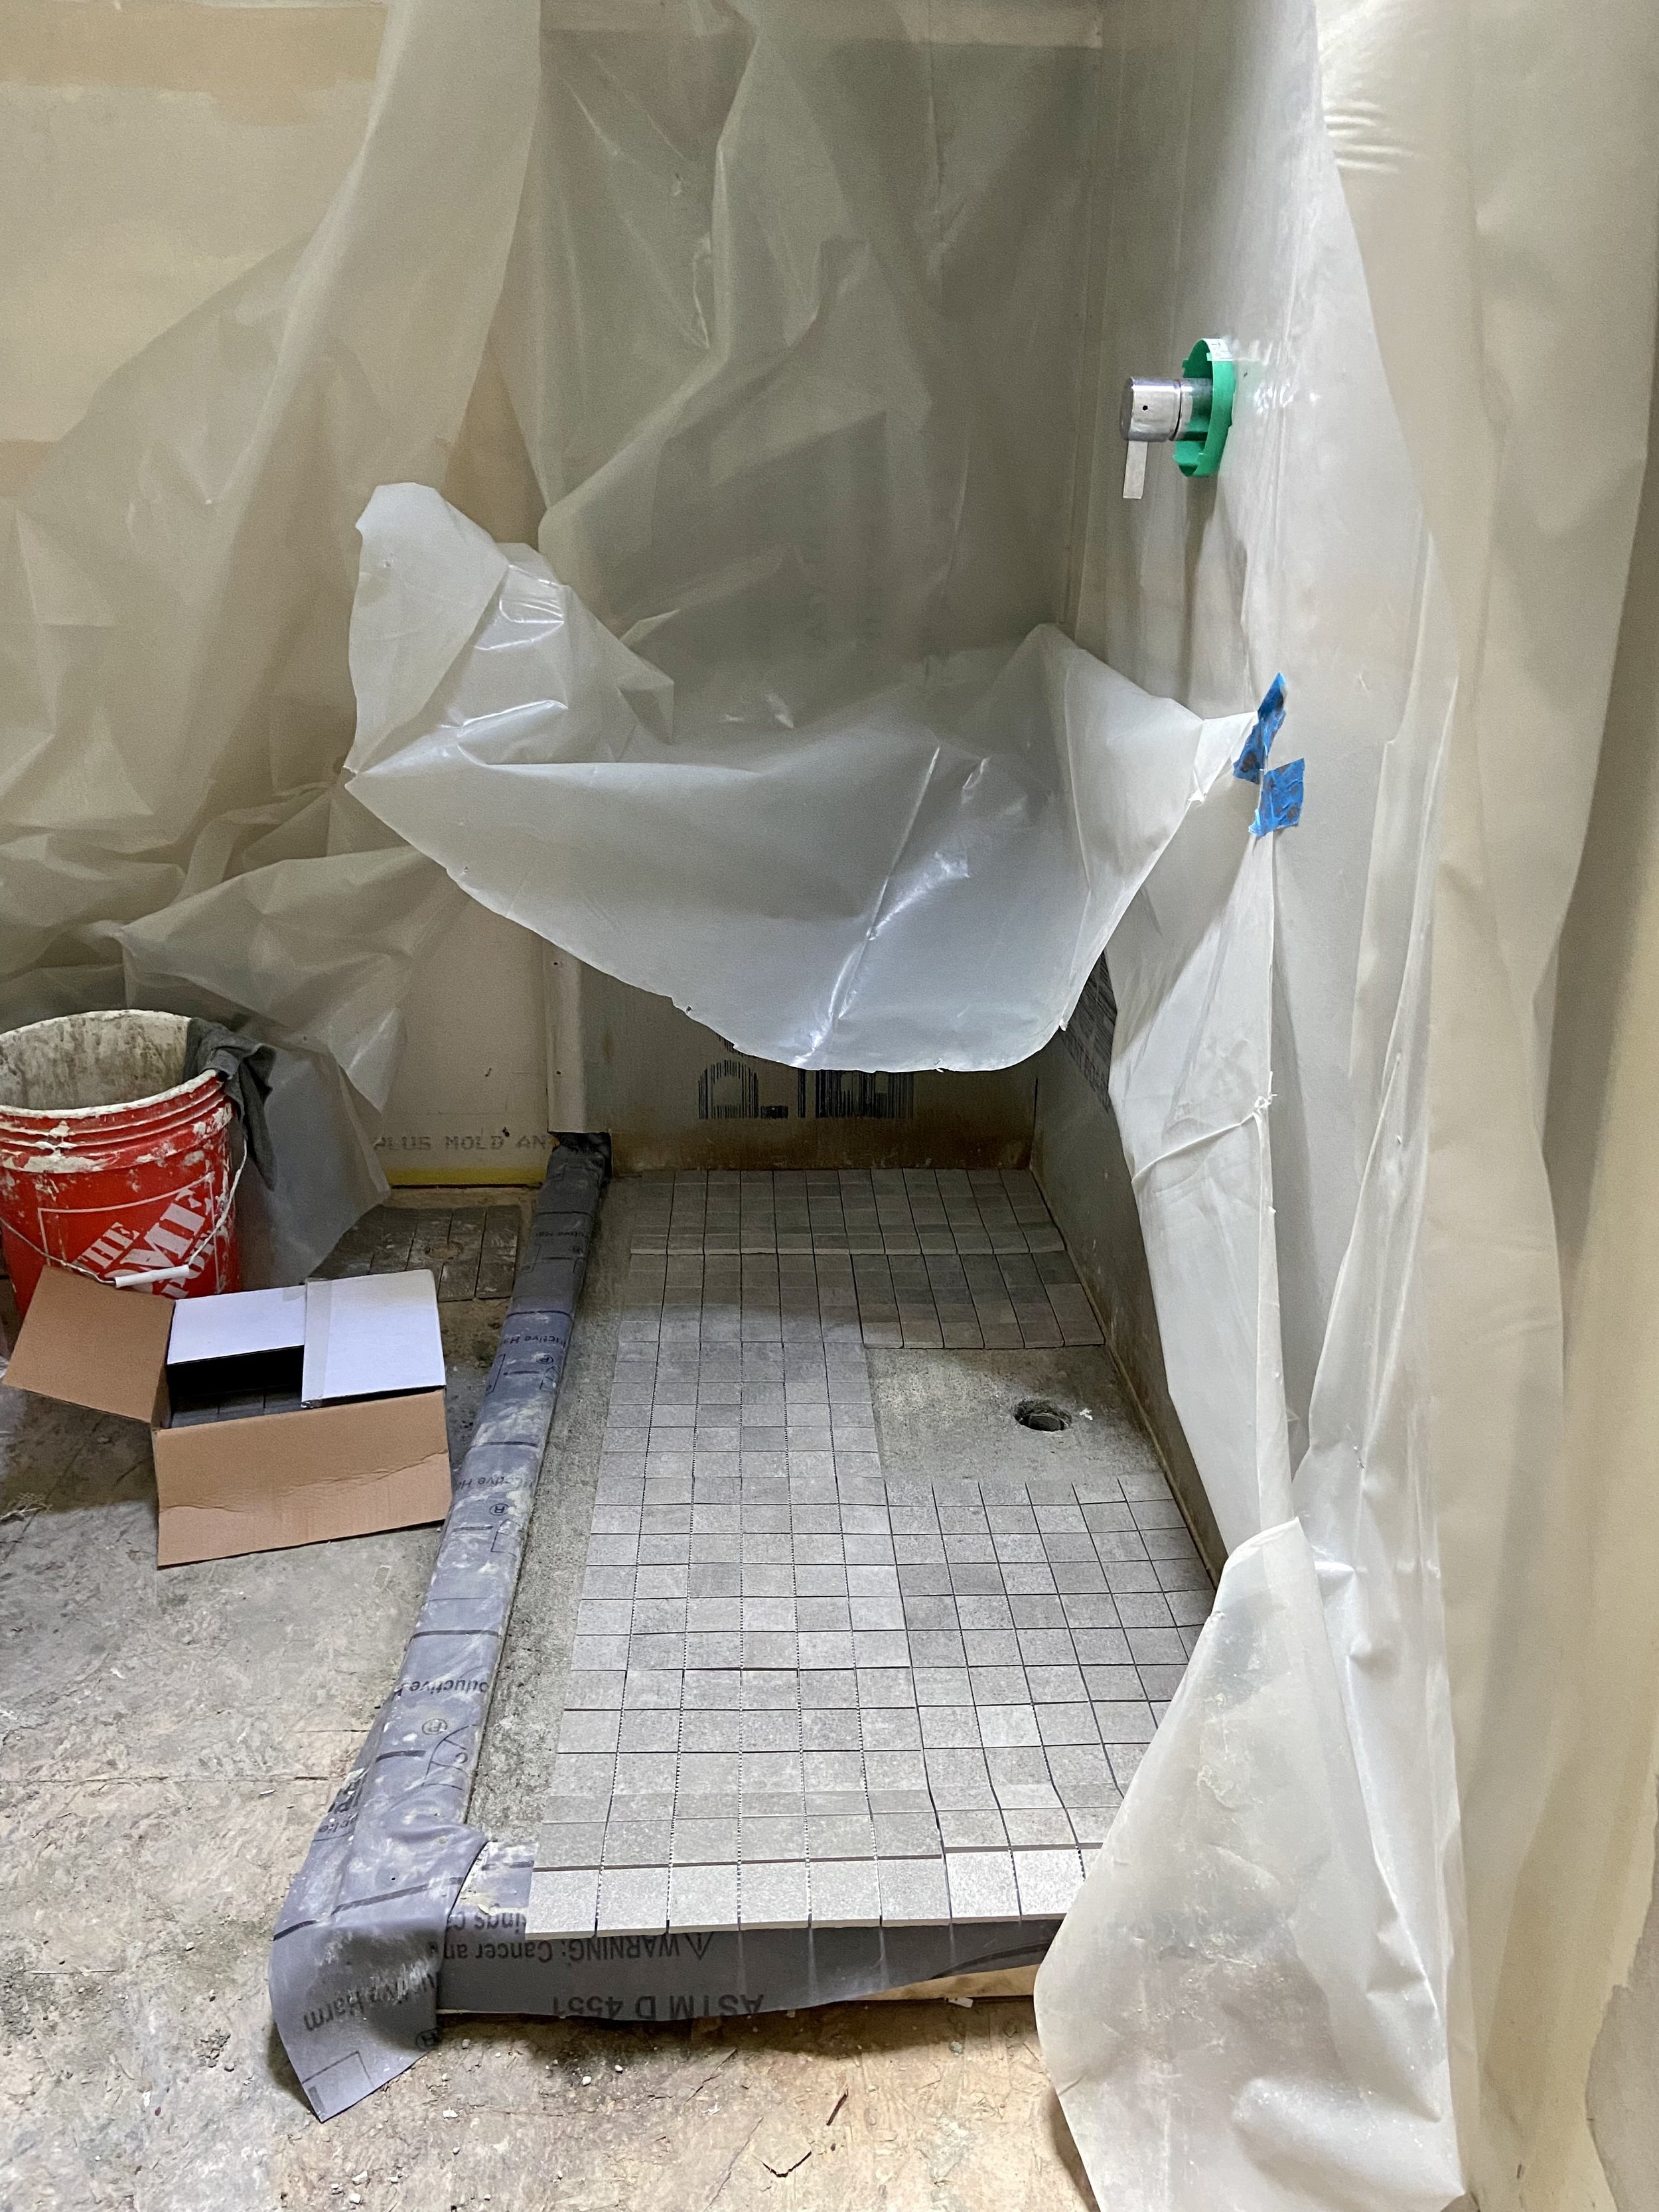
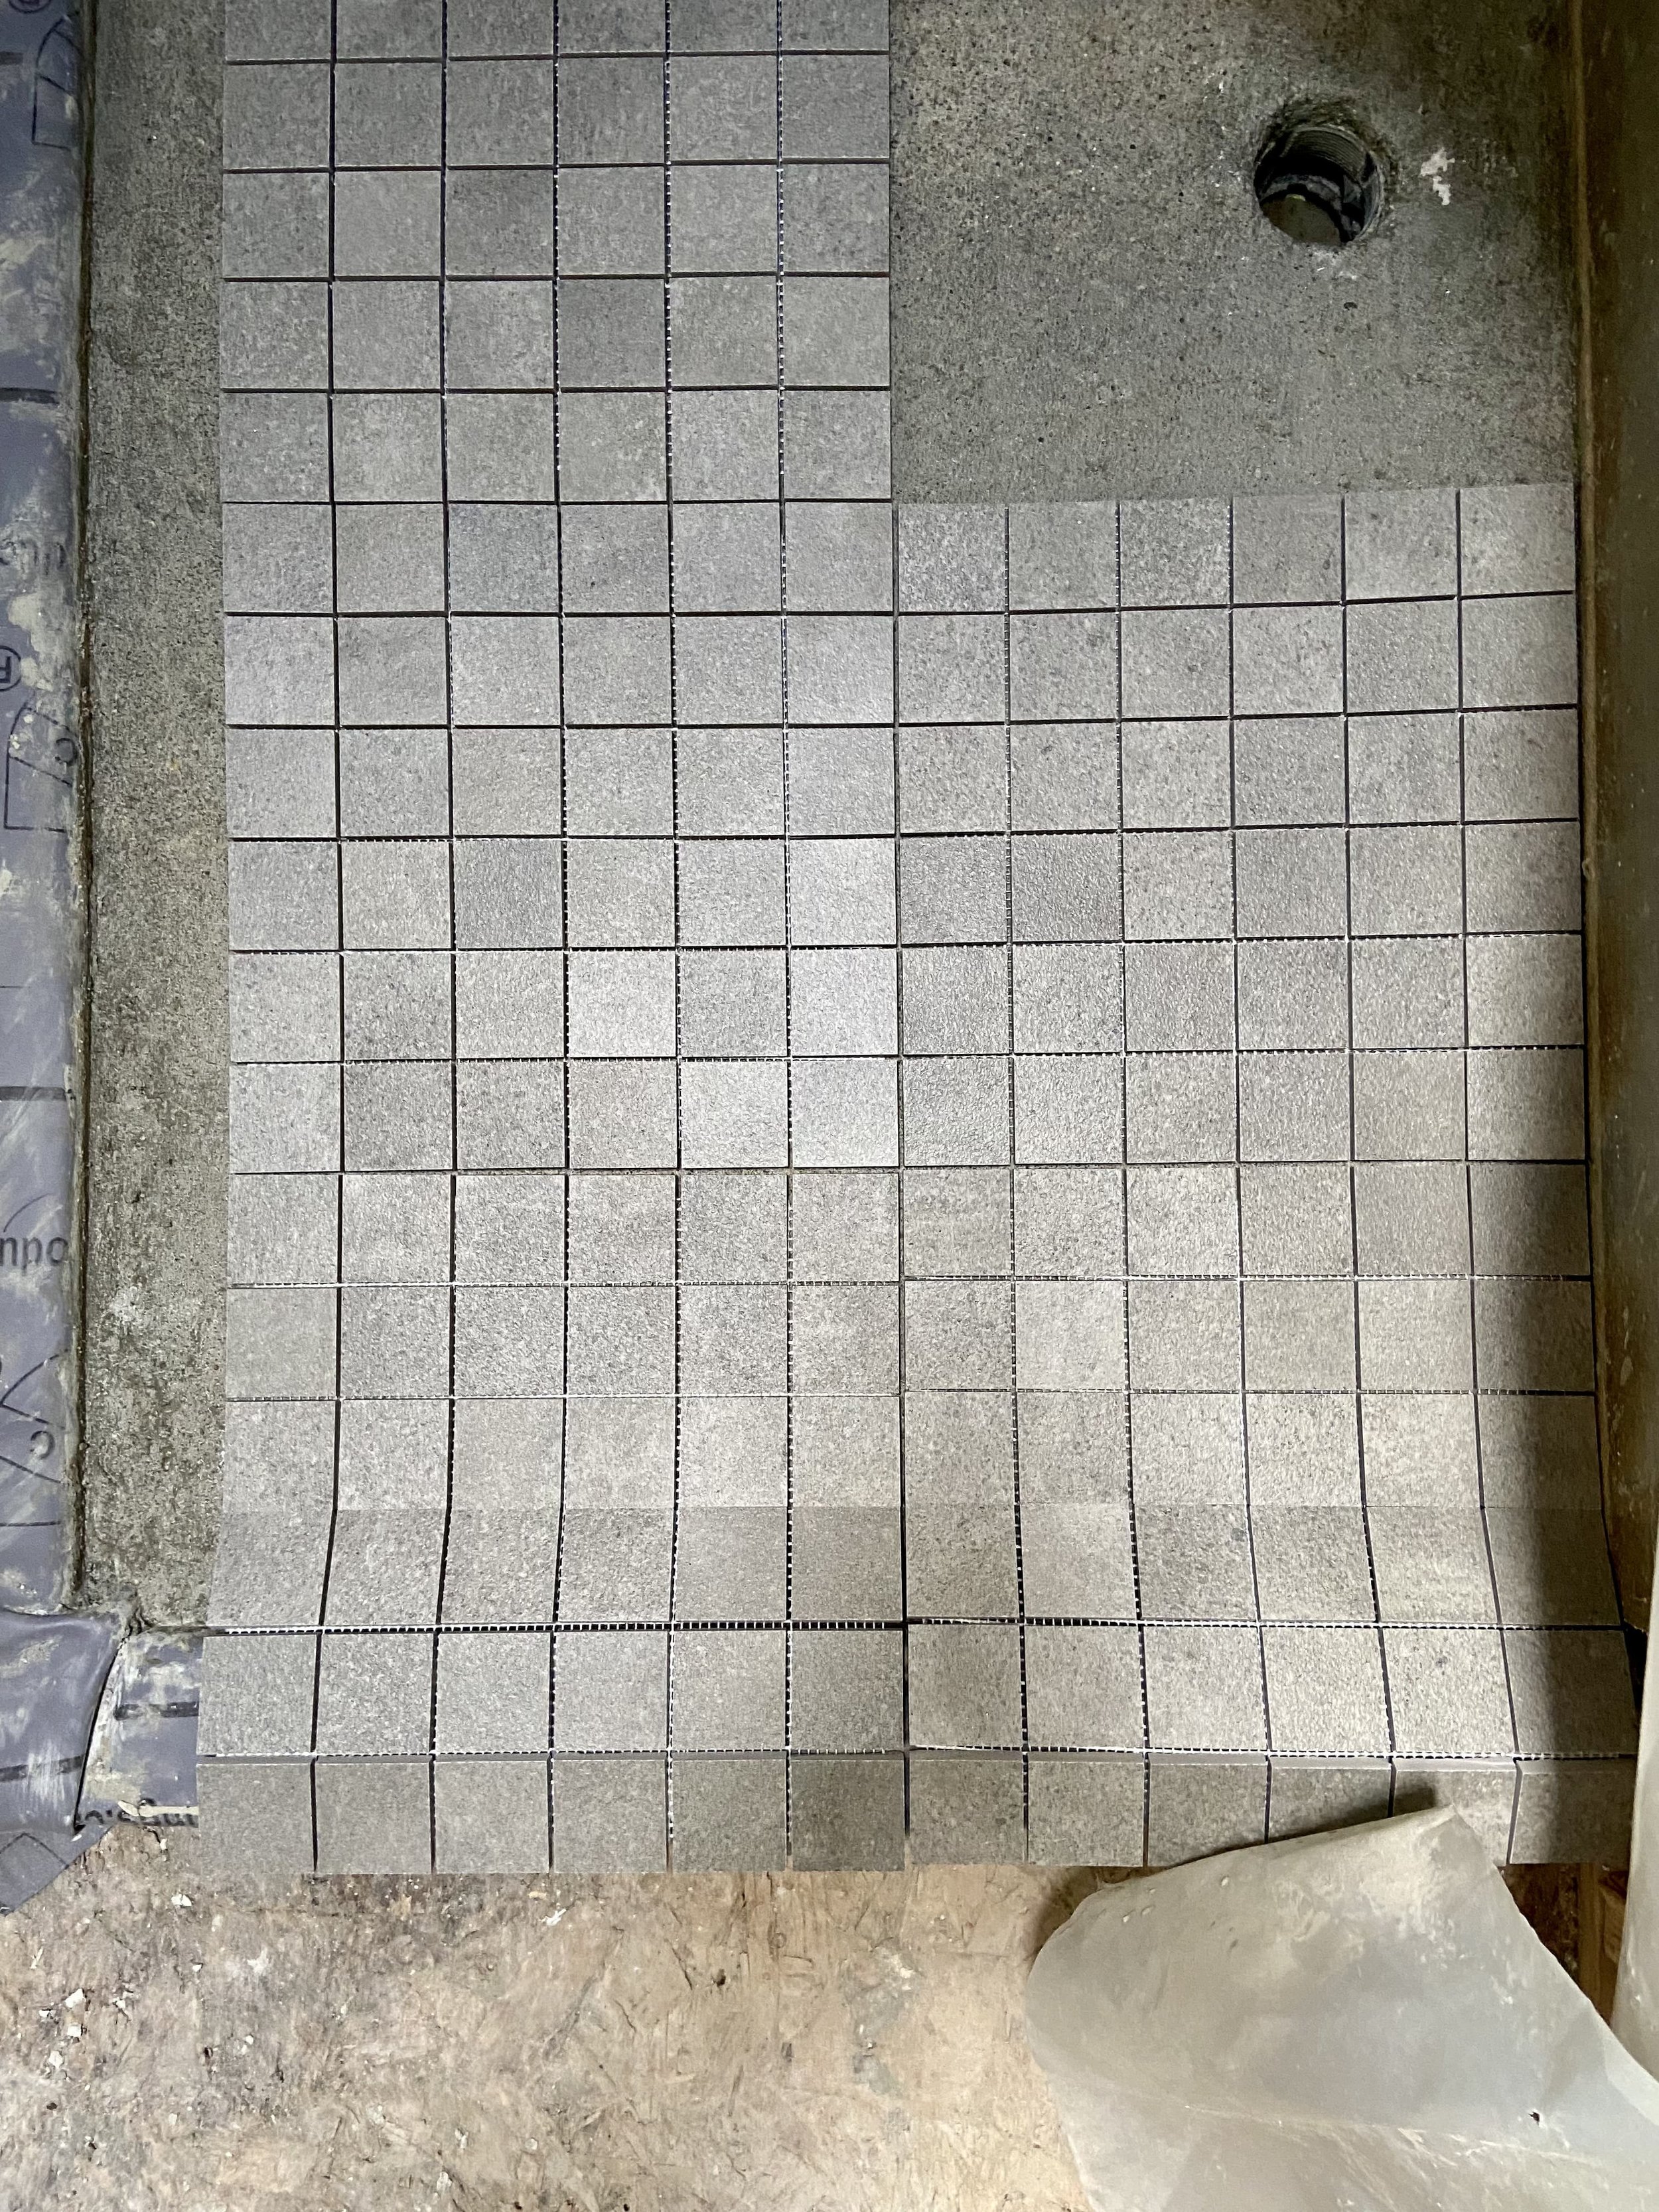
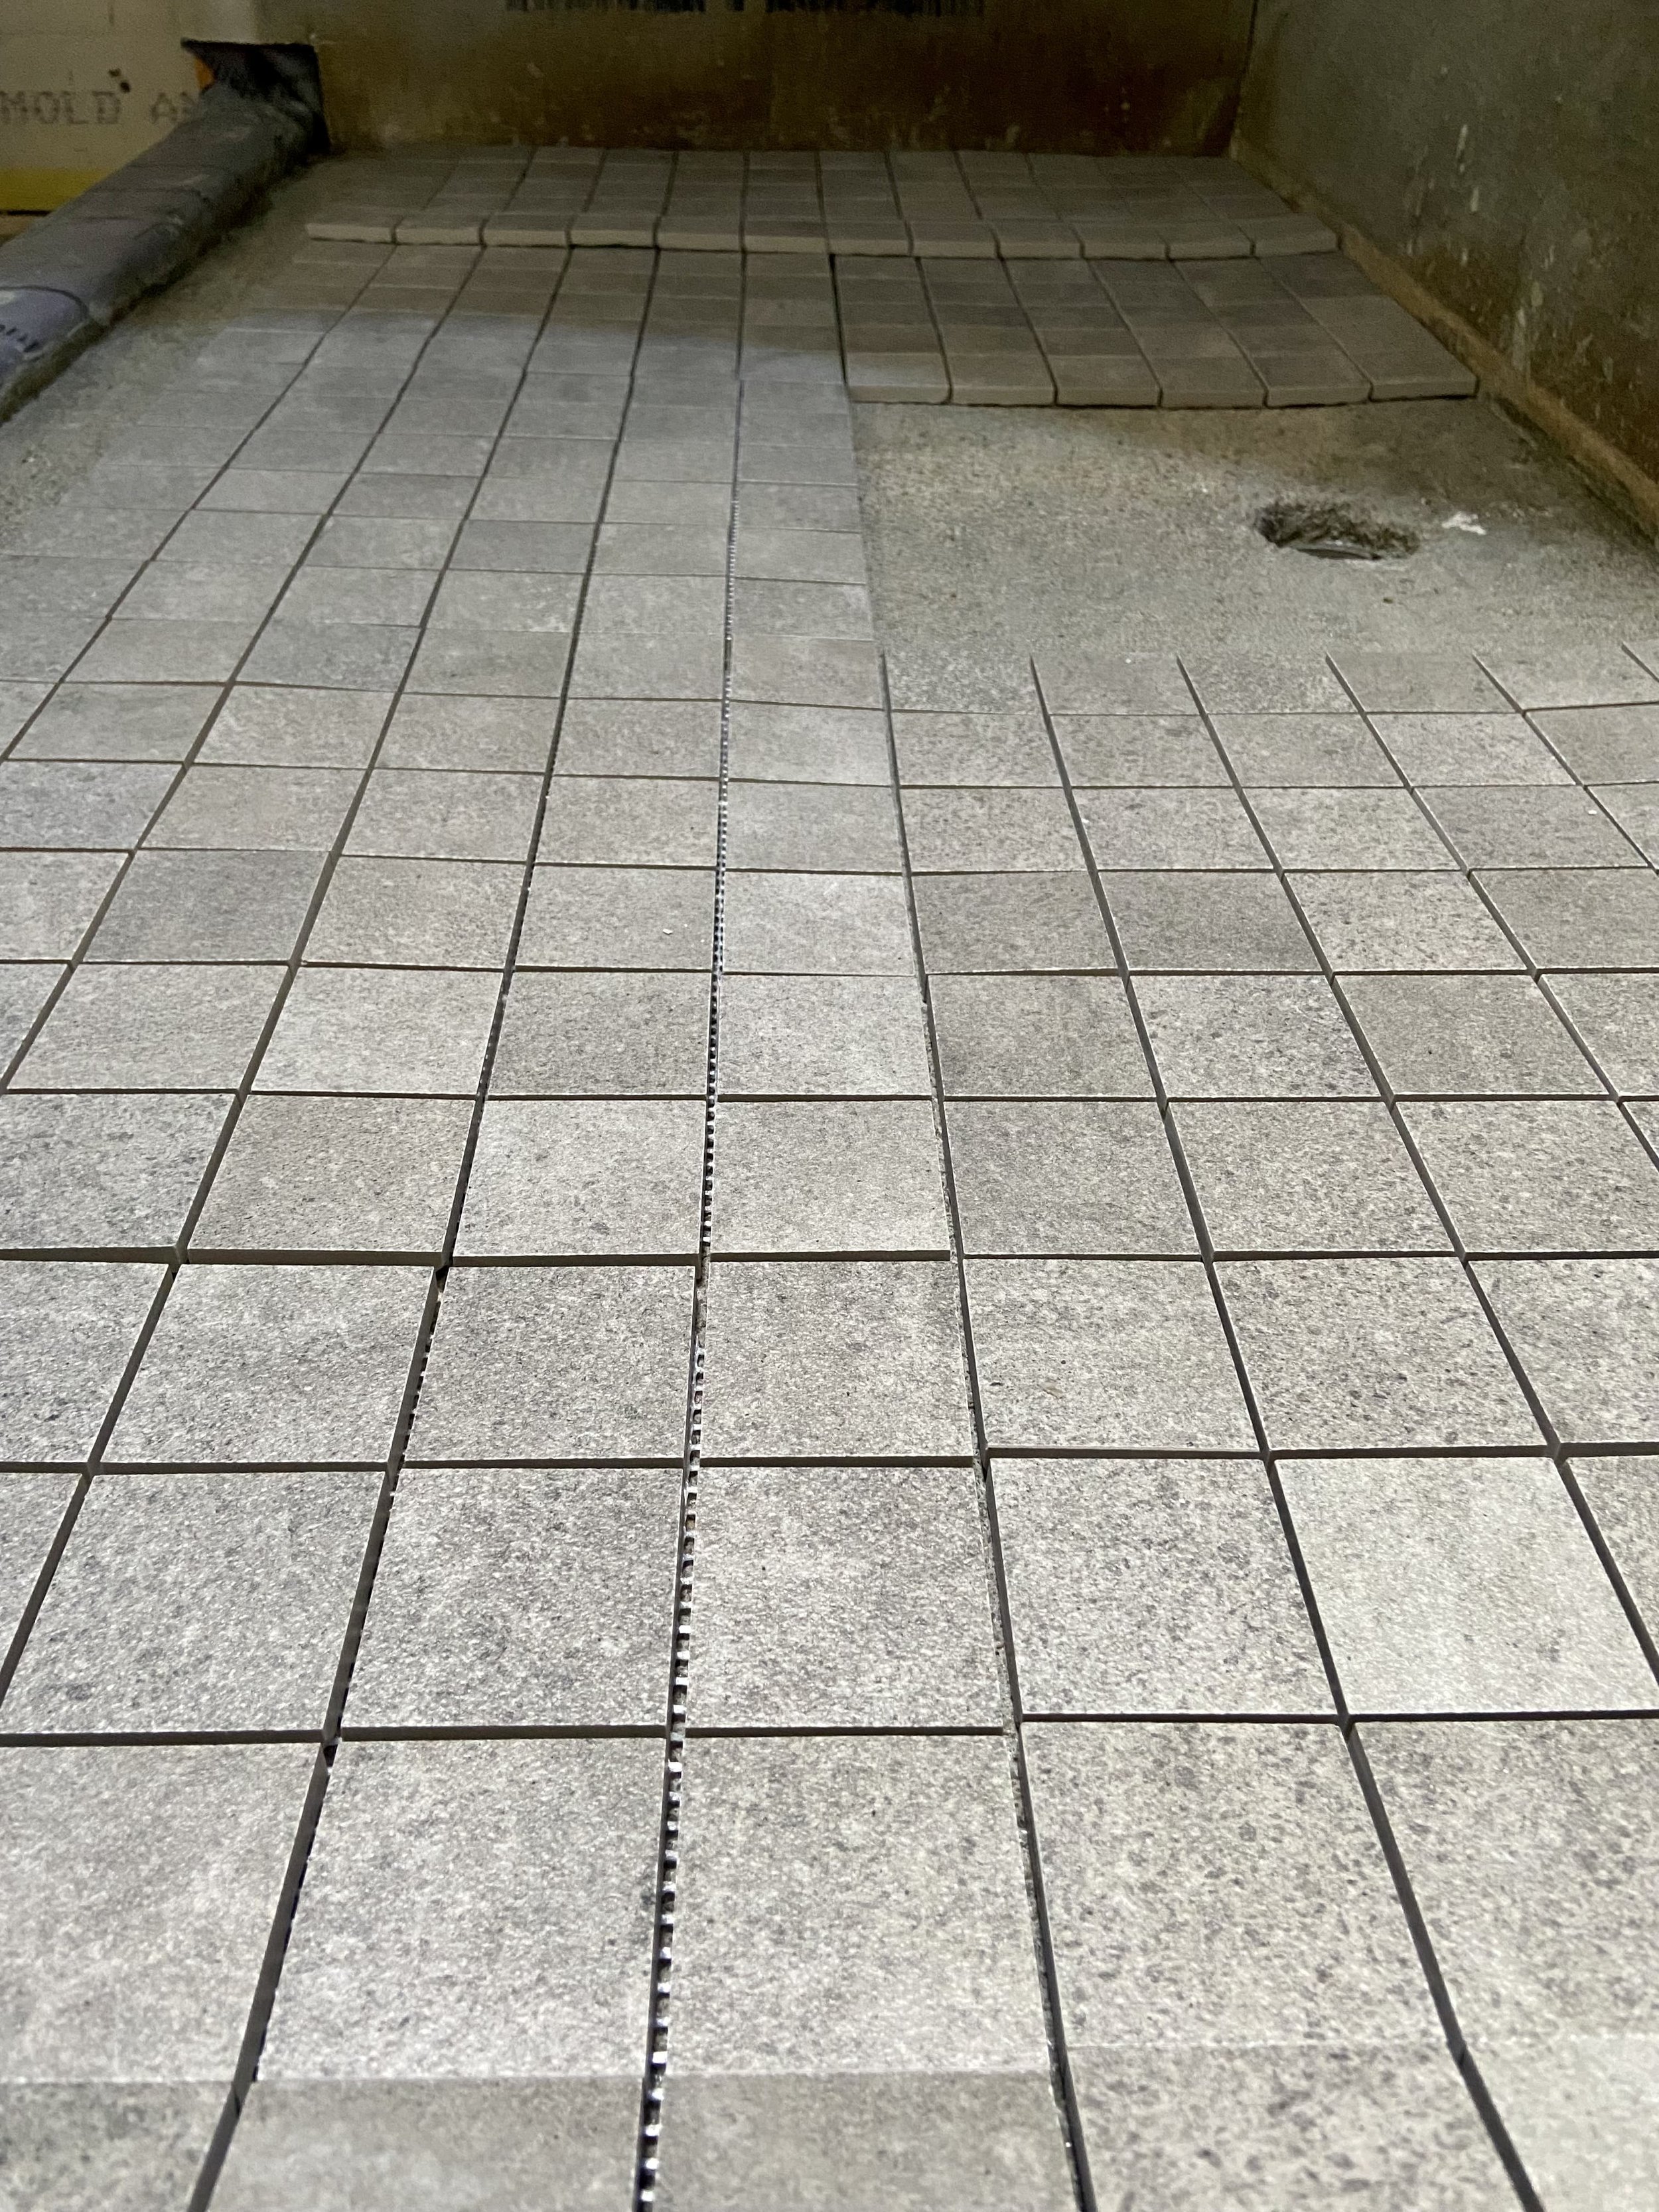
Tiles for the shower floor have to be in smaller cuts because they follow the grade of the floor towards the drain. These tiles can be bought pre-cut and affixed to a flexible mesh so your tiler has an easier time.
I mean, you could technically demand that your tiler cut fresh tiles, but you’ll probably go to hell for that.
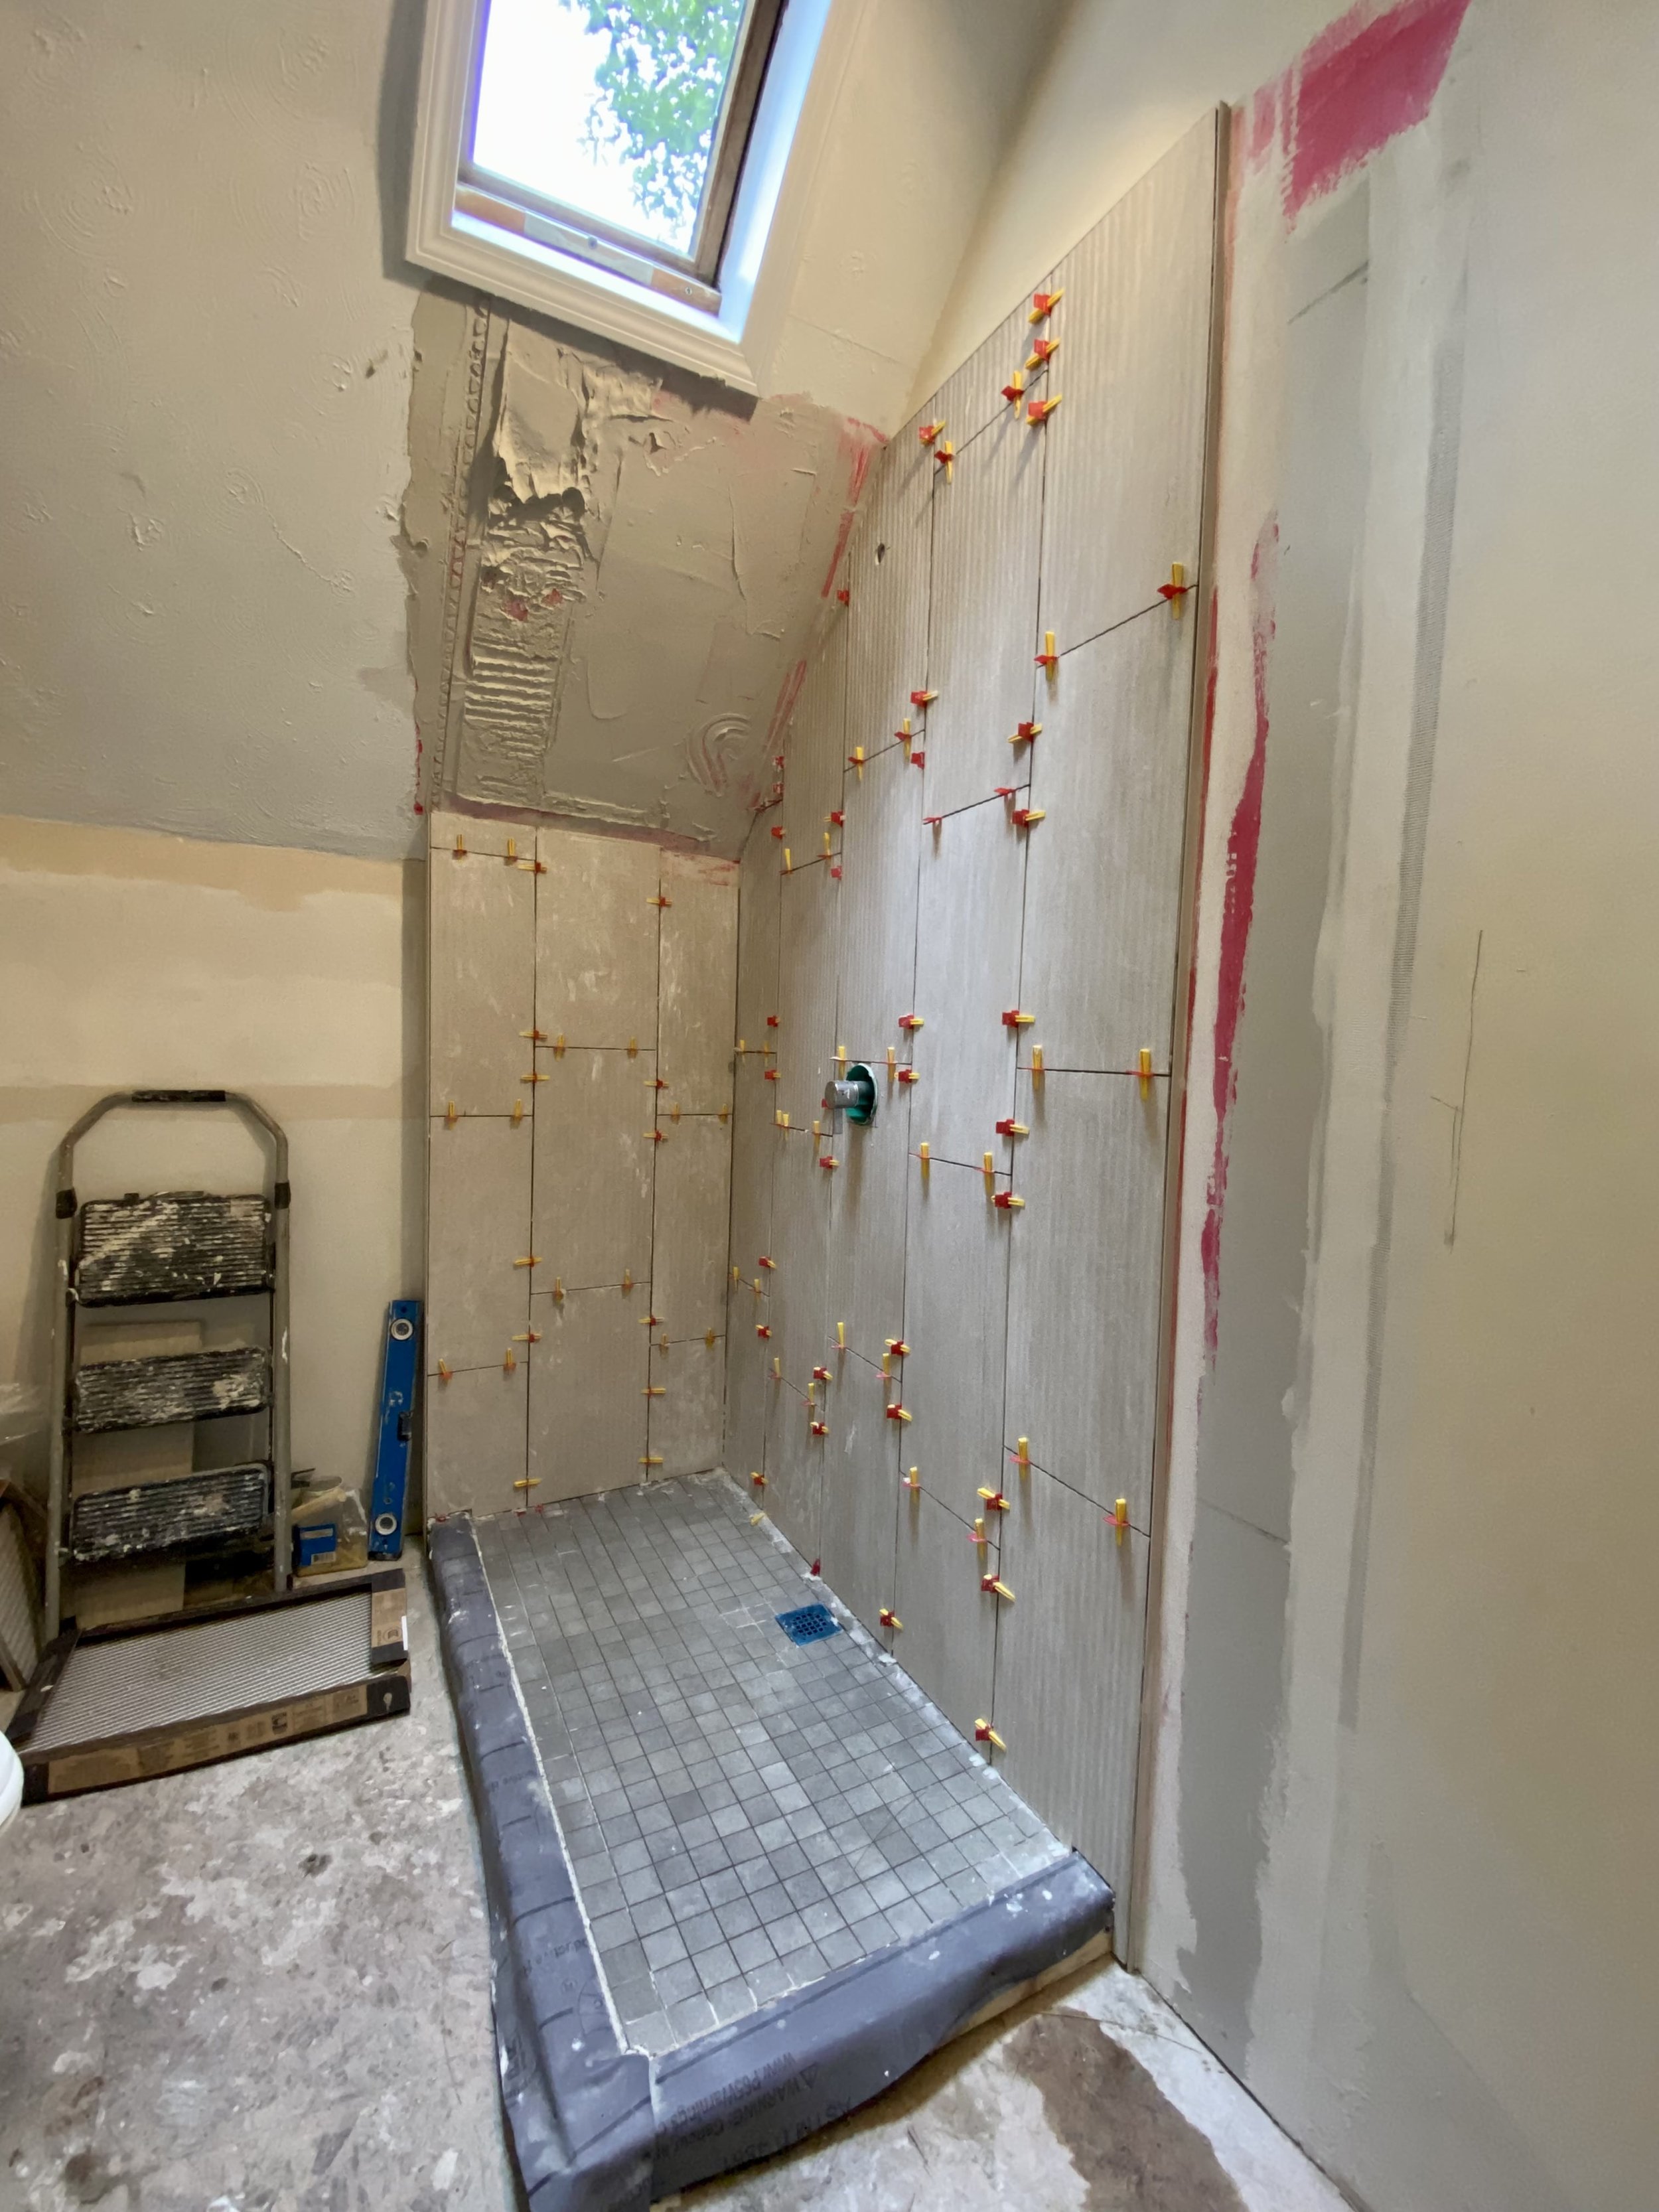
Tiles on the wall have RedGard, which is a waterproofing and crack prevention membrane.
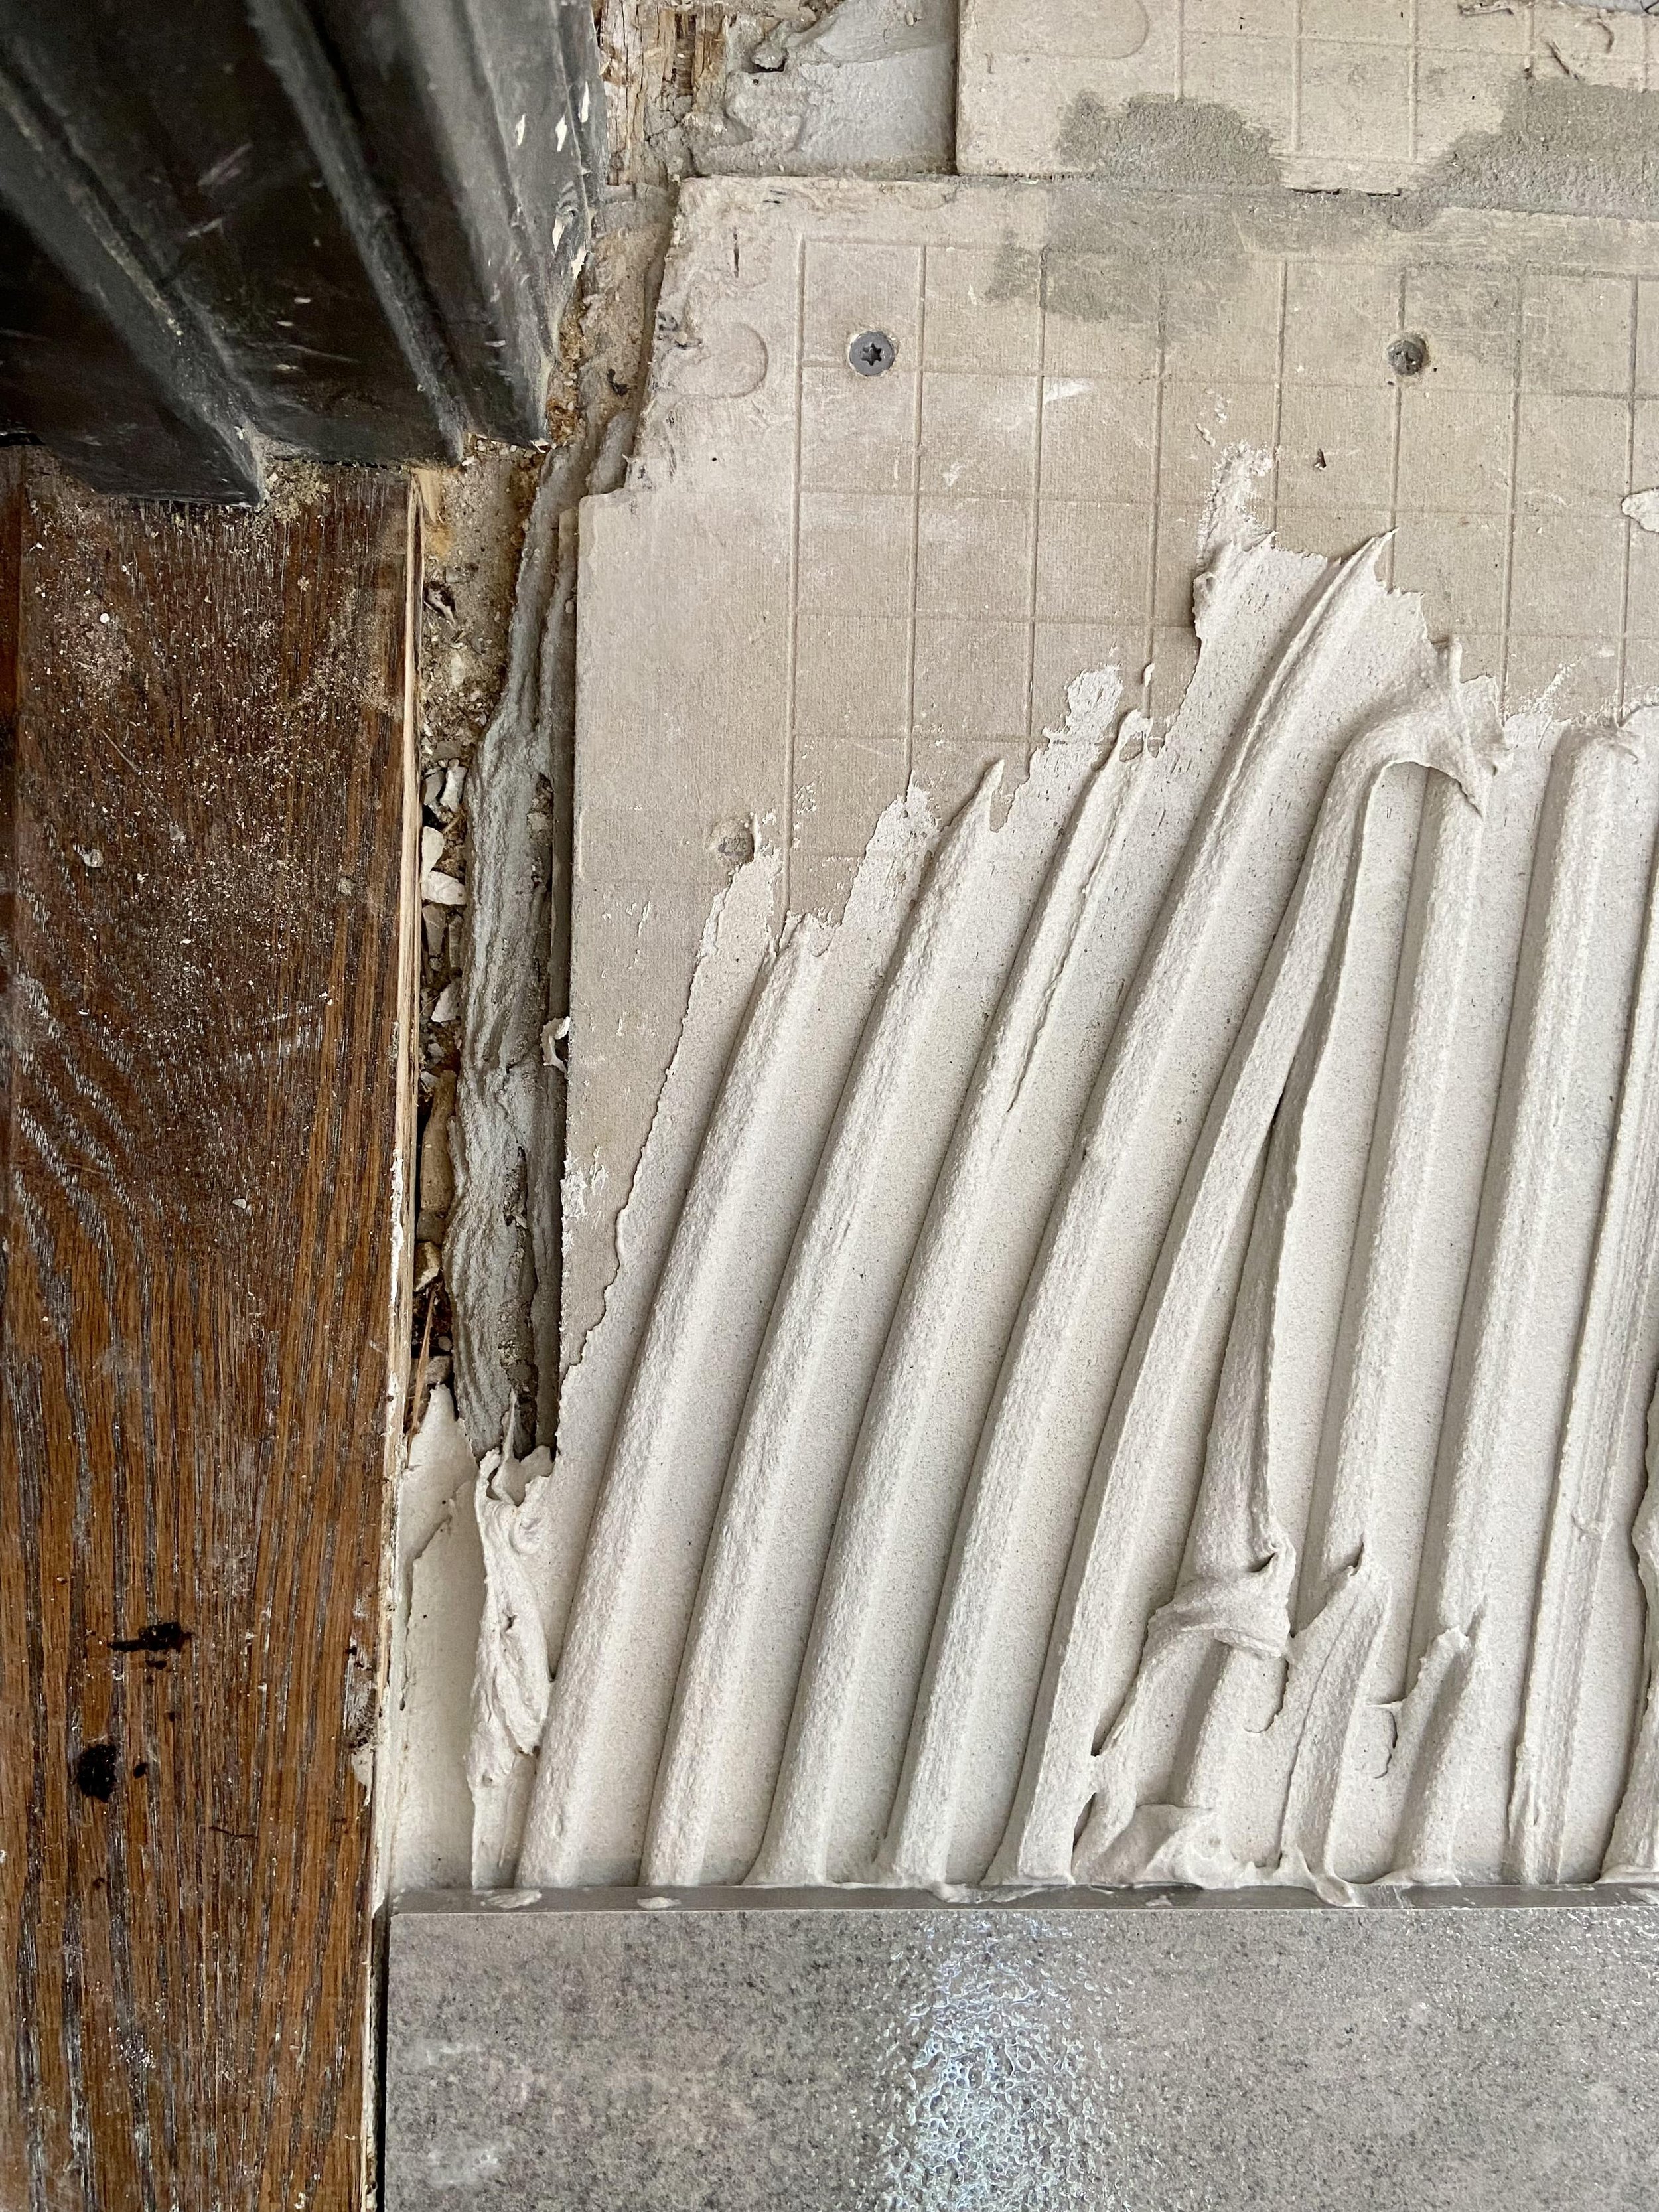
After that comes the thin-set mortar which has to be mixed to a consistent texture and evenly applied, but oh hey, you have to be quick and not let it dry out or your tile will not stick properly.
I feel so indignant for my guys. Also, microcement sounds like it would be easier, no?

Note the laser line- can’t get any more precise and meticulous than that. Then there’s the little red tabs and yellow clips to make sure that the tiles are evenly spaced and held down so that the surface lines up and is even.
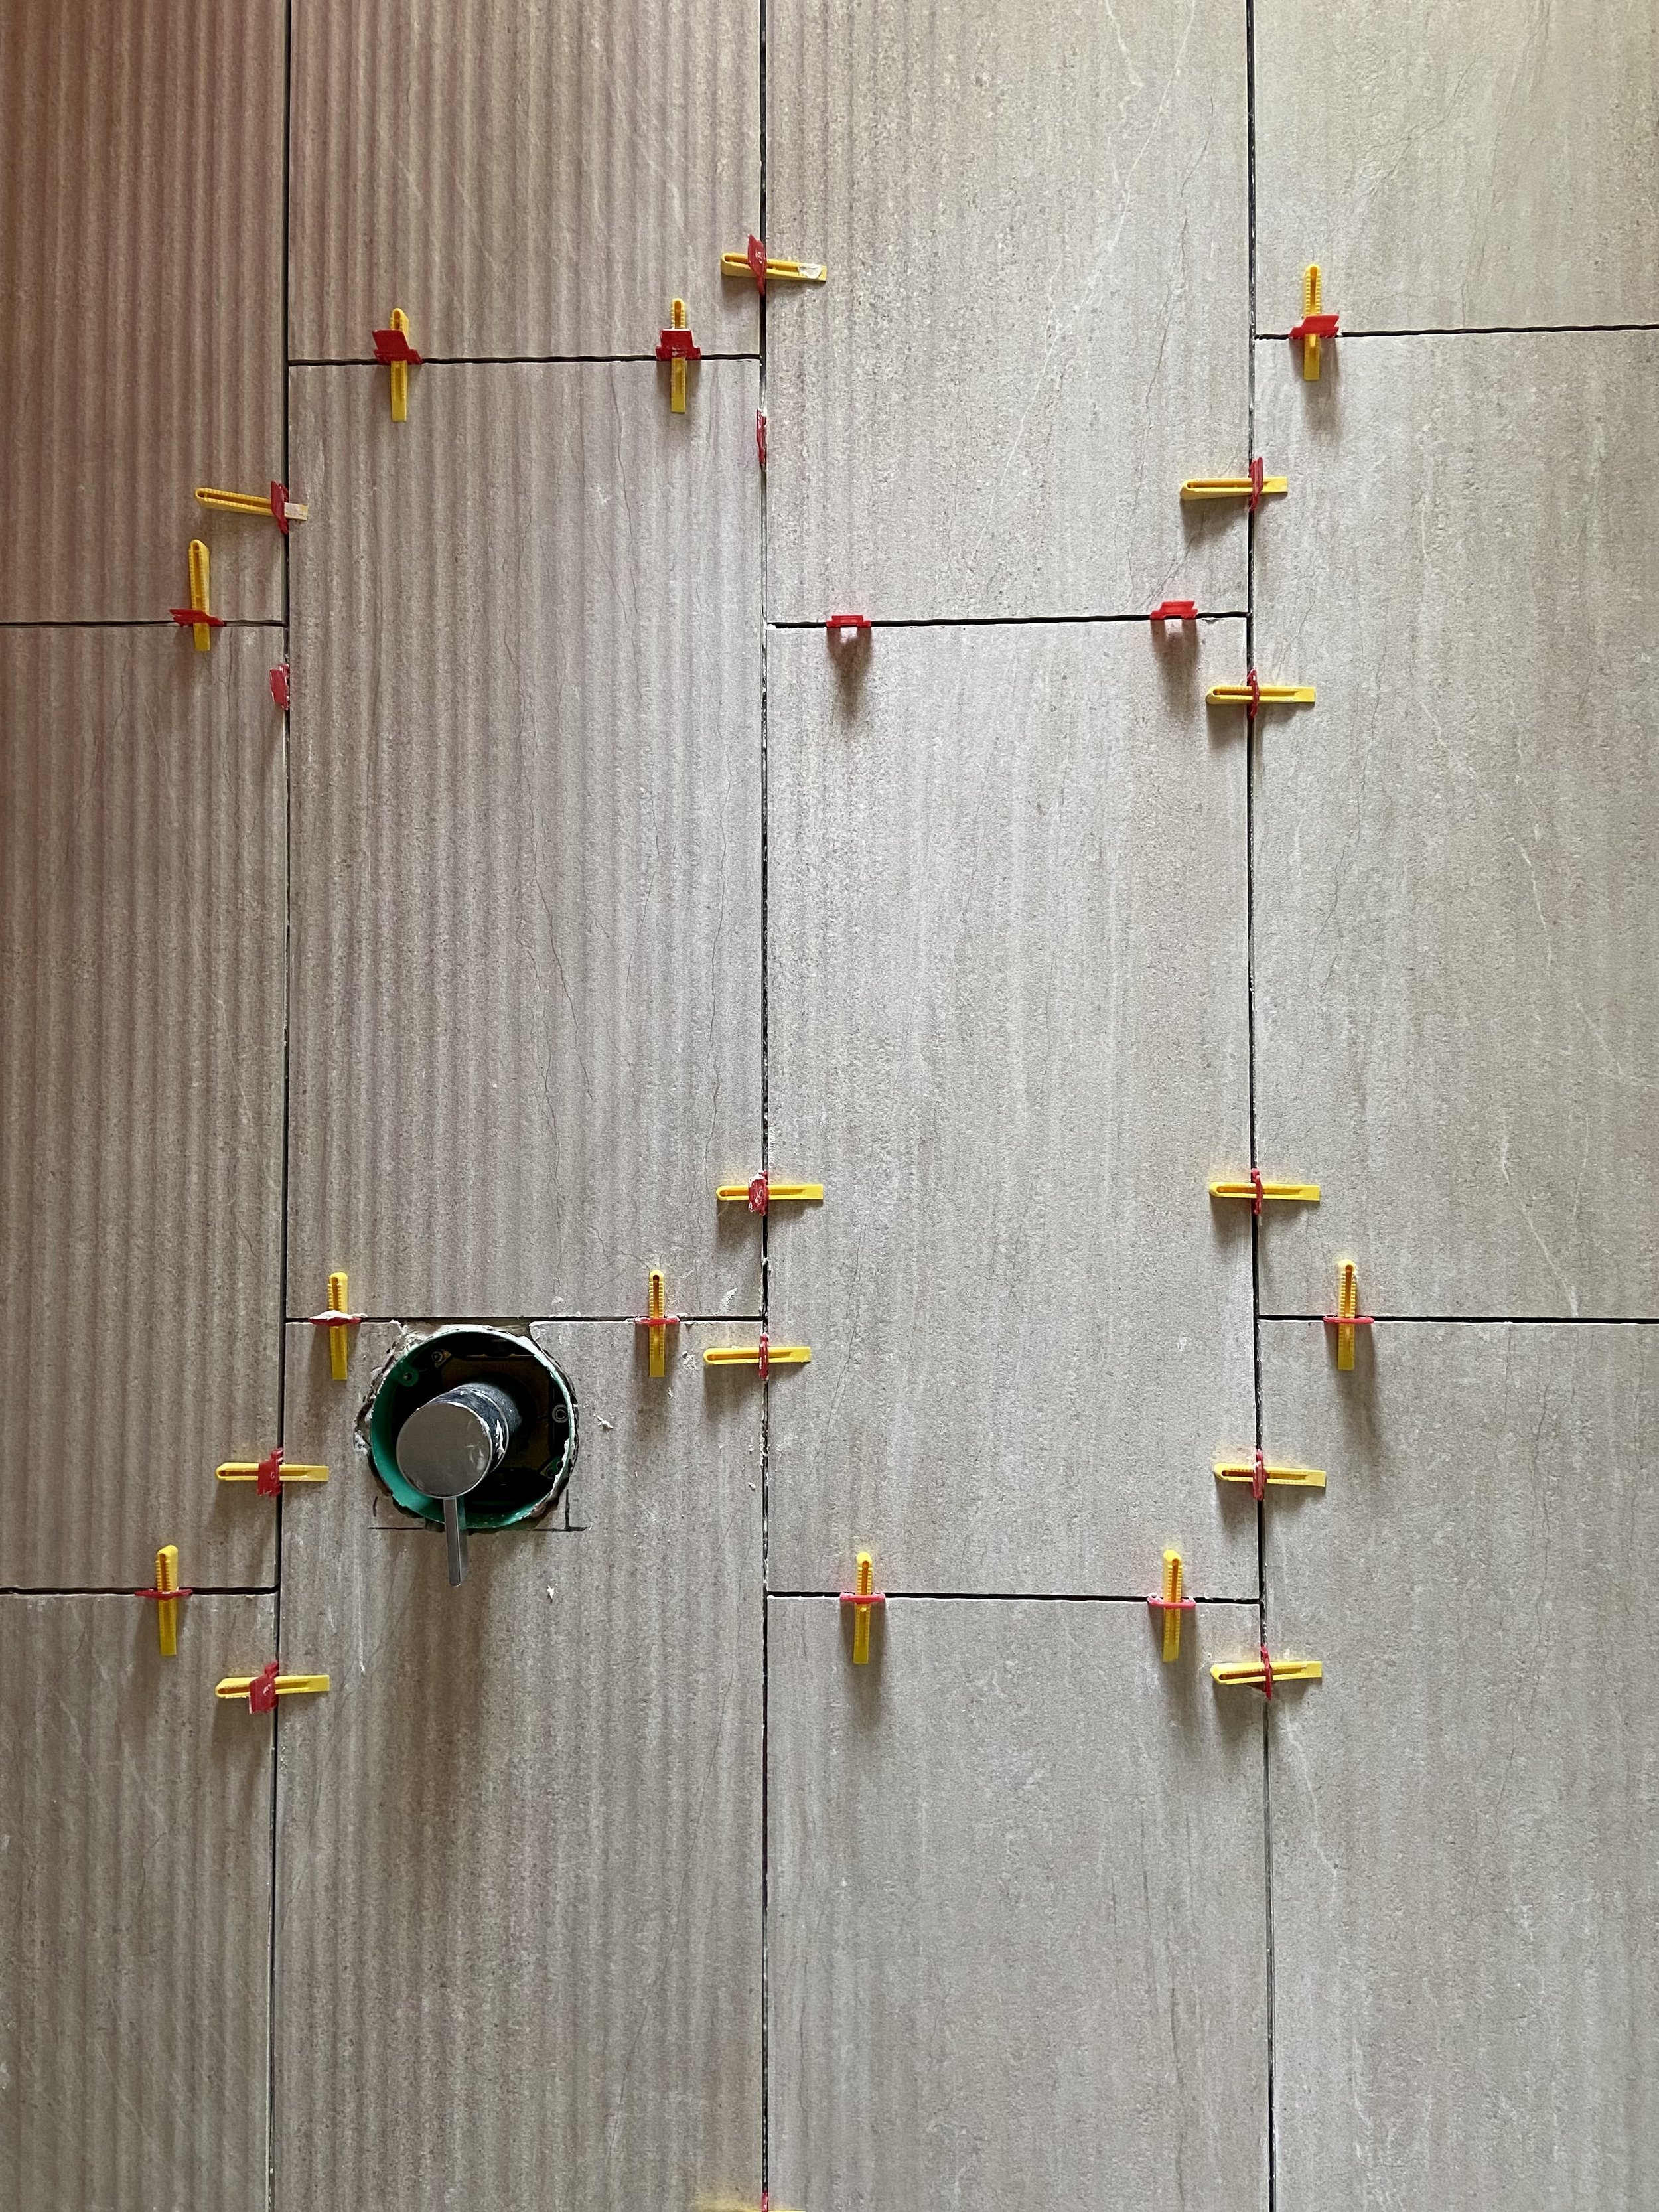
When you have tiles that come with vertical grooves, the outcome is binary - it’s either perfect, or it’s not.
Again, thank heavens for Erick and Angel! 🙌
And of course, as is expected with construction projects, brace yourself for unexpected events and costs. Happened to us - the sloped ceiling of our bathroom was sagged and had a curve because it was previously untiled and water got to it. Erick could not continue tiling because the tile would be at a tangent.
We held our breaths for news of water damage to the beams but thankfully had none of that. Once Erick swapped out the wall we were good to go. It did however set us back many more days because now we had older walls with existing swirly patterns and a new wall which was flat.
Could we live with mostly swirly ceilings and a portion that is flat?
Nope.
We had Erick sand the entire ceiling. Took a few days, because he had to sand, skim coat, and re-prep the surfaces.


In the meantime, our large format floor tiles got laid, but that wasn’t an easy task. Because they were so large, a single person could not maneuver it alone for cuts. It needed 2 men- one to hold the tile to keep it leveled while the other to guide it along the machine for cuts.
Remember what I said about tile planning? My 1930s house is not level, so there were parts of the floor that needed 2 cement boards as base instead of one to level it out. What you see in the second image below is where my bathroom entry threshold is - Erick and Angel cut it so that the tile would be perfectly flushed against it.
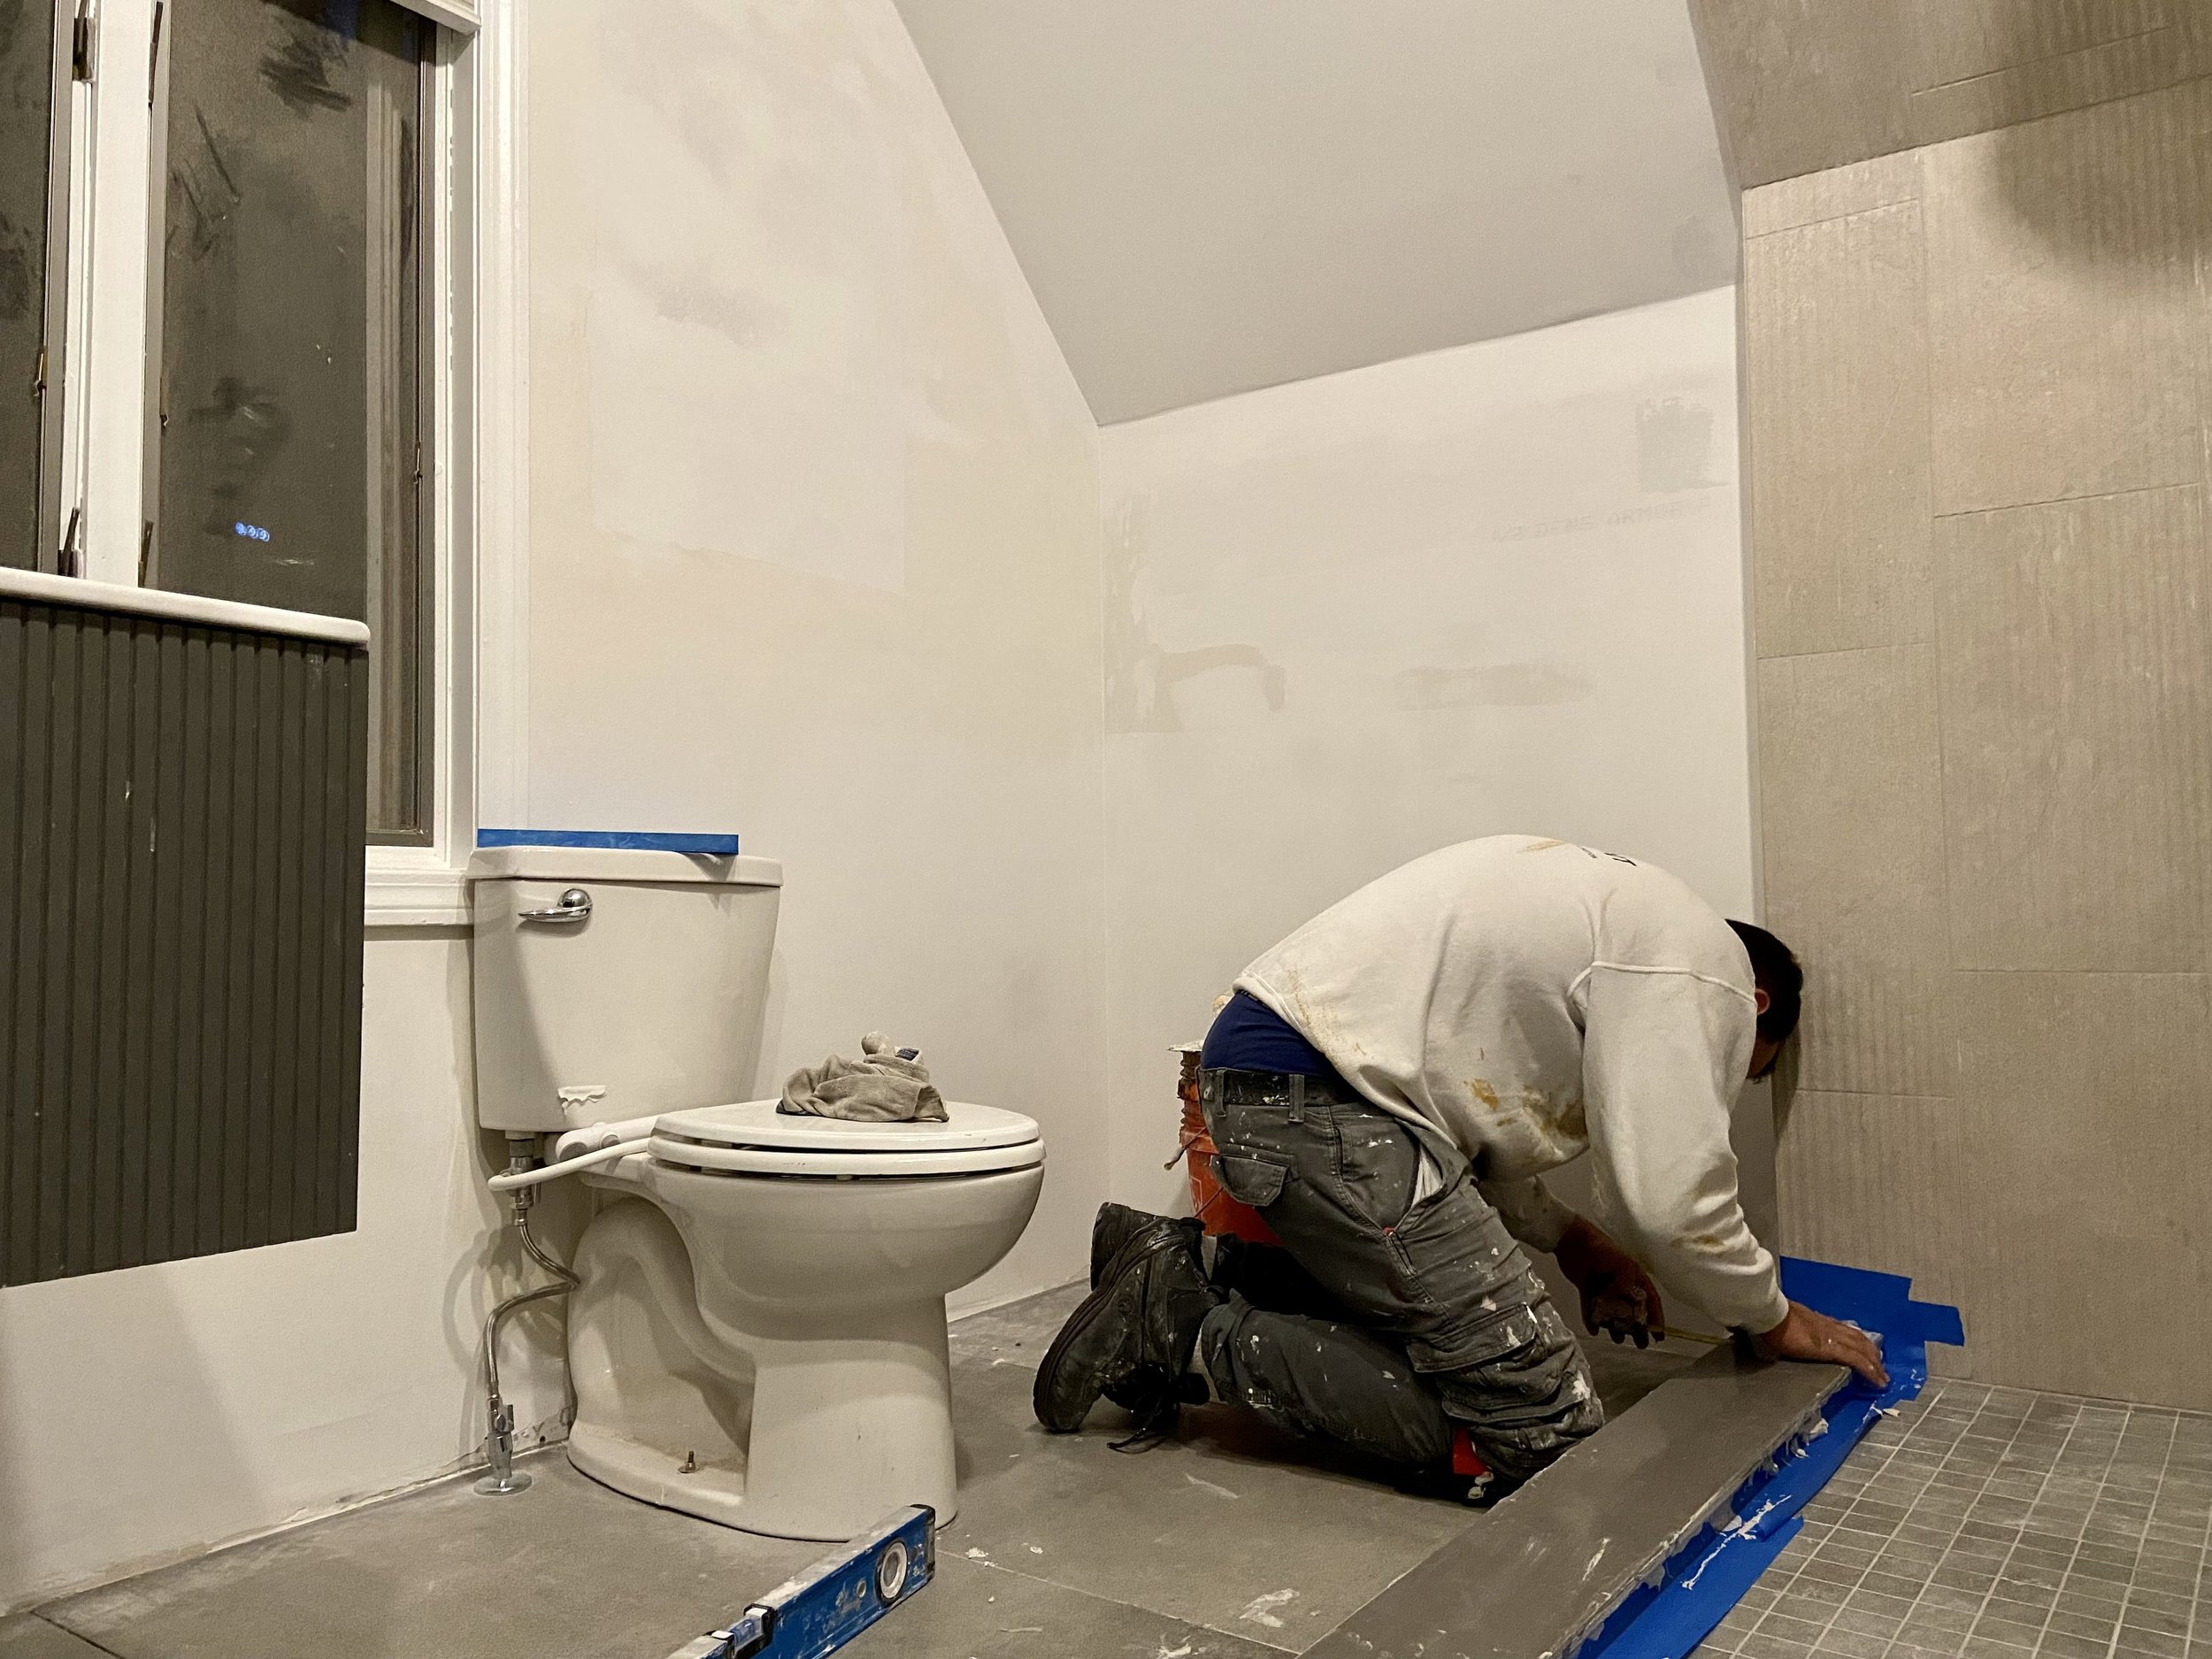
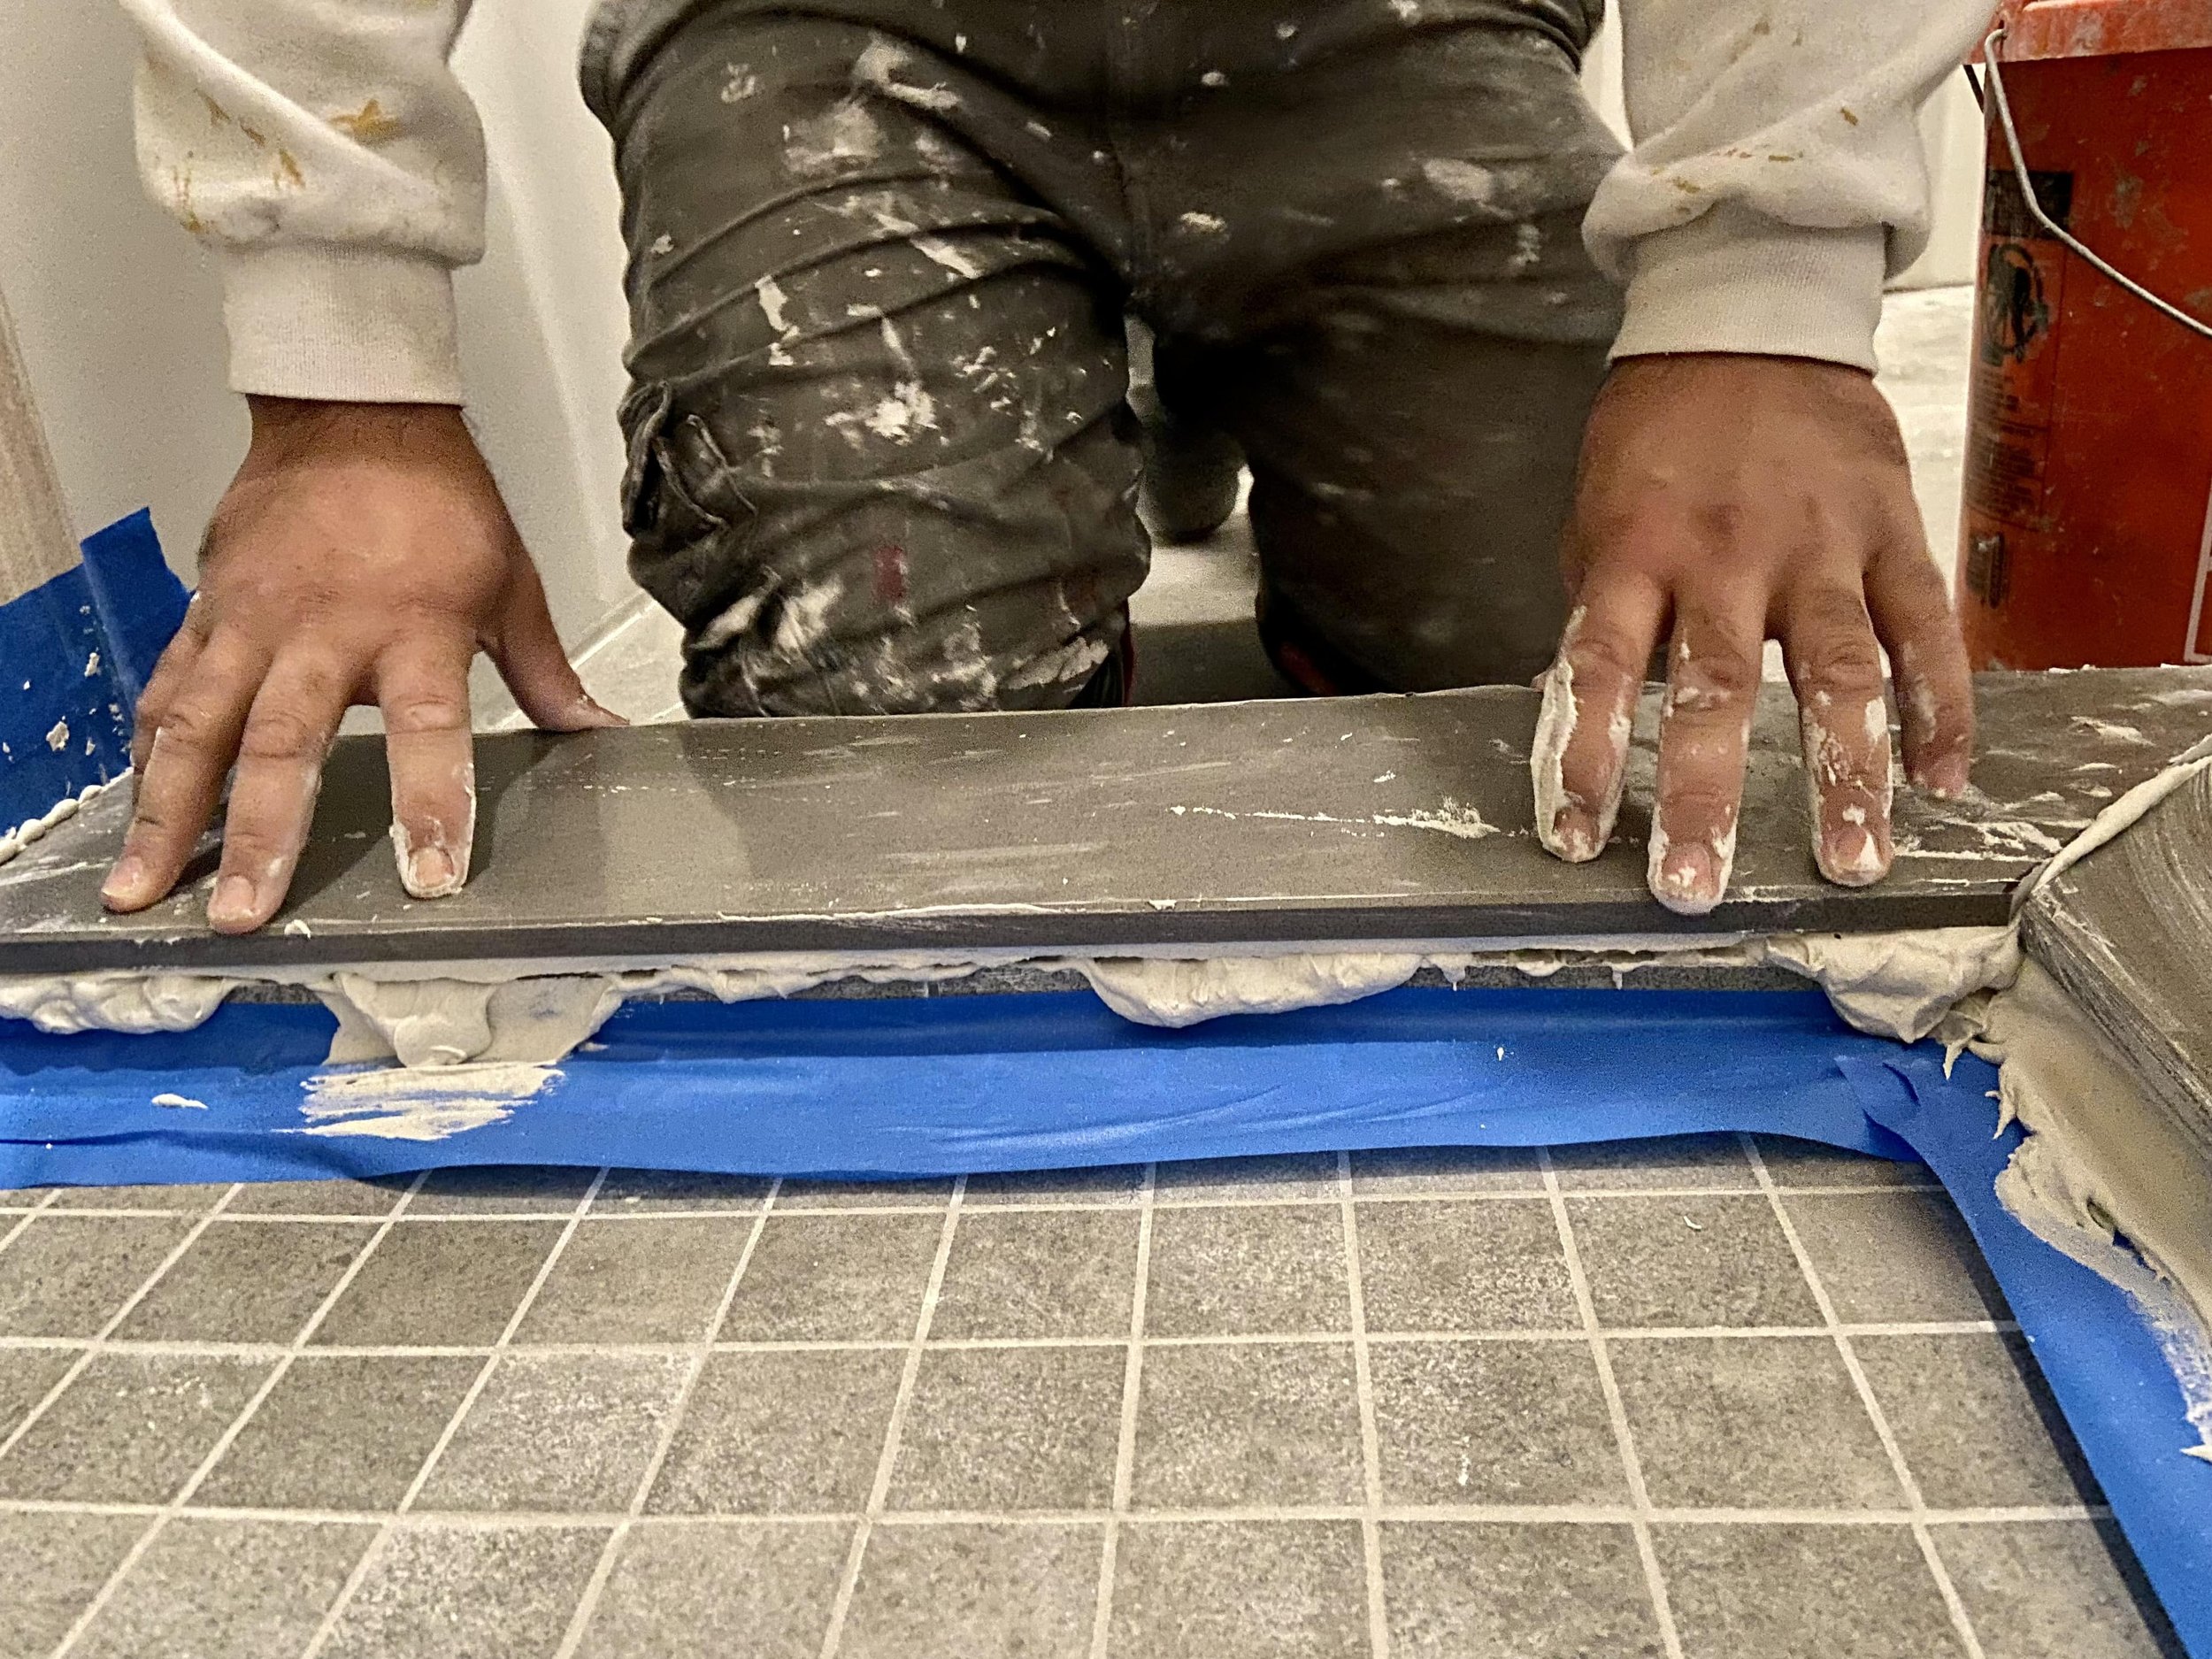
Then came the quartz threshold for the shower enclosure.
That’s Angel in the photo below… he knew we were stressed about not having a shower so he worked late whenever he could and in spite of having a family to go home to. 🥹
He also made sure the threshold sloped inwards so water wouldn’t stand and etch the stone.
We don’t deserve him.
After tiles are laid, grout is added to fill the gaps.
And at the end of it all, trims are added to the perimeter of the space. You could go with regular baseboard trims, but we went with quarter rounds as we did when we replaced carpets with hardwood.
How to remodel a bathroom step 6: Paint
Always paint last, or you’ll be constantly fretting about touch ups.
Pro tip #2: Paint samples- if you plan on getting Sherwin Willians, do not buy samples from an actual Sherwin Williams shop. They come in a full quart ($7+) which is wayyy more than what’s required. Head to a big box retailer like Lowe’s where they could mix any color you want and you’ll get 8-oz samples ($4). You’ll still have plenty of leftover, but at least 4 times less wastage.
We’d like a color close to that of the shower wall tile, so I picked out 4 samples and tested them on different walls.

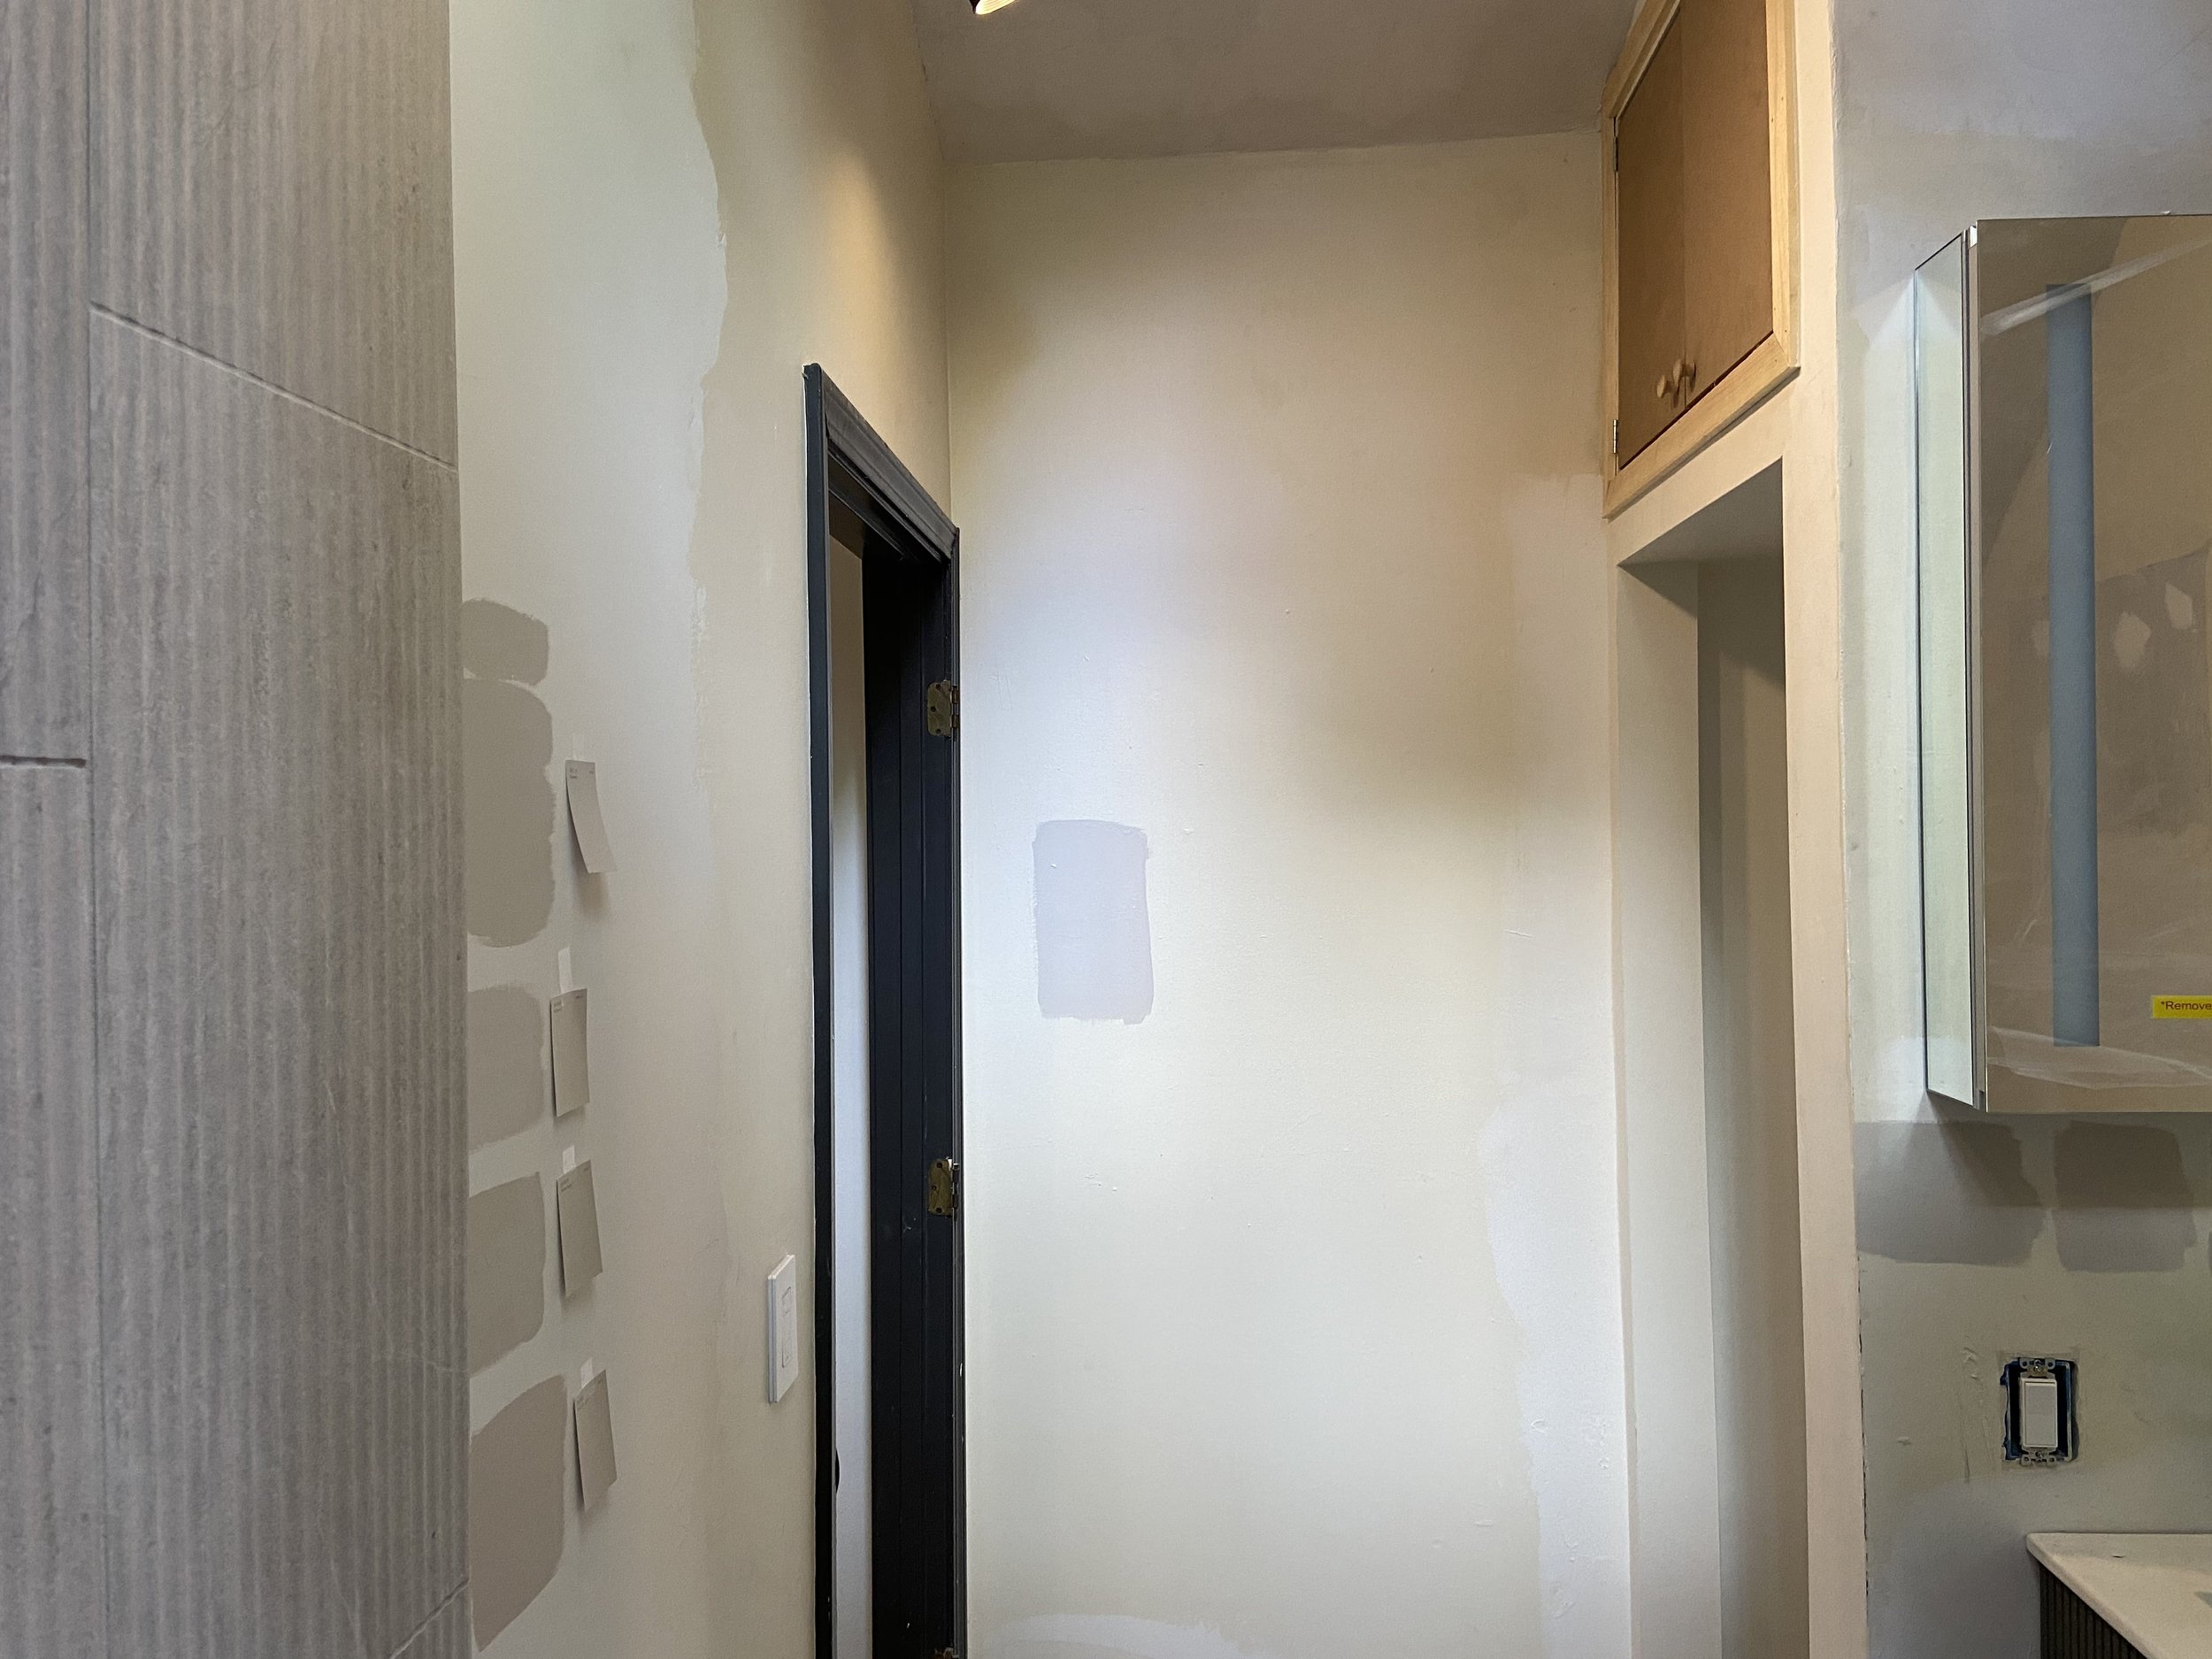

I was initially confused… why does the same paint look purple when painted on the front wall? Because of lighting?
I painted a little closer to my original swatches and realized that it’s because the base color was different - one had a white primer while the other had none. I’d always thought that as long as one paints it thickly the color would even out.
Guess not.

Walls & Ceiling, Pediment (SW 7634) / Accent, Snowbound (SW 7004)

Window & Skylight Trims, Carbonized (HGSW 1481)
Shoutout to Melissa from Erick’s team - she free-handed the edges where the two colors meet. No painter’s tape; no laser guide.
Just mad skillz! 🙌
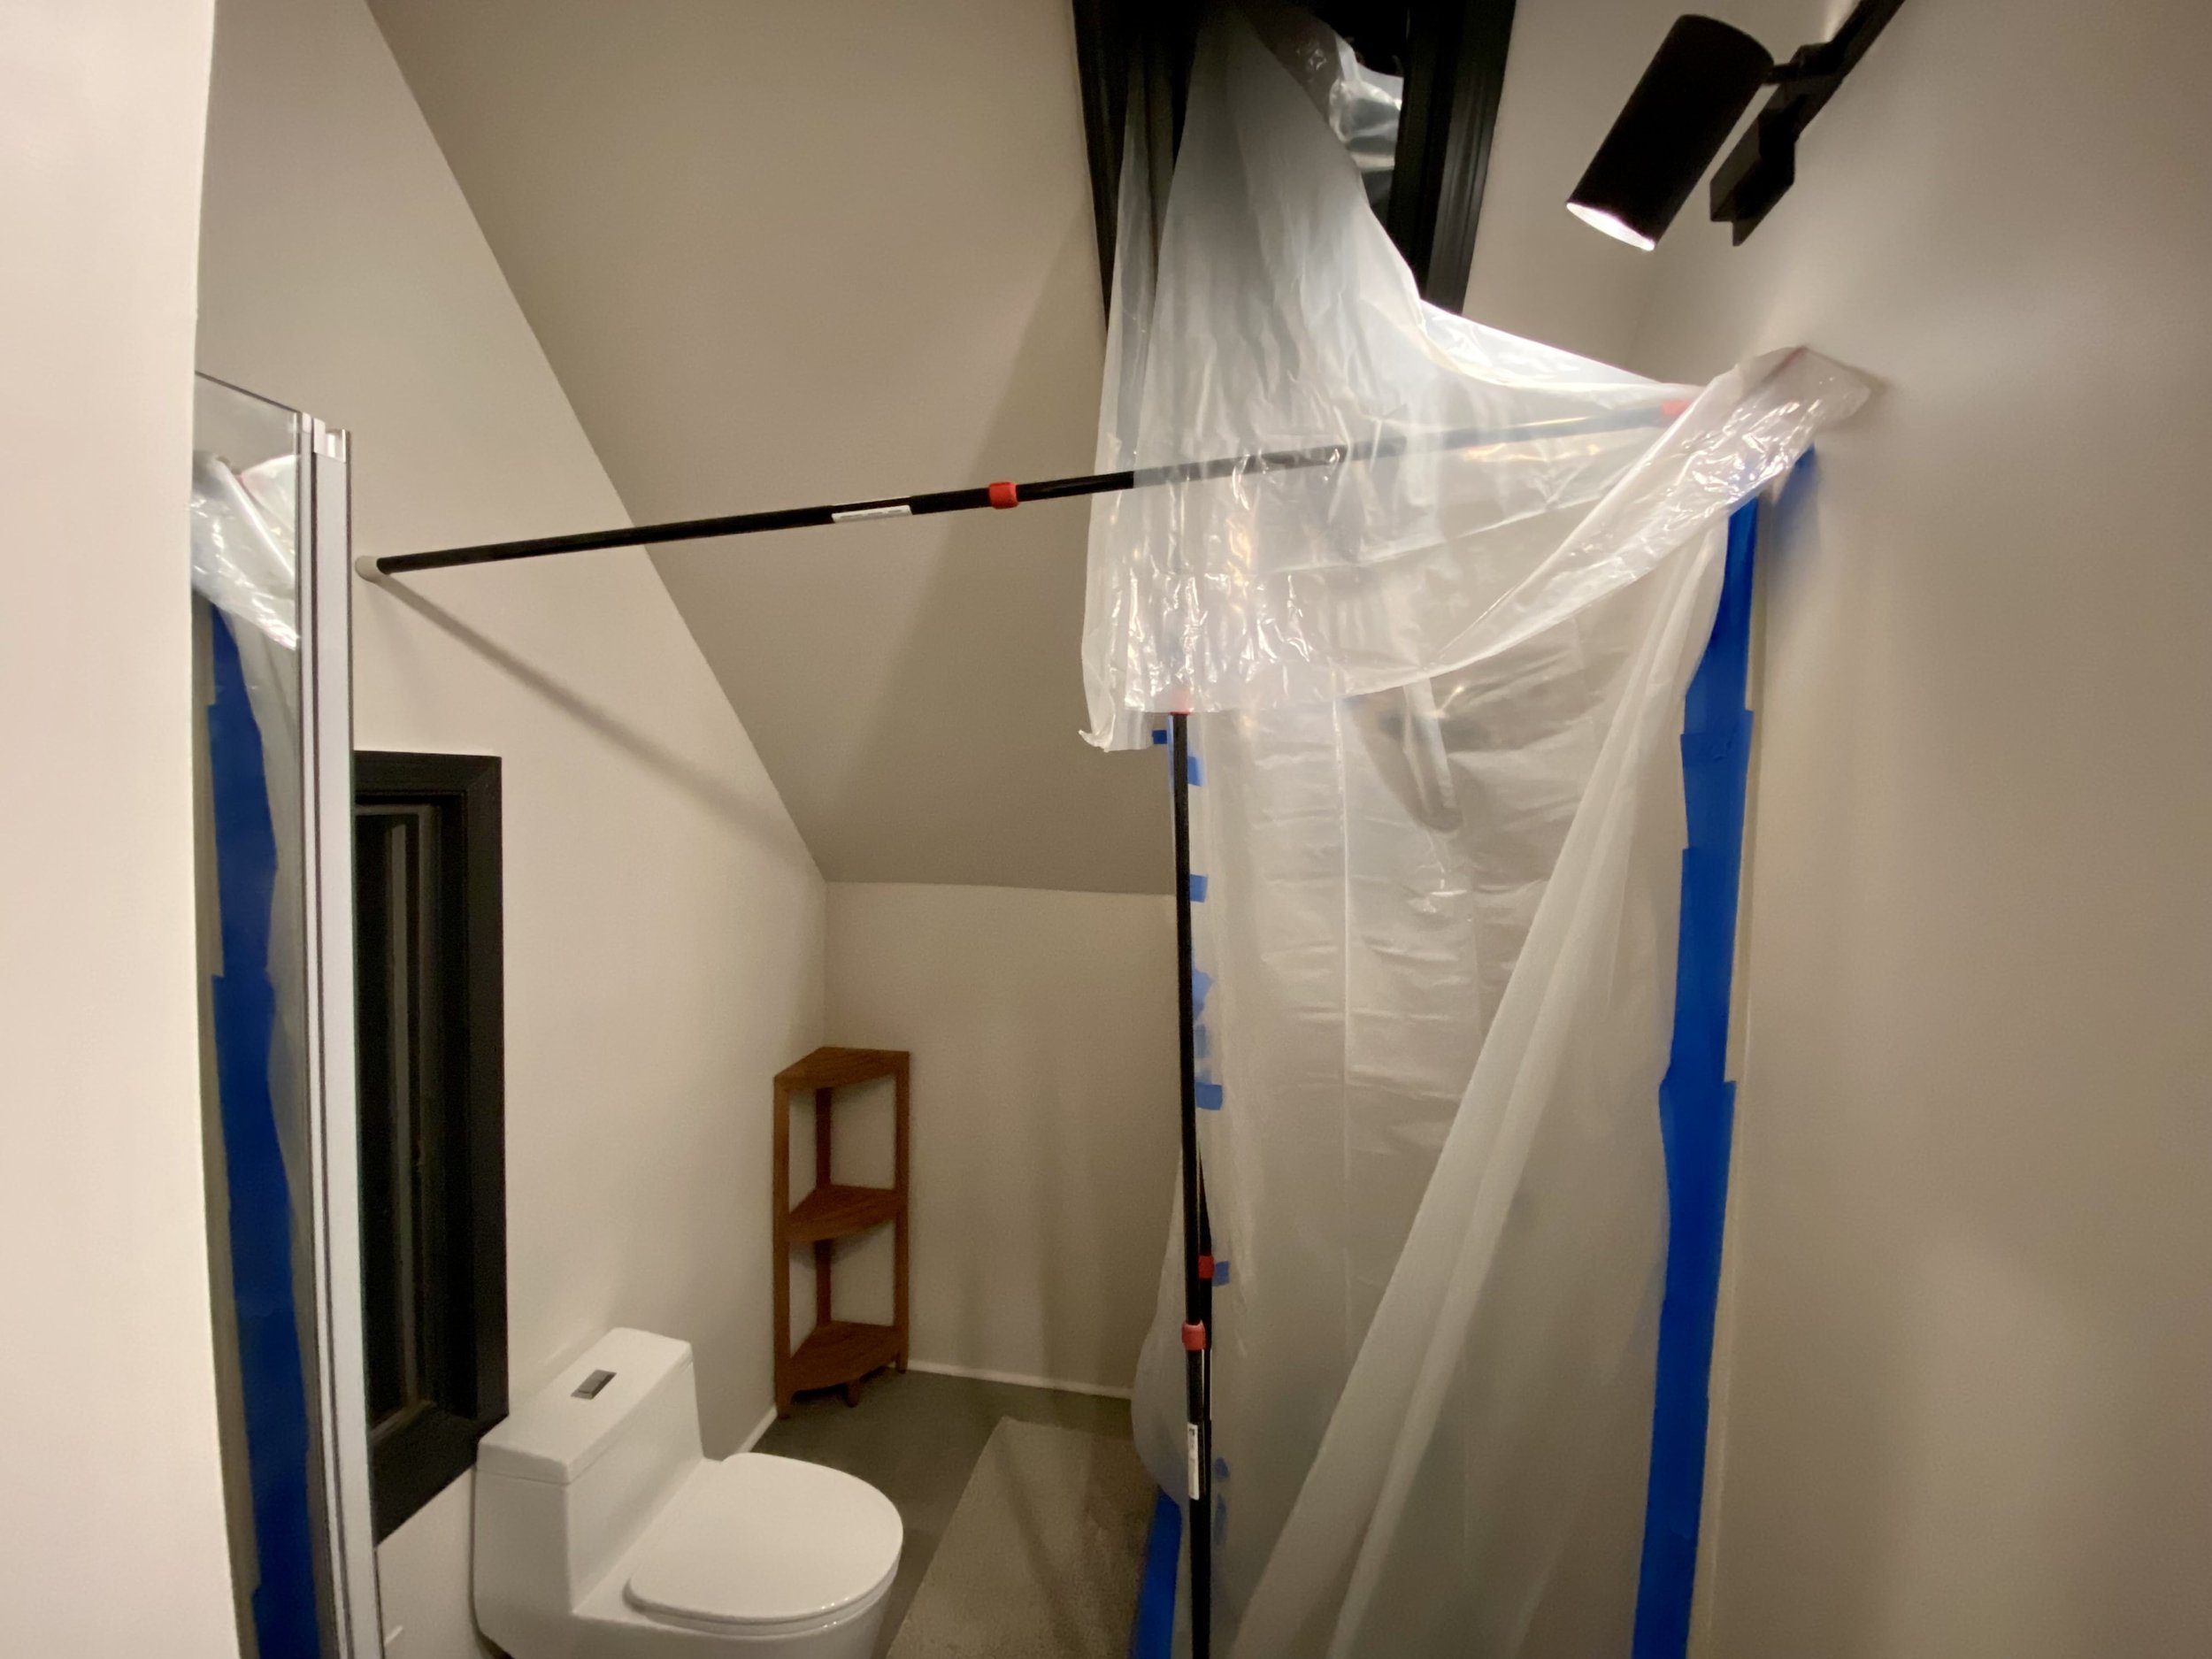
After the shower tiles were done we had to wait for our glass shower enclosure to be delivered. We were told 6 weeks, but I think it ended up being 8.5. Do you know how stressful it is to live without a shower in your home? I had to alternate between my neighbor’s house and my friend’s because I didn’t want to impose. I also cut down on showering twice unless I stayed over at my friend’s because again, didn’t want to impose.
Erick took pity on us and macgyver-ed this temporary shower using extendable poles after seeing Ralf and I suffer for weeks. We owe our sanities to him.
How to remodel a bathroom step 7: Accessorize
Time to own your space and make it yours.
Ralf decided that he needed to boss Alexa in every single room of our house so he installed one in the bathroom too. Fine by me, I get to listen to music when I shower.

Speaker, Echo Dot, from Amazon

Smart Switch, by Lutron Caséta from Amazon

Bath Rug, from Crate and Barrel


Faucet, Finoris Collection by Hansgrohe, from Build with Ferguson

Shower, The Croma Collection by Hansgrohe, from Build with Ferguson

Towel Hook, by NearMoon, from Amazon

Toilet, by Woodbridge, from The Home Depot / Toilet Paper Holder, The Damon Collection by Mermelada Estudio, from CB2

Giant Peace Lily, from Mahoney’s Garden


No urban zen bathroom is complete without living greenery. Fact.
But that corner of my bath is tricky because it’s exactly east… without windows. That bit of sun that you see comes from the skylight and does not last for more than a couple of hours.
I needed a plant that could thrive in low indirect sunlight, and was specifically looking for one with large graceful leaves.
Thought that a Calathea Ornata might do it, but nope, insufficient sunlight and humidity quickly crisped its leaves. I had it relocated to my office and did more research for a hardier plant.
Swung by Mahoney’s Garden in Concord hoping to find a Cast-Iron Plant - which I did - but this Giant Peace Lily (Spathiphyllum 'Sensation') with its deeply ribbed leaves sent a Cupid’s arrow through me instead.
Yes, Cupid’s arrow. It was Valentine’s Day that day so I was exceptionally sensitive to these things.
I’ve been in love with this plant since. Showed off these photos to my Treetop Group agents when we had our team meeting the next day; most asked if I’d oiled the leaves because they look too glossy.
Err, no? It’s called natural beauty?
And then there’s Andy. Andy asked if I’ve got a name for my plant.
Whatttt.
What kinda question is that? If I say “Yes” you’re gonna think that I’m weird!
😏
Paloma. It’s Paloma.